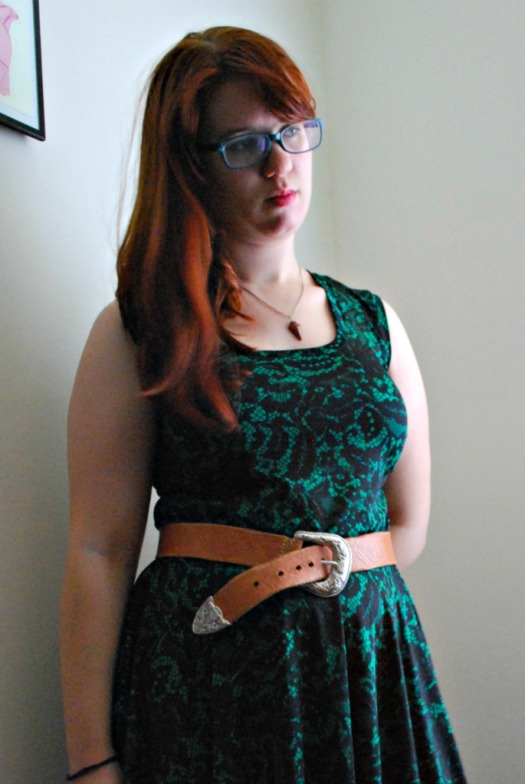
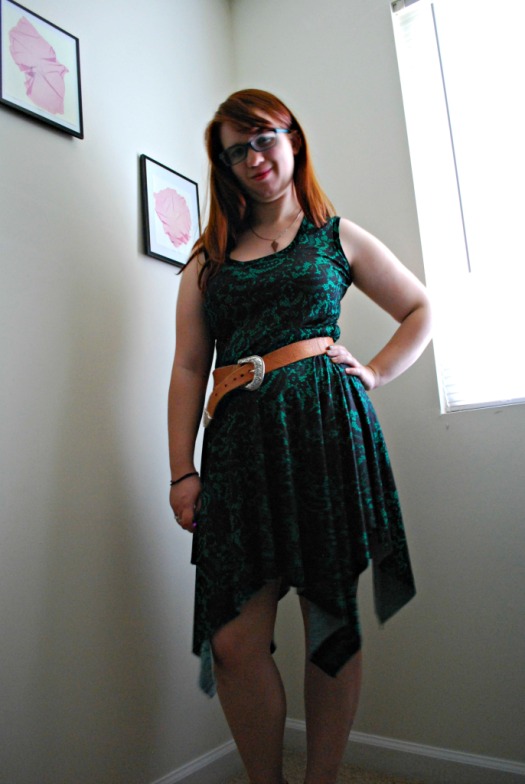
Plum Drop

If this was made out of a yellow fabric, I’d call it Lemon Drop, because it’s sweet in the front, and slightly sassy in back.

I modeled it after this dress I found on “The Stylish Geek” when I was searching for inspiration for the Monthly Stitch’s RTW Challenge that’s on next week.

And I decided to hack Nettie to do it!

So here’s what I did:

patternhack

1. Cut the front bodice pattern at the lengthen/shorten line. I think I cut it at the top one, since I’ve got a very short torso.

2. Trace out the full back, then draw new cut lines for the crossed back.

back

3. Cut out one front and two backs, and then the two sleeves. Also, I cut out a full circle skirt and two pockets.

4. Attach the bodice to the backs at the shoulder, attach bindings, sew in the sleeves, overlap and sew up side seams. Assemble the skirt and pockets.

front

5. Attach the skirt to the front bodice. Cut and sew elastic to the waist.

6. Decide not to hem the skirt because you’re already late for your weekend trip with your best friends.

The fabric is a lovely four way stretch jersey, which I believe is a rayon spandex blend, but there wasn’t a listed fabric content when I bought it, so I can’t be positive. I put it on immediately after finishing it, and refused to take it off, even though I’d be spending the next seven plus hours in a car. That’s how much I adore this fabric and dress.

back2

This plum version is actually the second try, since the first one was out of a two way stretch in a peachy color. Actually, I consider that my Hamilton Angelica tunic, since the color matches her dress. And I’m minorly obsessed. The two way stretch created more folds and wrinkles at the underarm to bust, so I made itty bitty darts, which look weird but it’s still wearable.

pocket

And the obligatory pockets.

The Shirtdress that I’ve Dreamed About

This post might also have an accurate subtitle of “Spot the Mosquito Bites!”

I love early summer, because it still gets cool at night, but I do not enjoy the mosquitoes that come with it. Especially since we’ve had a really rainy spring so far, which spells a very mosquito ridden summer.

I’m going to be miserable, i can just feel it.

This is my new shirtdress, and I love it and want five to ten more. Both the fabric and the pattern conspire to make this some amazing level of secret pajamas.

The fabric is Robert Kaufmann chambray, which I believe is rayon cotton blend. It’s lightweight, but has a large amount of body to it. I got it on sale last year for about 3 or 4 dollars a yard,  and I’ll definitely buy the bolt if I find  it for that price again.

The buttons and bias tape are from my vintage stash, and the buttons are probably from my grandmother, which  makes  them a little more special..

The pattern is s Sew Over It’s Vintage Shirtdress.  It’s so so lovely. As in, the design fits me perfectly (in my eyes)  right out of the package. I thought I’d have to use a size 12 at the bust and a 10 at the waist, but I decided to just stick with the 1o all around.

I used some goldenrod quilting cotton for the pockets, to match the buttons, and I kinda  french seamed them, at least to the skirt seams. I also used  bias tape to finish almost all off the seams. I missed the lower part of the skirt seams though.

This is my new  favorite  garment. As in, wear it every week favorite garment.

And I can’t wait to make more!

Me Made May 2016 in Review

May is over, and I’ve started taking stock of how my month went.

day1

This year I did manage to wear something me made every day, and had many all me made days to round it out. I even took pictures for about half the month, though not even all of those made it to Flickr.

day4

My workhorses this month were my denim Ginger Jeans and Hudson pants. I’ve been working myself up to making another pair of Gingers, and now I’ve got the pattern traced out and ready to cut any day now. But I was surprised about how often I wore the Hudson’s. They got a lot of wear in the winter, but I don’t think about them much in spring and summer. But I see now that I really need a second pair. Preferably a bit more summery.

I didn’t keep track as I was going which me mades I was and wasn’t wearing, but looking back I think I hit all of the summery spring ones.

Here's the shirt in a MMM14 post!
Here’s the shirt in a MMM14 post!

There’s a couple that I really need to retire, like a shirt I made in early college that I love the (self drafted) design but at the time my execution has left much to be desired. It’s a little too short in bodice length, and I didn’t yet understand ease, so the band at the bottom of the bodice doesn’t meet, even with the buttons and elastic that I had added. I think I’m going to make a second version, but updated from all the experience I’ve gained in the past five years.

day20

One of the other makes that need to be retired is one of my black Nettie shirts, which has been washed so many times that it’s become sheer…

day21

Really, this month has come down to two thoughts. I need more Gingers, Hudsons, and realistically Netties too. And I’ve got enough (casual) office appropriate gear to last a full month. Not without repeats, but I love having a small wardrobe, so that’s fine with me!

day10

Thanks to Zo for organizing the event again!

How did your May’s go?

Claudia Vest, Mark 2

There’s no snazzy quote associated with this post, since I’ve used a lot of the ear and eye catching ones already…

Plus I’m writing this before bedtime to post in the morning, so searching or listening to episodes from more is not exactly going to happen… Because of that bedtime thing…

front

So just imagine some Claudia Donovan sass, if you will!

The first trial of this vest was made three years ago out of a lab coat that I bought when I was abroad, perhaps the cheesiest and flimsiest lab coat around. When I pulled it out again recently, I realized that there were large obvious pit stains. And it didn’t fit. And it had a normal zipper, not a separating one, since that was always something I wanted to change but forgot to.

So I decided it was time to start over.

wback

This version is based off of the old one, out of linen this time with some redrafting since I know how to make a collar and facing now. It’s fully interfaced, since the linen was a bit shifty.  When I tried it on, it was still really big, despite my redrafting efforts, so I took it in on the fly, with pinning while I was wearing it, because separating zippers are magical!

It’s now a bit snug, but I like the way it fits, and I’m planning on actually doing that exercise thing, now that the semester and most of the craziness that goes with it are complete. So it might be a little less snug by the end of the summer, and that’ll be good too!

lining

I took the old lining since I adore the fabric, and I think Claudia would too, and slapped it onto the new version. I had to fish out my scraps to add some length to the top and bottom, but I had saved all of them for this exact purpose. I whipstitched the lining on carefully, hiding the ends under the facing for a clean line.

side

This new version makes me really happy, since I was so sure this costume was already finished barring pictures, but since I’ve remade the vest, not only am I feeling better about the costume as a whole, but I’m now actually pushing to make the next pair or two of Ginger jeans, since they’re potentially going to round off the costume.

In the next week or two, I’m going to be announcing an exciting costume/fangirl/crazy thing I’m doing, so stay tuned for that!

open

Birthday Dress

It’s been over a month since I made this dress, and yet I’ve only worn it once or twice. But it’s special, cause it’s my birthday dress.

style

The week before my birthday I was finishing up the TARDIS sewing, so I didn’t get a chance to make the dress. The day before my birthday I got back from a ballroom engagement and didn’t have the energy or willpower to start. I think I got as far as retrieving the fabric before I gave up and collapsed on my couch.

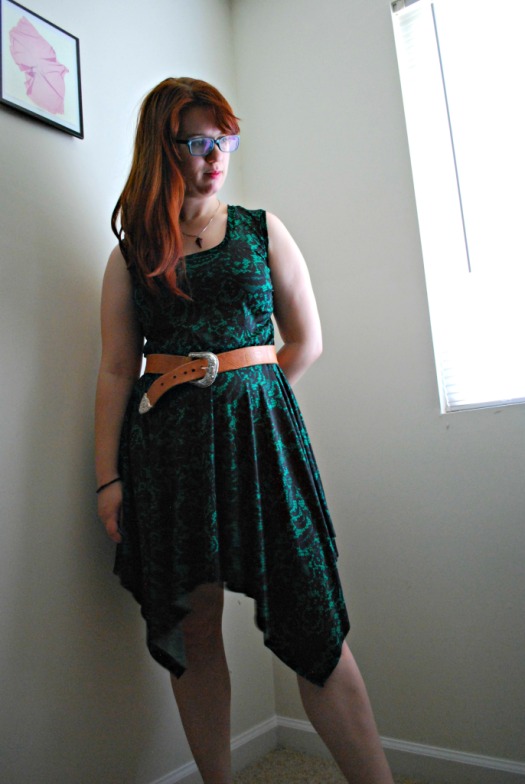
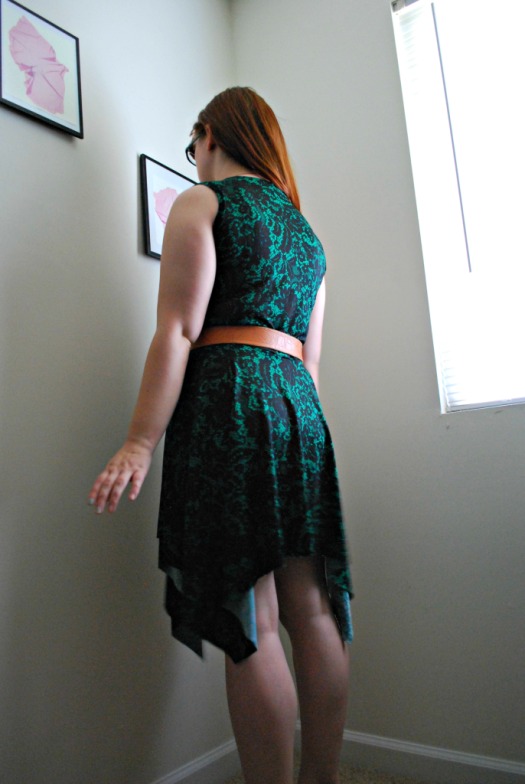
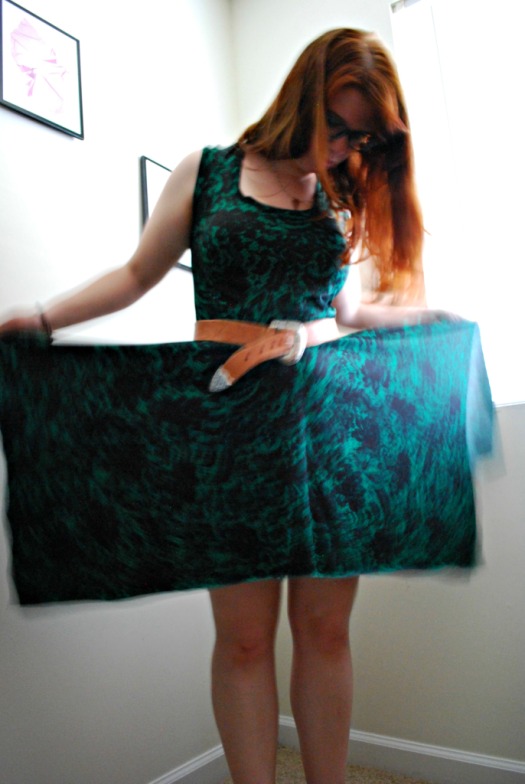
This green lace printed polyester jersey had been in my stash for  a couple months, after I picked it up because the print was so cool despite the polyester-ness. I knew I wanted something sleeveless (so my armpit sweat wouldn’t be cooped up {is that too much info? Sorry}), and I’ve been wanting a handkerchief hem dress for a while now.

back

So on my birthday morning I pulled myself out of bed and cut out a square for the skirt, and then used the Nettie shirt pattern I’ve manipulated to make a front and back. I remembered to cut out the arm and neckbands at this point, instead of having to go back and get them later.

I managed to get it sewn up, eat both breakfast and lunch, and get to campus for my class with caffeine in hand. And with time to make more caffeine for class, which is always a plus.

wide

Wearing it that day, though, showed me that I had miscalculated the length I’d need in the bodice, and it just got longer as the day went on. It was too short to be dropwaist, and too long to wear without some sort of waist definition, so I have been wearing it with my life belt.

closer

About a week ago, I added some elastic to the waist seam, which helps with the droop, but it’s still loose at the waist. Maybe I should take it in some more.

Anyway, the armbands instead of sleeves are definitely comfortable, and it looks nice sleeveless. I’m probably going to be making more this summer! And I have a nice amount of fabric left, so I’m thinking a short sleeve Nettie hack. I’m going to cut that out now, I think!

sass

TARDIS Hair and Makeup

When I was doing my makeup for my first TARDIS photoshoot in March, I was walking back and forth between my friend’s small bathroom with very little counter space and her living room with all the natural light, so I didn’t try hard to do anything too complicated.

front sideEven this doesn’t look too crazy, I guess.

I love the original photoshoot’s results, which you’ll see in a few weeks, but I think I can go more over the top. It is the TARDIS after all, and there’s nothing more over the top than Eleven’s.

back side hair

So this time, I did my best to replicate the hair (though I will use second day hair from now on, since I had washed it in the morning, and it was not easy to work with even by afternoon).

back filteredBasically, I twist the right side (which is nearer to my part), all the way around my head, and take half of the hair on the back on my head and combine these parts into a bun at the nape of my neck on the right side of my head. Then I twist the left side, careful to catch my bangs and secure them in the process, and twist again all the way around my head. This time, though, I wind the twist above the right side bun and turn it back, catching the ends between the bun twists. Then hair spray and add bobby pins until its relatively secure.

eyes closed

But I went crazier on the makeup this time, and I like it very much!

front s2

In case you’re wondering about the products, I’ll list them out here. If not, hope you’re having a lovely Tuesday!

productsFace: Ponds Luminous Finish BB+ Cream; Neutrogena 3-in-1 Concealer; Benefit Watt’s Up Highlighter; trestique Baby Blush Stick in Bora Bora Coral; NYC Translucent Pressed Powder; Mellow Bronzer

Eyes: Jesse’s Girl Eye Shadow Primer; ipsy’s NYX gold palette; Covergirl Golden Sunset palette; Mica Beauty Cream Eyeshadow in Bronze; Coastal Scents Eye Shadow in Mimosa and Deep Cantaloupe; Pixi by Petra Shades of Brow; an auburn eyebrow pencil, probably WetnWild; Benefit They’re Real Mascara; Starlooks Longwear Eye Pencil in Jet; theBalm Mr. Write (Now) in Jac; Sephora Jumbo Waterproof liner in Peacock Blue Shimmer

Lips: Ofra Lipliner in Wine; NARS Satin Lip Pencil in Rikugien

Brushes: Knockoff Beauty Blender, Royal and Langnickel Medium Eyeshader, Studio Basic’s Angled Eyeliner, Coastal Scent’s Travel Blush Brush; Real Techniques buffing brush; Coastal Scent’s BR-C-540; Coastal Scent’s BR-B-S03

side eyes

Summer Sewing Strategy (and MMM Pledge!)

I have come to terms with the fact that summer in the South is warm. One may even go so far as saying hot. Perhaps boiling. My northern sensitivity can’t take it. (Though as my Dad pointed out to me earlier today, I complained just as much about the winter in New England, so I guess I’m just picky regardless of where I live…)

My first summer here I stayed inside most of the day, and only really left at night. I didn’t have any reason to do otherwise, having no real job and no friends in a new place, and not wanting to spend any money as well.

full

Last summer I had a job and friends, and spent the summer purposefully ignoring the heat, which is how I got heavy polyester high waisted trousers. Not that I regret that decision, and reasonably they were for a costume, but still. A good decision? Not in the slightest.

This summer, though. I plan to embrace the heat, at least a little bit. My makes, at least for the next month or so, will be focused on surviving the summer, with at least a bit of very-casual-office appropriateness.

image

I’m envisioning a host of sleeveless tops. I’ve already made a sleeveless Nettie version, as part of a dress, and with I tweak I could love it for a top, but I also want to take apart this top that I love to death but is looking dingy around the edges and recreate it. And I’ve got the Miter pattern lying around waiting for more use. So those are three different types for at least 3 new blouse/tshirts.

image

And then some skirts. I have this wrap skirt of this awesome seafoam green that I love to death. It’s essentially a half circle on a bias “waistband,” with a thin cotton layered under and eyelet-type fabric. The only downside is that it has ties, and that doesn’t feel secure enough for me, so I’m planning on making my new ones with a real waistband and buttons. Because I love a good buttonhole! I mean, really who doesn’t live for buttonholes? I may need a life.
image

I also have been trying to make two more pairs of jeans, probably one bootcut and one long and skinny (since I’ve found my most recent ones a bit short when I want to wear socks and real shoes). These may not be the best options for my “breezy” sewing plans, but I want to use any leftover fabrics to make some shorts. Since I have almost none to speak of. And summer kinda requires them.

In terms of the actual next month, though, I’m planning to “attend” Me Made May for my third year! In case you’re not sure what MMM is about, you should check out Zo’s blog post here.

The first year I “failed” because I was moving and also burnt out and a smidge sick. Graduating from college will do that. But I still made it through the month with only one or two missed days, and I learned a lot about my dressing preferences. Last year, I also moved during the month, and spent a few weeks “adjusting” to my new place, which basically meant ignoring the outside world and living in non-me-made pajamas. So I did okay, but nothing spectacular.

This year is going to change that.

I, Annabelle from Annabelle’s Project Overload, sign up as a participant of Me-Made-May ’16. I endeavour to wear at least one me-made garment each day for the duration of May 2016, with one day a week wearing an entirely me-made outfit!

Now, I find myself often doing this daily, but then there’s days where I’m in entirely not me-mades. So, I think this will be a nice challenge, and it will give me a good chance to test some of my less used options, and hopefully I’ll use some of my knits that are chunky but meant for summer.

P.S. I want to add in a clause that prohibits accessories, like my handmade purses, from counting, but perhaps its best if that’s a guideline rather than a hard rule. Never hurts to have a backup plan, right?

Green Julia Cardi

This post has been long in the making…

I got the Julia Cardigan pattern from Mouse House Creations way back in late 2014, I think? Back when the Perfect Pattern Parcel was still around.

I made it up for the first time in December or early January. And I’m still not sure how I like it.

The fabric is only 2 way stretch, so the lower arms are a smidge tight, and they’re drafted small as well. There also wasn’t enough of the fabric to get two bands out, so I made due with one, and I don’t think it works well with mine.

And my swayback game is strong, and this really shows it. I also tacked down the back neckline for security and flexibility’s sake.

But I reach for it weekly, so I guess I must like it?

I’m thinking of cutting another neckband of a black or other complementary color to assist in the movement of the neckline, but I also have been planning a lot of things. Like jeans and corsets and house cleaning. We’ll have to see how much procrastination I do in the next week before my last final ever!

TARDIS Blouse

The final new piece of my TARDIS puzzle, the blouse, was a rush job.

full

I’m talking the day before I left on a trip that I’d be also using for my first photoshoot of the costume, when I realized that the shirt I had planned on using looks crappy with the jacket. And I can’t really change the jacket, since it’s lined and I love it.

hung

It also occurred to me that because I’m not necessarily stuck in a summer con that I can wear long sleeves. So I did, and I think it helps balance out some of the elements.

I used the pattern I made for my Peggy costume, which is quickly becoming my favorite close fitting button up pattern (also known as my only close fitting button up pattern).

back

The back needed to be redrafted so it was a single piece with no gathering, and I removed some of the curve that is meant to help with swayback, since this would be worn over a corset and was short enough not to really effect it.

The front was redrafted for a shawl collar, which would start its separation above I also decided that long diagonal darts would be neat for a change to the front. I wasn’t feeling the tucks this time, and they would be completely hidden by the outer corset anyway.

The fabric that I showed in this post three years ago that I thought I’d use for a bustle was originally going to be used for this shirt. I got all the way through making it, and was ready to cut the facings when I decided to try it on. And the fabric next to the side seam tore about three inches. Worst feeling ever.

Granted, the fabric was old and holey, and I think it’s silk, so I should have expected some mishaps. I ended up going to dinner with a friend, and once I got back I assessed my options. I looked at the pile of fabrics that I earmarked for this project, and I found this very neat, and very stiff home decor fabric. It would work for the body of the shirt, and I could use the same fabric from the apron for the sleeves. I was able to reuse the broken silk version for the facings, so that is could still be involved.

fabric

The body fabric doesn’t press very well, which may have to do with the fact that it essentially feels like lightweight bendable plastic, so the seams and the darts aren’t flat, but most of that is hidden by the outer corset.

collar

There is a slight stain on the gold fabric I used for facing, but that also means I have an excuse to use my Eleventh Doctor’s sonic screwdriver pin. I felt it was fitting.

Now that I’ve worn it once, it’s not quite as fitted as I’d like, so I’m considering taking in the side seams, and maybe adding another dart, a smaller one, to help with some accidental saggy boob look, from being too loose at the bust with a tight corset underneath.

But regardless the shirt does it’s job, and once I bind the inside seams to keep fraying at bay, it’ll serve its purpose for as long as I need it to.

front

That wraps it up for the new construction. I’ve got some more posts, like updates on older pieces, and I don’t think I ever showed you the TV purse, and also hair and makeup… But I might save that for next week! See you later!

Bustle and Apron

In case you’ve missed the last few posts, I’m giving notes on my most recent costume, and anthropomorphic version of the inside of the 11th Doctor’s first TARDIS. I’ve posted about the bum pad, the petticoat, and the console skirt.

When I picked up the gold taffeta that starred in the skirt, I also picked up this dark gold taffeta. Originally it was planned to be a part of the skirt, so it would have been aqua: bright gold: dark gold: bright gold: aqua, etc. But I thought that might be a bit too busy, and it definitely would have complicated the “I made the skirt way too big” conundrum. Then when it came to the bustle, I decided it would be the best option.

otherside

Three years ago, when I started this concept, I had gotten this decaying silk (I’m pretty sure) gold fabric from a costume store in Cardiff. I thought it would be fitting, since we had just been to the Doctor Who Experience, and having something in the costume from Cardiff would make it even more special. That fabric would have been much too light for the bustle, I know now, so it will make an appearance later.

sidefront

The taffeta has enough body all on its own to hold up to bustling. I gathered it to the back of a waistband and attached it. Granted, I probably should’ve waited until I had the apron sorted as well, but I was not thinking clearly on day 4 of a marathon costume journey.

closeup

Then I decided to work on the apron, since that would determine how long down the sides the bustle could go. The apron is entirely made up of curtain fabric that I got from a grab bag. And I’ve got plenty more if I need it. Because this stuff will shrink down to nothing, so I got to stuff the bag really full. It has two layers, or technically three. The outer orange-y iridescent layer, the lattice layer, and then the orange layer on the inside again (though this one is folded from the first layer. Come to think of it, the lattice one might be a double layer as well. I wanted the apron to be soft, but hefty enough to allow for the nice folded texture.

front

I learned from this video that I should pleat upwards, which I used for both the apron and the bustle. I can attest that it really does give so much body to the garments that makes them so much better! And I got the idea to combine the apron and the bustle on the same waistband from this tutorial.

I fiddled around for awhile until I got the apron the way I like it, and then I pinned it to a ribbon hanging off the waistband on either side.

The bustle was equally as fiddly. I pleated the sides, and then I just fiddled until it looked less like a mushroom and more like a poufy cream puff. I attached these to more ribbons hanging down the back with some tacks.

side

The waistband closes on one side with a whole row of hooks and eyes. I’m planning on adding some buttons to add to the design, but buttonholes would never work with all this fabric, so the hook and eyes are there to stay. The other side has the bustle and the apron sewn together, for ease of putting the contraption on.

So that’s it for the skirts! We’re nearing the end of our journey. Next week I’ll tell you about the blouse I cobbled together, and perhaps either the TV purse, or the accessories. Or maybe just the blouse. It’ll depend on how busy I get, and whether I remember to prepare… I do have a field trip this weekend, so we’ll see how much I remember to do!