Quiver – Part 2

My unfinished quiver sat around for over a month between the first part and todays, but it was mostly because I was trying to determine the best way to sew it up.

I thought I could maybe butt up the two sides so they would form a solid point… My leather was just a bit too floppy for this.

I thought maybe I could fold under and sew it up like a seam. My leather had just too much structure.

And then it became the lace versus waxed thread debate. And where would I even attach the belt?

So I waffled.

initial

But I knew that my TARDIS belt was going to be made of leather, and I have a policy for leather goods and myself, that I am not allowed to cut into leather if I’m still working on a different piece. So I had to finish the quiver.

stitching

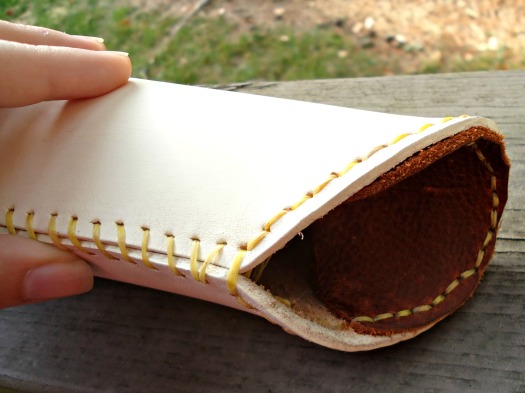
Using my trusty awl, I punched holes every 1/4 inch both up the seam line and around the bottom, since I knew I’d be attaching a cap to the bottom.

Waxed thread was my “weapon of choice” in the end. I used a whip stitch, I guess, to sew up the seam, which seemed to hold it very stably.

inside

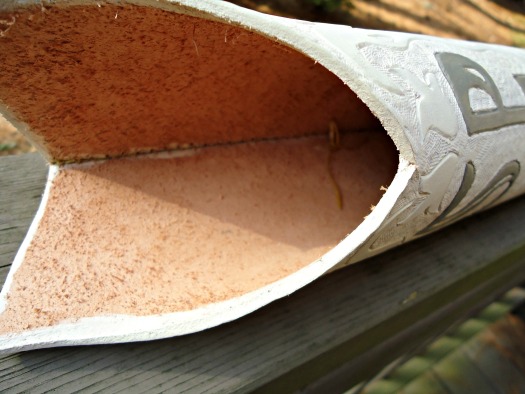
I had intentions of attaching the belt by running it through the quiver itself, but that didn’t pan out. For one, I only had as long as a partially used cow belly, which was not as long as I was expecting. Threading it through like that also made it really blocky and uncomfortable. Comfort is key in the costume game, especially since I’d already be wearing a corset, which is enough comfort-restraint.

top

So I ended up running a few loops of waxed threads to serve as attachments for the belt. It works well for now, but I’ll probably need to adjust it in the future.

Then I actually needed to make the belt.

belt

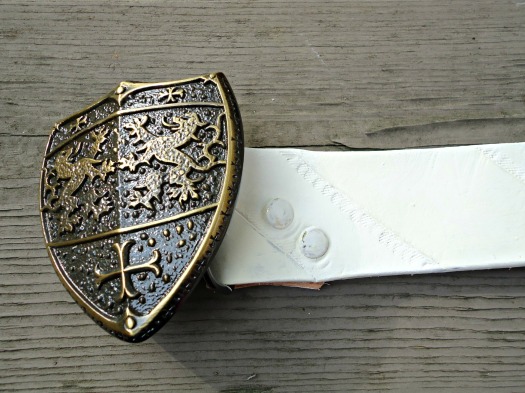
I wanted it to be something I could potentially wear, since I love the buckle so much. Isn’t it just the cutest shield ever? But I also knew the belt had to be long in order to cross my body like a messenger bag. So I made it as long as I could, and punched holes in various places, so I could wear it at my natural waist, or through jeans, or through the quiver. I cut a simple design using my swivel knife, just diagonal lines, and I tooled a few sections for some visual interest. It doesn’t show through the paint though, so I ended up painting a very subtle alteration between cream and ivory, based on my ability to mix paints well, which ended up with a more ivory batch right at the end of the painting cycle.

So that’s it for my quiver! Isn’t it purdy?
Knapsack

At the beginning of the semester I ran into this problem…

whole

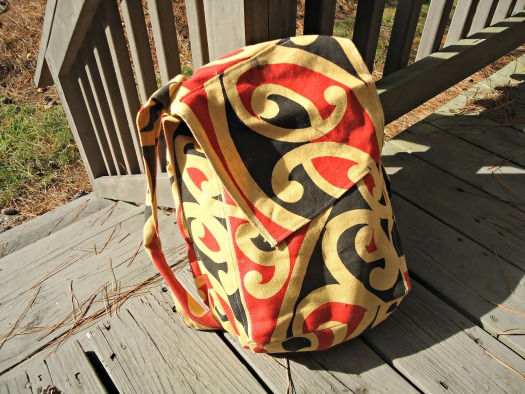
My trusty backpack that I’ve used since 8th grade was just a bit too big for what I needed to bring into grad school each day. You see, I have an office, or rather a cubicle in a shared office with three others. I’ve personalized it and everything. Most of my prop type things have migrated there. So I don’t have to carry around an entire world, since I’ve got plenty of space to stash stuff.

And my “laptop” bag was too small. I made it specifically to carry my old laptop, which was a smidgeon bigger than my current one, and one or two notebooks. I have managed to stuff up to 6 slim notebooks and the laptop, but I was constantly worried about it breaking. I am planning to use it as a “round campus” bag, though.

But I really needed an in-between bag.

So I made one to fit my laptop!

I cut the back to the approximate dimensions of my laptop, adding about an inch to the width, and a few to the height, which I later cut down to size. The width of the laptop segment was maybe 2 inches? I measured the depth of my laptop to be 1 inch, and I wanted some extra clearance room, since this was non-stretch upholstery weight fabric. I forgot, though, that my laptop has some curvy sides, which also ends up adding clearance room.

inside

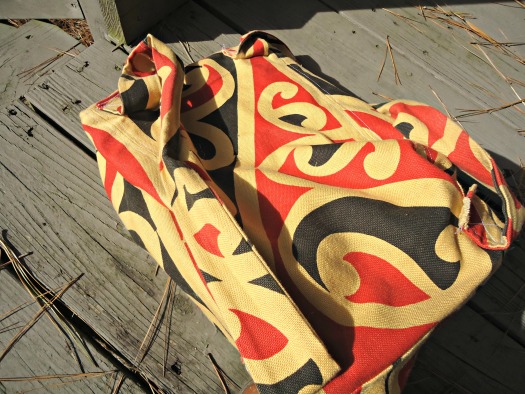
The other bit of side is trapezoidal, made from an eyeballed width of fabric at the proper height, triangled, and sewn up. The front panel was just a longer version of the back. I added a top flap, which rarely seems to sit properly, but I like it. The straps were made up of scraps, and are actually comfy for being un-interfaced and un-padded.

It’s  unlined, but that’s more because I was lazy, and for the most part the seams are unfinished. All the pieces went through my serger, except the top flap, but the seams themselves aren’t backed up.

But it fits everything I need, is comfy, rather stylish at the moment, was free to me, since I was donated the fabric, and I know how to fix or remake, if the need arises.

back

Backpack crisis averted!

Foodie Friday #8

Most of my ‘experiment’ cooking is relegated to weekends. There’s more time to sit and read a recipe or a technique. And you don’t have to be starving while you’re waiting for the food to cook because it’s been a long day and it’s already dinnertime because a class ran over and the bus was late and you’ve got a test tomorrow…

Those times are not conducive to experimenting.

A few weekends ago I was away at a symposium, so my cooking efforts has to be on Sunday. I made quinoa as my grain for the week, cooking it in chicken stock, which made it really easy to shove into a small lunch container with some peppers and pork for a lunch. So I ended up eating grain salads all that week.

The next week I was on math homework mode, so I don’t think I made anything special. My lunches ended up being tortillas and hummus, and my dinners were whatever I had left in the fridge…

The next week was worse. I don’t think I ate a vegetable for nearly a full week. Not my shining moment.

This week, though, I’ve finally had time to both make stuff and update you!

I made marzipan last week, and molded it into strawberries using this recipe. It made an awful lot and now I wish I had only turned half of it into the strawberry form… But when I brought them to a potluck, they were certainly eaten up!

A new batch of potstickers was also on the menu, using this recipe. When I ran out of wrappers I just cooked the rest through and have been eating it “plain”which is still quite tasty. I find the recipe to yield a product that is too liquidy and oily, though, so in the future I’m cutting back on the seasoning.

I also made my first risotto add my grain for the week. I used the Kitchn’s method, which is straightforward and easy. Mine needs a little more salt, but it’s quite good!

So that’s what I’ve been up to… made anything good yourself?

Quiver – Part 1

Even though Susan doesn’t actually wear her quiver with her final gown, it was still a must have prop for me.

Though it is very likely that the cosplay I see is not a full indication of people’s geeky interests, I’ve always thought that Narnia fans, of the movies more specifically, are more subdued (aka they don’t cosplay). There have been a few wonderful ones, but altogether the cosplay quantity is rather low.

tease

So the likelihood that I would be easily recognized from the costume alone (and with my hair, not a wig) is slim. I’m already risking the Lucy vs. Susan issue, with the red hair, but anything to make the costume more recognizable is good.

Plus I’ve always wanted a quiver for all the imaginary arrows I have.

The problem with Susan’s quiver is that it is likely meant to be ivory, or rather it was carved in one piece. There have been some good reproductions made with PVC pipe, but I didn’t have the requisite skill set. So I decided to use leather, something I do know a bit about.

I took pictures like this was a real tutorial, at least for this first half…  and then I let it sit for two months before I finished it. But that’s another story.

pattern

I started with posterboard, knowing that I had a limited amount of leather big enough to create this quiver. I drew a pattern, dragged a belt from the closet to “try it on” and fiddled with the pattern until it felt right. It slimmed down a bunch, and shortened as well, so that it would feel proportionally right on me.

Then came time to cut into the leather. I managed to find a big enough piece, and I used my rotary cutter to cut clean lines through… Leather is like fabric, right?

begintool

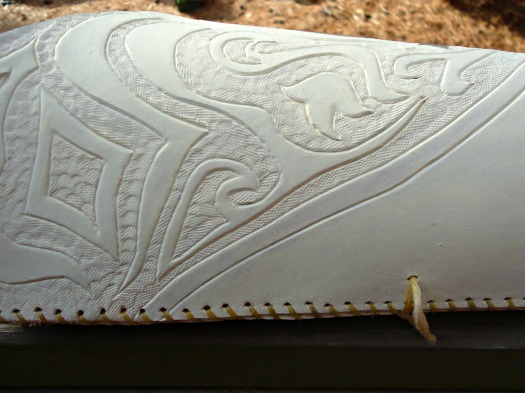
I had previously drawn designs for the top of the quiver, but they  didn’t precisely fit, so after some tweaking I got a useable pattern and traced it on. I cut into it with my swivel knife, and began tooling.

finishtool

And here it is with the design finalized!

The real quiver has a picture of Aslan carved in the bottom, but I didn’t want to take this that far.

So I began painting. I had both white and cream acrylic paint, neither of which was perfect, so I mixed the two and diluted with some water.

first

The first coat turned out streaky, and it ended up taking 4 coats before I was satisfied. In the tool-work, there’s still some areas of low paint, but I’m learning to give it up.

DSC03285

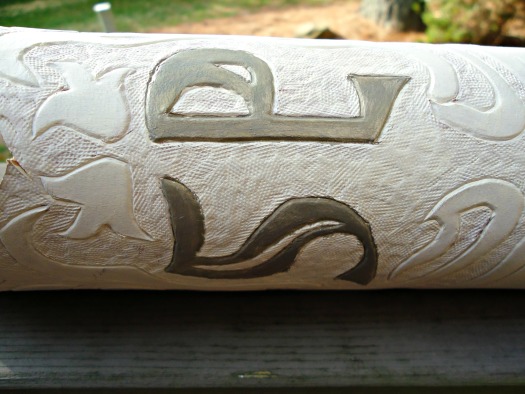
I then painted the initials with a grey and gold mix of paint (though technically it was a mix of cream, white, black, and gold), with the gold added in for a bit of sparkle… Not that its really visible, but it can be seen in real life.

Look out (hopefully) next week for part 2 of my quiver fun!

Macaron Sorbetto

It wasn’t until this year that I figured out what a macaron was… the almond ones, that is.

Growing up with a family member who despised coconut, macaroon (with two O’s) were not discussed, or talked about, or were to enter the house.

So I just assumed that the two O version was the same as the one O…

I was wrong. The latter is a pastel color rainbow!

front

Much like the Sorbetto I made.

(Jumping in to say that yes, I am wearing headphones for these photos. When it’s just me and my self timer function on the camera, and I’m in the middle of a Thrilling Adventure Hour podcast, I will refuse to remove headphones…)

This pattern has been floating around the interwebz for longer than I’ve been blogging, but I never took much interest in it. I didn’t have many reasons to wear a sleeveless blouse-type shirt, since I was in college… and I’m still in college.

But now I’ve a part time job that suggests business casual attire. And as a newbie to the world, I’m sticking (mostly) to it.

I’ve got plenty of stuff that is appropriate, but I figured that another blouse never hurt anyone!

back

This fabric was given to me when my former boss destashed last year, and even though its not at all my style, I jumped on it. I had been thinking Archer, but in the end that didn’t happen. I’m glad now, as it is very wrinkly right out of the wash, and I have no patience to iron an Archer every wash. A Sorbetto is much more ironable.

The drafting of the pattern seemed nice, and all the sewing went well. If I had worked directly from start to finish (until the alterations) it would have been maybe an hour, hour and a half at most.

Mistake number one was using a small-width fabric, so it felt like I was eating up over two yards (though I do have plenty of scraps).

Mistake number two was using such a wide bias tape, but it was the only one I had in stash that was definitely long enough and happened to match the colors pretty well.

Mistake number three was not pressing my alterations post sewing.

cutefront

My neckline was gaping at the back and the bias tape turned outwards throughout, so it looked very poorly sewn. That was due to mistake number 2. I made darts on the front and the back to fix these, but because I didn’t press it, they still stuck out.

And I wore it that way, even to work, since at the time I was too lazy to get out the ironing board.

But now I want to actually wear it, so out of the corner the ironing board comes…

Subtle Cosplay Thursday

I’ve missed a few weeks now, and so I had to make up for it this week…

This week was full of cool days and jeans weather. And I had a test on the day I wore this outfit. So I was looking for comfort and cuteness.

front

Frozen’s Anna came to mind. So I grabbed my pink Anna sweater, a blue button up and black skinny jeans.

Since I was thinking comfort I actually wore my comfy walking sandals, but when it came to picture taking those had been taken off. If I had cared about accessories I would have worn a snowflake necklace and a Celtic leather wristband.

sideish

Not exactly Norwegian, but it’s always felt right for that situation.

Comfy Anna outfit, check!

Sewing Plans, with a Purpose!

Oh dear… It’s been a while.

In explanation – math. Out of my league but its kinda too late to drop the class and we haven’t gotten grades back so I’m not 100% sure I’m failing yet math.

On a happier note, I’ve made a sewing plan.

It seems like everyone is doing it right now. Trendy for the week, I guess.

But for me it’s prudent, because not only does my current math headache end on Tuesday, but I’ve got a four-day weekend coming up, which means sewing time! Especially now that I’ve cleaned the room and can actually walk through it.

My blog posts are perpetually behind, so you probably won’t see much of these for a while, but I felt like putting it down on “paper” anyway.

fabric

So the final sweater is coming soon. I’ve shown you magenta, and beige, and now its finally time for plum. One of these days soon, as finally its sweater weather. At least in the mornings!

AliceHatter-handslink

One of my mini cosplay plans has always been Hatter from the Syfy mini series Alice.

fabric

Mostly just because I have the perfect fabric for his shirt. I’m thinking an Archer. Here’s hoping I’ve got enough fabric!

I’ve got most of the other things too, except the hat, which is actually the best part, so I’ll have to keep a lookout.

fabric

Another Nettie of sorts is up as well, but this time, a t-shirt. My favorite black thin t-shirt is dying, probably due to acid holes that I’ve been ignoring for nearly a year and a half. And I’ve got lots of fabric left over from my Hershey chocolate Nettie, so I’ll be replacing with that!

fabric

My blue velvet and lace dress hasn’t been touched since the last time I posted on it. But I’ve got a “red carpet” event coming up, so if it turns out, that could be up instead of my go-to ready to wear dress. Needs to be danceable though, so that may be a drawback.

fabrics

Seamster’s Dandelion dress was a recent purchase, so I’ve got plans to use this lovely green lace and the grey fabric I made my Aurora skirt from to make up a cute version. I’ve heard I need to muslin it well first though, so I’ll be a good little sewer and start there.

My TARDIS and Susan costumes are still in the works, so those are added to the list as well.

Whew. Does anyone have any tips on photographing just plain fabric? Because it’s pretty darn difficult.

Uganda

Out of all of the places that you can choose to study abroad, one of my friends chose Uganda, and had a lovely time in Kampala, the capital city, and toured some of the countries that have been in the news for not-so-great news over the years.

When she got back, she was just as bubbly as ever, but having read her blog of her adventures, it was clear that the experience had changed her deep down, which is really what such and adventure is meant to do.

Our schedules didn’t match up much for that winter break, but the one time we were able to get together she gave me this lovely African wax print cotton fabric that she had picked up there! It’s a gorgeous color and feel and just plain lovely.

front

I’ve worked with batiks before, when I’m quilting they’re my favorite, but this was different. This was special. What was I going to make?

So I delayed, I waffled, I forgot about it for a while, and I waffled some more.

My mom suggested a suit, like a pencil skirt and jacket. Now that I know more about construction, I know that would likely have been difficult construction-wise, since I would end up wanting a long sleeve jacket, and pencil skirts out of wovens take up fabric because the grainline really does matter… And I don’t like pencil skirts, which counts against this plan too.

back

I did like the idea of a jacket, and in the future, I may use the scraps to manage that. But in the meantime, I made a dress.

I happened to be muslin-ing a pattern for my Susan costume, and realized that the corset pattern I used for that costume, when actually fitted to my body without the insane ease, had pretty nice lines. So I muslined half the pattern for Susan, which I have not continued working on yet, and the other half for a woven dress.

My methods from this point on grow a bit…sketchy. I managed to get the bodice made up quickly, and even cut out a lining and sewed that up too. Then I started on the skirt. I measured the fabric and it was only 40 inches wide… Which was not anywhere near long enough to make a 3/4 circle skirt, which is definitely my favorite kind. It was barely going to be decent with a full circle skirt (at least in my mind). So I cut out a waistband, which hadn’t been planned. Even with that addition, I’ve still got to wear tap pants, mostly due to the sitting-down factor. I like to sit down, and I especially like the extra insulation of not sitting down and getting my legs and maybe butt stuck to the seats. Just a personal preference.

pockets

But the dress is lovely, and I’m so glad I was able to use my special fabric in such a pretty and useable way!

And… pockets.

Oatmeal

If you’re a long time reader of my blog, you may have noticed my love of cardigans.

There was the pink one, and the blue one. I also made two green ones pre-blog.

Plans were made for two more… And I made one of them!

The other should be made up shortly… but will I blog it anytime soon? Not likely!

front

So here’s my beige sweater, or Oatmeal.

zero waste technicals3

You may remember this picture, which I got from Pinterest. Isn’t Pinterest cool? Full of fun ideas and things that I have no interest in making, but just look so darn pretty!

I loved the idea of this, and I don’t mind the execution, but once I look in the mirror I start pulling and fiddling to make it look “right.”

If I move, or breathe maybe, the back seam rides up, likely because I’m a sloucher, and pulling my shoulders forward drags the fabric up.

back

You may notice from the pics that I wore this with my black dress (which is definitely the most comfortable thing I’ve made, and once I fix the straps I think it may be a weekly wear option.). I  also made it at about the same time, but I haven’t gotten around to posting about it.

That seems to be a theme for me.

I got the fabric from a Fabric.com haul last year, or early this year. I’m not quite sure anymore. But its a viscose tissue knit with some rayon, I think. Maybe some lycra, maybe not. Very breathable feeling and soft.

I tried to follow the “pattern” but I made changes. Like attaching the entire “skirt” to the “bodice” and shortening the cardigan. I made it up during the summer, and a shorter drapey cardigan makes for better summerwear.

It works very well with jeans, though. Quite nicely, though I think I’ll like it in early fall and late spring for a slight addition of warmth without sleeves to interfere with flow.

So I like it, and I’ll wear it definitely, but its one of those staple cake items that I’ll stay enthused but not excited by.

front2

Foodie Friday #7

It has been a long week. I’ve still got a backlog of creations to tell you about, but there was this thing called school… and math homework.

I was dutifully working on the problems throughout the week, like a good little student. It left little time for post writing.

But I have been making some stuff… still gotta eat, right?

Math makes me hungry anyway.

This weekend I made up some baked tofu, using this recipe… it was good, but not nearly as good as when I last made it. This time the texture was off, since I made more in the same pan, so it didn’t cook as well. Make sure you leave enough space for the moisture to bake out!

They’re making a good insert to grain salads, though. Something about the extra vegetables that gives extra taste.

There also was a banana bread make… supposedly. I didn’t have any eggs, and I used almond flour… it flopped out of the pan in a mush. It was a delicious mush! But not very appetizing. I ended up eating it for breakfast for half the week, which was a nice change from my normal oatmeal.

Last night I roasted up some peppers and tomatoes! Set the oven for 425*F, waited 20 minutes on the tomatoes, 10 extra minutes on the red and yellow peppers, and another 10 minutes for the green. Haven’t tried any of it yet, but the smell was absolutely fantastic!

I also made miniature welsh cakes, using Sorted’s recipe. I’ve made them before, and I’ll make them again! I forgot to fake the self rising flour this time, but they came out well anyway, even puffed a bit. I needed snacky food since I’m away from home this weekend and won’t have access to a car to get breakfast tomorrow, so I needed to make sure to have something tasty to make it through the morning!

And since I haven’t posted anything this week, I decided to take a picture of the miniature cakes! Would you believe that even with every light in my kitchen on last night, I still couldn’t get a better picture than this?

welsh