Peggy Carter

So I finally got some pictures of Halloween costume in its completely finished state… I’m only 5 months late, so that’s not bad, right?

And photodump:

ponyfront hat jacket hat shirt jacketpony shoes

The jacket is from Amazon (though they don’t have it in brown at the moment), the hat was a vintage find on eBay, and the shoes are from Modcloth (they also seem to no longer be available. Oops!)… They’re actually the shoes I use for swing dancing and are super comfy. For the first two hours at least!

Hope you like it! And happy Monday to all!

My name is Agent

peggyskirtPeggy Carter is the master of well tailored shirts. Most of them are soft and drapey, and a few are structured. I’m excited to see whatever the next season brings, but from the first there were many good shirt examples, and mine is a combination.

This shirt post is long overdue. After all, I first wore this shirt in an unfinished capacity on Halloween… But then didn’t get around to actually finishing it until December. And it’s very wordy…

peggy-sideI started drafting in late September, and it went through a number of muslins (at least 4) and an incredible amount of drafting variations (meters and meters of Ikea drawing paper), some of which got scrapped before a muslin was even cut.

peggyfrontThe many alterations that I made for this shirt included a full bust adjustment, rotating and then eliminating darts, removing the back darts, adding a yoke, raising the armscye, moving the shoulder point up, doing a full back adjustment, and then taking some of that out, making a swayback adjustment, removing it, and then adding it back in, adding room to the bicep, adding room to the sleeve cap. Etc.

I had bought this lightweight linen at the same time I bought the linen for my Merida outfit, so I knew that it wouldn’t be super drapey, but not 100% structured either.

peggyback

This is also the time to infodump my many sources for patterning and fitting this shirt. This was the website I used to draft the initial block that I drafted the shirt from. I used this article to help explain and draft my one piece front/collar and facing. I’m fairly certain I tried this forward shoulder stuff too… This placket tutorial is awesome! And this explanation of sleeves and drafting remains my favorite reference, and one that I re-read often.

sleeve upper back

front lower back

The front darts were replaced by three tucks, which do a good job of dealing with the dart-replacement, but make hemming the shirt a bit miserable. I eliminated the darts in the back, and tried to use a center back seam to solve swayback issues… It only worked a smidge, and the execution needs to be improved on my next version.

peggy-raised-armsLook look look! I can raise my arms! The armscye is super close to the base of my arm, which I’ve learned is the key to a shirt that doesn’t pull out of a tucked-in state, and since I knew that I would be tucking the shirt into the 40s style trousers, this was very important to me. Because of the size and shape of the armscye, though, this shirt is oddly uncomfortable to take on and off. The sleeves are ginormous at the top, but because the circumference of the base of the sleeve is about the same as my bicep at its fullest fat level, the sleeve base pulls a little as I put it on. The sleeves are ginormous mostly because slimmer set sleeves were creating extreme draglines, so I overcompensated and made a super large sleeve cap instead, since I was running out of time. I’m hoping to slim them down slightly for the next version.

peggy - back-skirtThis was supposed to be my Halloween costume, if you remember. And a version of it was in fact done for Halloween… One that wasn’t hemmed, no cuffs, no placket, a very ill-fitting back, and I sewed the top three buttons on when I was in the car on the way to the party… Also, I was sick-ish.

So most of the finishing was done post-Halloween. It’s currently a bit too chilly to wear the costume out of doors, but I anticipate that once spring comes, I’ll have more opportunities to photograph and show you the full costume! Maybe with a second version, that’s a bit neater and more crisp.

peggy-front-skirt

In fact, I can’t actually wear this version as is… The cuffs don’t overlap, and for these pictures I’ve managed to pin them close with these tiny treble clef pins that I got in high school. Unless I take those off, and attach new ones (if I can find any remaining scraps of fabric), then this shirt won’t really leave the house.

I keep talking about this next version… I have the fabric, a white shirting material, and I’m just working up the motivation to cut it out and make it.

First I’ve got to finish this homework assignment due in four hours…

Belle

back side up

My first completely finished costume from my initial cosplay plans.

back side front

Also my first self drafted ensemble, completely from start to finish.

back side

Can you see my beaming smile?

side no cape

Probably not, since its a) the Internet, and b) not showing up in the photos… I’m happy, I promise!

front reality

I was in a bit of a mood during the photoshoot. I only had an hour of sunlight left, and I was running late since curling my hair took longer than expected. Plus, smiling to a tripod is not exciting, especially when you’re trying not to fall over… And I forgot to put on the necklace, so there’ll be another post of pictures in the future including that, but for now, here are the pictures!

jacket side

The progression of shots is in general shedding the fairy tale and changing into the Storybrooke version. I’ve noticed this season that (***spoilers ahead***) when they go back to the fairy tale world, she spans the bridge between fairy tale and real world quite nicely, so I wanted to capture that…  (***end of spoilers***)

selfie half smile

Plus it made it easier for me to grocery shop afterward, since I already had the hair extensions out.

selfie smileThere’s the smile. Alright! Next up, I’ll be sharing one of my (many) overdue to blogging projects, and then next week will be reflections!

Halloween Week – 2015

If Halloween was an Olympic sport, I think I’d qualify to compete for the national team. I wouldn’t win, but I would probably be invited back for the next year!

That’s probably not how the Olympics works… Moving on!

I upped my Halloween game this year. For almost each day the week before, I subtle-cosplayed. I was so close to making it each of the 5 days, but that Tuesday was unseasonably cold, and the chosen outfit wasn’t finished and wasn’t warm enough. And I got out of bed too late. So there’s room for improvement, right?

Also, coincidentally, all of my outfits this were Disney princess themed. So next year I should try to diversify…

One of my fellow grad students figured out what I was doing on Wednesday, so for Thursday and Friday she made guesses, though my Belle outfit does have a dead giveaway component. I’m not sure if she knows about me making clothing, and if she knows about the blog I’d be very surprised (but hi, if so!), but its nice when something like this gets noticed.

Monday – Briar Rose

cuteShirt: RTW thrifted / Cardigan: Primark upcycled / Skirt: Me-Made

Tuesday – supposed to be Merida, with a second choice of Kaylee, and neither happened…

Wednesday – Ariel Day Dress

arielTop: Me-Made / Skirt: Me-Made

Thursday – Merida (Epilogue outfit) – More on this one soon

cuteTop: Me Made / Skirt: Me Made (and not yet blogged)

Friday – Belle

=back sideDress: Me-made / Cape: Me-made

And then Peggy Carter for real Halloween! But I’ll save that for another post… After the holidays. Stay tuned!

Farewell to Narnia

It has been a long journey to get here.

I started planning this costume nearly three years ago, just before I started this blog. I had fallen in love with it when I first saw ‘Prince Caspian,’ and even working in a costume shop, I had never thought about making it for myself.

During my senior year of college, I finished my first overbust corset, thinking that it would be used for this costume… I’m still a little sad that I won’t be able to use it for this costume. I also got the fabric for the underskirt and the dress itself, which was quilting cotton and poly-satin, respectively.

Last summer I made the “sleeves” and the underskirt, and attached the sleeves to the corset. Not my brightest idea.

In late summer, or early autumn, I showed you the two posts about creating my quiver.

Over the past year, I drafted the overdress from the corset pattern, constructed it from the lining fabric (turquoise satin) as a muslin, then used those pieces to cut out the real fabric and sew it up. That was early autumn of last year. Then I stalled for months. At the end of the spring semester I started sewing the trim onto the top, and when I had the trim mostly on, I stalled again deciding what pattern I really wanted to paint. I got so fed up with it mid-July that I started on it with dots and then worked on the pattern as I went. I finished the painting mid-August, right before school started, and happy with myself, forgot that I actually needed to finish it.

I decided on the last Monday in September that I needed to finish the dress and get it photographed that weekend. This costume deserved better than my living room.

So a friend volunteered to be my photographer, and told me about this awesome library, and here are some of the photos!

back quiver back column quiver storybook back up

It’s about time after 2.5 years, right?

Maybe I’ll get pictures outside sometime, but for now I love these pictures, and this library!

Peggy Trousers

Peggy Carter is my hero.

Granted, my favorite Avenger is Iron Man, and I only watched the first Captain America a few times, but I knew during the first watch that Peggy was awesome.

And then they gave her a show. Cause she’s brilliant.

My costume situation is currently… complicated. My Claudia was basically finished, but I wanted to switch out the zipper on the vest for a separable one, and that’s when I saw the massive pit stains. Why must white be so terrible? Belle is essentially finished sewing and stuff-wise, but I’m deciding/working on the hair. I’m keeping my hair shorter, and its just to short to be both curly and Belle-like, so I’m working on a hairpiece to assist. Susan is being painted, and the TARDIS needs a skirt, so I’m currently fully booked on costuming.

full

But I couldn’t resist starting another costume.

I have a problem.

I’m rationalizing it in this case by saying that these are work appropriate, surprisingly comfy, and very fun to swish around in.

Cake Patterns has always been a favorite of mine, even if I haven’t made much from them. I love the designs, even if I don’t want to wear all of them. So when they put out a woven pants pattern, I knew that I had to have it. Plus, they’re wide legged, and I wanted to try that style.

side

I had just cut into some fabric for a Ginger Jeans muslin (the fabric of which was a bad choice because it had no stretch. Trust me, you want some stretch for that.), and after getting some whiskering, I wanted to take a break before cutting into my really expensive denim.

There’s been this brown twill sitting on my shelf for at least half a year. I’m not even sure where I got it, but it was perfect for the Endeavor Trousers. Just a little stretch, and its quite a lovely bottomweight. I realized that it was the perfect color for a Peggy costume, and these wide legged trousers fit into that theme too. So on the 4th of July, I started this Endeavor. Hee hee. Puns.

pants

I made up the pattern with the side zipper, and pretty much followed the pattern exactly. It’s very high waisted, which is a lot on my small frame, but that made it a little easier to fit, since the way the waist laid made the crotch drop just a smidge, and that solved the fitting problems there. I did take off around 3 inches from the side seams, and the pockets are much too deep for me, so I’m going to need to shorten them on future pairs. The side seams might have been because of the stretch, though. And I had to use a normal zipper, so eventually I’ll need to find a heavy duty invisible zipper. It bubbles a bit, which creates these weird bumps, as you can see on the right side below.

backside

I was also getting some creasing at the back yoke, so I ended up making a horizontal dart. My swayback game seems quite strong.

waist

The waistband and pocket lining are the same quilting cotton as my project satchel, and I love it!

heels

The hem requires some sort of heel, though, since I knew I’d want to wear heels for a costume. It doesn’t limit them, but it does limit my comfy footwear. Gave me a chance to wear my original Belle heels! The hem is only held up by Steam a seam, though, and it might not be holding up well, so I could shorten it if I want.

makeup

I also did a makeup test, and it was my first time contouring. Not sure it worked/was worth the effort, but I think it’s a snazzy face. The red lips are definitely fun, at least. I’m working on pin curls, but I will probably want to do one of her ponytail styles anyway. This was not a good hair day, and without pin curls, but it is generally what I’ll probably be doing. The makeup might also work for Belle, though I need to decide if a more costumey contouring could give me more rounded cheeks… Choices…

The week that I decided to do this costume, I found a lovely red fedora on Ebay, and I couldn’t let it go, so with a blouse and a satchel, I could complete this costume. Sure, the red hat would be a little out of place for that outfit, but it would be a valid way to identify as Peggy! Once I get a bit further into the costume, I’ll show you the hat… AKA I forgot to take a picture…

Blouse draping is hard, though, so it might be awhile before the next update on this costume. But is that news for anyone?
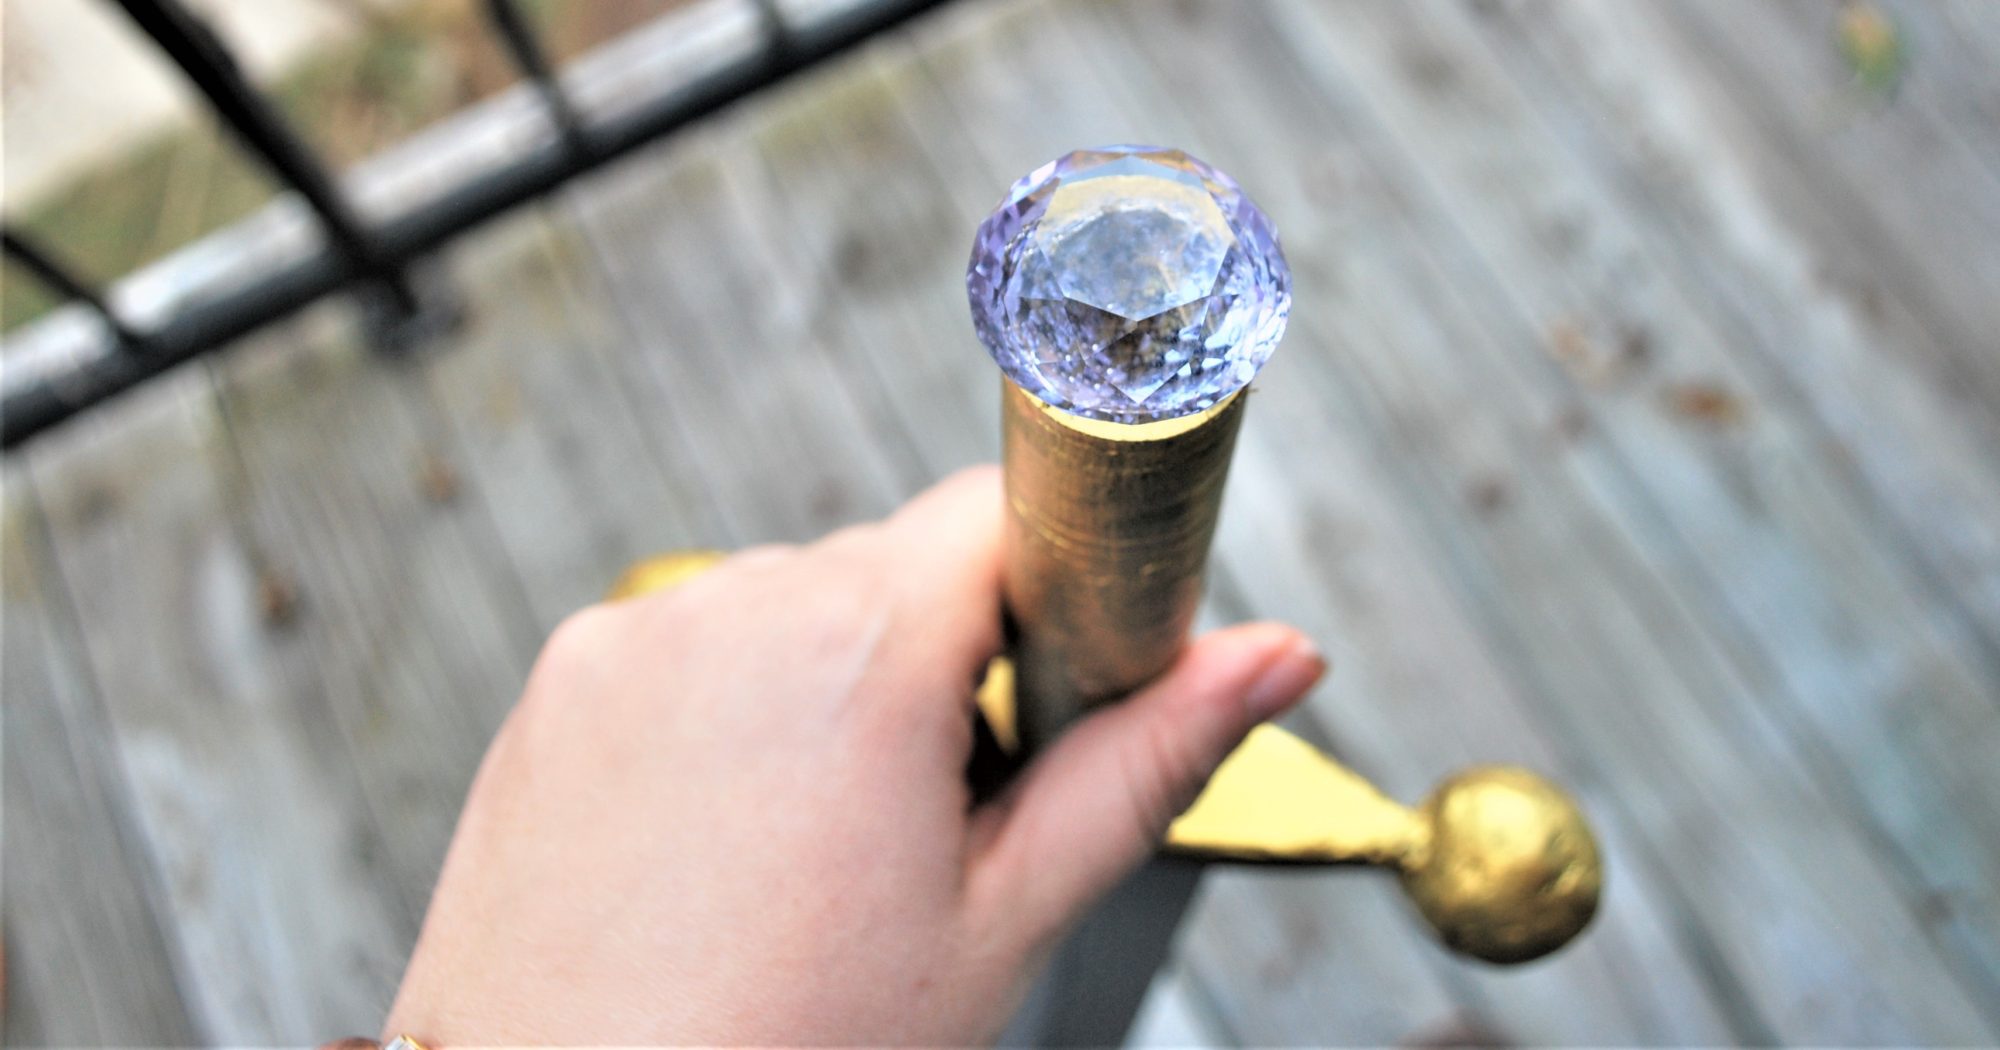
Shiny

This project took me forever.

I was looking up when I ordered the parasol in the first place. It was the end of September. That was a long time ago, wasn’t it?

This is basically the same one I got, which is the perfect size in every way, except it doesn’t fit well on my desk… So painting it sometimes got touchy.

Now, I then didn’t start painting until the first of our snowstorms. Because what else was I to do? So that was February…

I also have nearly no in progress shots, because I worked on it mainly at night, or when it was raining/snowing, neither of which provide enough natural light to take nice pictures. I do have this one though.

For paints, I used the cheap acrylic for all of them. I’m talking the 50 cent paints at Walmart. Maybe they’re a dollar, but either way, very inexpensive.

This might be why I needed nearly three coats to get the green to look solid, not streaky. The yellow and red didn’t have that problem, but the green and I were not getting along.

But the funny thing is, a few days after some snow melted, and we were back in classes, the power went out at home. I’m pretty sure that’s why I woke up before my alarm. Since it may have been three hours till it came back on,  as expected by the power company, I decided to pack up the project and take it into work.

In my defense, I’m still basically only taking classes. This first year of grad school is basically undergrad part 2. So when I don’t have a class until 12, am I going to do work in the morning? Or rather, on a Friday, with no homework due in that class, what am I supposed to do in the early morning?

So I finished it up, and during my mass photography escapade (where I also photographed my shawl, and a yellowtail cami that’s upcoming, and maybe something else too), I got some nice pics.

And there you have it! A lovely parasol in a Kaylee style. Yes, I did wait for the entire post before I mentioned Firefly. Can you notice my restraint?

Because I’ve been squealing internally ever since it was finished.

TARDIS Cape

My homage to the phone box. The only part of my costume that screams Tardis…

This was the next thing I made after the jacket, since I knew that I would just be able to hook into the jacket and not need to worry about it afterward.

front

I bought this satin backed with twill, I think, last year with the side purpose of using it for this cape.

I had also bought a roll of the really wide black ribbon.

But I just couldn’t get myself to put it together. After my issues of the Belle cape not really fitting over my head, I had just started procrastinating.

So once I had the jacket made up, I finally decided that it was time. I cut out a half circle, I believe, and a hood from my royal blue fabric. I made sure that the hood was larger than the last time.

hood

Then I took the ribbon and attached it to the edge of the hood. I had thought about adding it to the edge of the cape, but it wouldn’t have worked out with the circular edge.

I sewed it all up, included a gold lining to the hood, but not the length, and used a rolled hem for the length of the hem. It all sewed up smoothly.

back

But of course I didn’t work on the lettering until the morning of Halloween. One of my classes had been canceled on the fateful Friday, but I still had to go in for the second, where I was leading a discussion. So I decked myself out in a light version of Belle, and got to work on lettering and sparklies on other costume parts. I used puffy paint to write out the letters, but I tried to get them as block-y as possible, as well as even, which I may have sacrificed a bit. I centered the Public Call segment, but then Police and Box weren’t even.

words

When I got back from class, though, the puffy paint was still wet! I ended up carrying the cape very carefully and separately from the rest of my costume until we were almost ready to leave for the festivities.

It worked out, though, for the most part.

The hood is not comfortable to wear when attached to the jacket, so I’m considering added a thread loop, so I can wear the cape on the jacket or around my neck.

Decisions, decisions.

See you next week!

TARDIS Tuesday – Cropped Jacket

I’ve determined that Tuesdays are going to be TARDIS themed here in my little corner of the internet.

You see, I decided the week before Halloween that I wanted to wear my Tardis costume, if I finished it in time. But at that point I had completed less than half of it.

It’s time to share my trials in completing these four pieces of my costume, and maybe by then I’ll have worked a bit on the skirt!

The first part of the total costume  I made was a bolero jacket. I had just completed my Sorbetto and figured that would be a good pattern to build off of for this jacket. It was actually almost a month before Halloween, but my momentum stalled after I finished it… that does seem to happen a bit.

fixed

I knew it was going to end up over a button up shirt, so it couldn’t be skintight, and it had to be comfortable as well. Remember me telling you about this weird shirting fabric that I used to line my graduation dress? It made another appearance as a muslin and subsequent underlining here! It provides a good amount of weight to the jacket which really makes it lay beautifully.

For the pattern, I just folded the pattern at the pleat and traced the shape off. I rounded the front up to the center and added some darts at the back. Then I realized that in order to use the button that I’ve been saving for over a year I would either need to overlap the front or create a button tab. My buttonhole ended up a bit screwy, and I don’t have matching thread, so I’ll probably redo it, but it worked in a pinch.

Some bars were added on in order to attach the cape, and some beads… the beads. I wanted to incorporate these lovely pendants that I repurposed from vintage earrings, and when I saw Journey to the Center of the Tardis I thought they would be perfect in that context, but I still wanted to use gold fake pearls… until I ran out of them. So I added some silver ones. And then a strand of them fell off during Halloween night. So I need to do some fixing.

closerThe strand that fell off is discreetly on the other side of the jacket in these pictures. Because I was feeling a bit shameful.

But there’s my jacket!

(When I can get pictures of me actually wearing it, I’ll update the post!)

Hudson River Blues

Its been rainy here.

Cold too, though that doesn’t bother me. The rainy part isn’t even that bad, but the combo means I can’t take good pictures!

hands

Bonus fun fact: I’m a descendent of Henry Hudson. A few generations back a Hudson gal married into another family, so we lost the name, but sometimes its nice to know where we came from anyway!

So I’m here  to show you my Hudson pants… Nice intro, right?

I got the Hudson Pants pattern from one of the Perfect Pattern Parcels, which I bought mainly because of the Bronte Top and the Hudson Pants… Yeah, there’s a Bronte or two coming up.

back

Once I had it printed, I had a marathon cutting and gluing session with three or four patterns.

I treated myself to some fabric shopping, and I found this nice thermal fabric in a dark grey. Comfy, but as I found out later, no recovery.

The pattern came together rather quickly, even with the pockets. They were something I was concerned about, but the only thing I’ll have to do better next time is make deeper notches. Once or twice I got confused because I couldn’t see them, but I think that was because of the type of fabric and my tiny notches.

Can I say that these are the most comfortable lounging pants ever? Because its true!

front

I never want to take them off. Ever.