TARDIS Cape

My homage to the phone box. The only part of my costume that screams Tardis…

This was the next thing I made after the jacket, since I knew that I would just be able to hook into the jacket and not need to worry about it afterward.

front

I bought this satin backed with twill, I think, last year with the side purpose of using it for this cape.

I had also bought a roll of the really wide black ribbon.

But I just couldn’t get myself to put it together. After my issues of the Belle cape not really fitting over my head, I had just started procrastinating.

So once I had the jacket made up, I finally decided that it was time. I cut out a half circle, I believe, and a hood from my royal blue fabric. I made sure that the hood was larger than the last time.

hood

Then I took the ribbon and attached it to the edge of the hood. I had thought about adding it to the edge of the cape, but it wouldn’t have worked out with the circular edge.

I sewed it all up, included a gold lining to the hood, but not the length, and used a rolled hem for the length of the hem. It all sewed up smoothly.

back

But of course I didn’t work on the lettering until the morning of Halloween. One of my classes had been canceled on the fateful Friday, but I still had to go in for the second, where I was leading a discussion. So I decked myself out in a light version of Belle, and got to work on lettering and sparklies on other costume parts. I used puffy paint to write out the letters, but I tried to get them as block-y as possible, as well as even, which I may have sacrificed a bit. I centered the Public Call segment, but then Police and Box weren’t even.

words

When I got back from class, though, the puffy paint was still wet! I ended up carrying the cape very carefully and separately from the rest of my costume until we were almost ready to leave for the festivities.

It worked out, though, for the most part.

The hood is not comfortable to wear when attached to the jacket, so I’m considering added a thread loop, so I can wear the cape on the jacket or around my neck.

Decisions, decisions.

See you next week!

TARDIS Tuesday – Cropped Jacket

I’ve determined that Tuesdays are going to be TARDIS themed here in my little corner of the internet.

You see, I decided the week before Halloween that I wanted to wear my Tardis costume, if I finished it in time. But at that point I had completed less than half of it.

It’s time to share my trials in completing these four pieces of my costume, and maybe by then I’ll have worked a bit on the skirt!

The first part of the total costumeĀ  I made was a bolero jacket. I had just completed my Sorbetto and figured that would be a good pattern to build off of for this jacket. It was actually almost a month before Halloween, but my momentum stalled after I finished it… that does seem to happen a bit.

fixed

I knew it was going to end up over a button up shirt, so it couldn’t be skintight, and it had to be comfortable as well. Remember me telling you about this weird shirting fabric that I used to line my graduation dress? It made another appearance as a muslin and subsequent underlining here! It provides a good amount of weight to the jacket which really makes it lay beautifully.

For the pattern, I just folded the pattern at the pleat and traced the shape off. I rounded the front up to the center and added some darts at the back. Then I realized that in order to use the button that I’ve been saving for over a year I would either need to overlap the front or create a button tab. My buttonhole ended up a bit screwy, and I don’t have matching thread, so I’ll probably redo it, but it worked in a pinch.

Some bars were added on in order to attach the cape, and some beads… the beads. I wanted to incorporate these lovely pendants that I repurposed from vintage earrings, and when I saw Journey to the Center of the Tardis I thought they would be perfect in that context, but I still wanted to use gold fake pearls… until I ran out of them. So I added some silver ones. And then a strand of them fell off during Halloween night. So I need to do some fixing.

closerThe strand that fell off is discreetly on the other side of the jacket in these pictures. Because I was feeling a bit shameful.

But there’s my jacket!

(When I can get pictures of me actually wearing it, I’ll update the post!)

Hudson River Blues

Its been rainy here.

Cold too, though that doesn’t bother me. The rainy part isn’t even that bad, but the combo means I can’t take good pictures!

hands

Bonus fun fact: I’m a descendent of Henry Hudson. A few generations back a Hudson gal married into another family, so we lost the name, but sometimes its nice to know where we came from anyway!

So I’m hereĀ  to show you my Hudson pants… Nice intro, right?

I got the Hudson Pants pattern from one of the Perfect Pattern Parcels, which I bought mainly because of the Bronte Top and the Hudson Pants… Yeah, there’s a Bronte or two coming up.

back

Once I had it printed, I had a marathon cutting and gluing session with three or four patterns.

I treated myself to some fabric shopping, and I found this nice thermal fabric in a dark grey. Comfy, but as I found out later, no recovery.

The pattern came together rather quickly, even with the pockets. They were something I was concerned about, but the only thing I’ll have to do better next time is make deeper notches. Once or twice I got confused because I couldn’t see them, but I think that was because of the type of fabric and my tiny notches.

Can I say that these are the most comfortable lounging pants ever? Because its true!

front

I never want to take them off. Ever.

New Years Dress… A Little Late

Remember my velvet and lace dress?

I finally got around to starting, and finishing it, a few weeks before Christmas.

front

About time! I had already had the project for over 3 years!

Since its been awhile, I’ll recap.

I got this dress from my boss at the costume shop where I worked during college. It had been falling apart for a while, which made it perfect for the zombie thesis it was last in, but not for actual wear as a costume. So my boss gave it to me to play around with.

back

I ended up taking off the lace top since it was a bit too fragile to stay together on its own, and then let it sit around for forever.

So in December I finally made an approximate pattern for the lace top out of this polyester lace, I sewed it up, and I carefully sewed it to the velvet. At this point it was still very much below knee length, which I never wear, especially in a party context. Instead of cutting off at the bottom, though, I decided to bring the skirt up at the waist, in order to give it a waistline, which i liked, but also to show off the cool detailing of the skirt, which is a subtle seaming of the velvet that might even be too subtle to show in pictures.

detail

It got its first outing on New Year’s Eve when I went to a party for maybe an hour… I stayed up to watch the ball drop though, so I still feel like I’m not a party pooper!

I even got a few compliments, by people who didn’t even know I make clothing, so I count that as a definite win!

top detail

Running a Teashop

front

A few months ago I laid out a small sewing plan, and though I’ve worked on all of the projects, I’ve yet to post on most of them. But the time has come!

My first project, which is really my latest one, is a shirt for a small Hatter costume (who runs a “teashop,” by the way).

AliceHatter-handslink

I fell in love with Syfy’s version of Alice in wonderland, which was a mini series that aired in 2009. It’s a perfect way of turning an old fashioned story around, and a story of family and love… now it just sounds like a romance. It’s more of a drama with a slight comedic undertone. The Mad Hatter is played by Andrew Lee Potts, and is not terribly nice or mean, but understandably complicated. He wears this awesome hat, go figure, which is the main part of the costume that I’m lacking, but his shirt is the craziest part.

Definitely vintage inspired, and oddly colourful, but rather simple otherwise.

closer

I had always thought that Archer would be a great pattern for this, a good go to dress shirt pattern.

The only changes I made to it was the hem, where I chose to use the hem that was already sewn into my fabric, so I ignored any hemming instructions, and I shortened the sleeves to elbow length, without a cuff. Oh, and I only cut out one yoke piece, so I french seamed the entire thing. So I guess that’s more than a minimum of changes.

back

Other than that, a simple make. I thought I had lost my buttonhole foot though, and after searching my room, I found it where it most definitely should have been… in my makeup container. But then I got clicking away, sewed it up, and here it is! It’s fairly comfy for a swishy polyester shirt. Maybe soon I’ll have a full cosplay!

front2

My Most Comfy Tee Ever

This fabric is one of the softest I have ever worn. Especially for a jersey.

I want to live in this fabric. Forever!

Unfortunately, I only have a finite amount, since it’s a mystery fabric find from a discount fabric store in New England.

So knowing that I only had a bit to work with, I wanted to make sure I used it well!

And I made a Nettie. Not this Nettie, which I still love dearly, and should remember to wear more often, but a Nettie shirt.

front

After seeing Lauren’s Nettie shirts, I had a plan to make a few for layering shirts once winter showed up, so I’m glad I started early.

Knowing that I wanted to use the higher back, I printed out a new copy of the pattern, and glued it together. I’ve begun to glue-stick my patterns, so I can easily take them back apart for better storage. Gone are the days of folding bulky taped patterns, at least for future pattern buys!

For sizing, I ended up using a slightly odd combo. I sized up one (from my mid-back pattern) at the shoulders, and through the armscye, but cut the sleeves a little skinnier to my original size, and after the waist I swerved out to two or three sizes up. I cut the bottom off around where the front turns into the bodysuit, and I attempted elbow-length sleeves, which is what all my long sleeve shirts turn into anyway, after I push the sleeves up!. In the future versions, I might even lengthen it, but this is perfect for this version!

back

I sewed it up according to the directions, but I left both the bottom and the sleeves unhemmed. I’ve given myself a policy that if it doesn’t need a hem, it shouldn’t get a hem. Most people around me already know I make my own clothes, and those that don’t will mostly not even notice!

There might even be enough fabric to squeeze out a Yellowtail, in conjunction with some other fabric, so I’m quite pleased!


Macaron Sorbetto

It wasn’t until this year that I figured out what a macaron was… the almond ones, that is.

Growing up with a family member who despised coconut, macaroon (with two O’s) were not discussed, or talked about, or were to enter the house.

So I just assumed that the two O version was the same as the one O…

I was wrong. The latter is a pastel color rainbow!

front

Much like the Sorbetto I made.

(Jumping in to say that yes, I am wearing headphones for these photos. When it’s just me and my self timer function on the camera, and I’m in the middle of a Thrilling Adventure Hour podcast, I will refuse to remove headphones…)

This pattern has been floating around the interwebz for longer than I’ve been blogging, but I never took much interest in it. I didn’t have many reasons to wear a sleeveless blouse-type shirt, since I was in college… and I’m still in college.

But now I’ve a part time job that suggests business casual attire. And as a newbie to the world, I’m sticking (mostly) to it.

I’ve got plenty of stuff that is appropriate, but I figured that another blouse never hurt anyone!

back

This fabric was given to me when my former boss destashed last year, and even though its not at all my style, I jumped on it. I had been thinking Archer, but in the end that didn’t happen. I’m glad now, as it is very wrinkly right out of the wash, and I have no patience to iron an Archer every wash. A Sorbetto is much more ironable.

The drafting of the pattern seemed nice, and all the sewing went well. If I had worked directly from start to finish (until the alterations) it would have been maybe an hour, hour and a half at most.

Mistake number one was using a small-width fabric, so it felt like I was eating up over two yards (though I do have plenty of scraps).

Mistake number two was using such a wide bias tape, but it was the only one I had in stash that was definitely long enough and happened to match the colors pretty well.

Mistake number three was not pressing my alterations post sewing.

cutefront

My neckline was gaping at the back and the bias tape turned outwards throughout, so it looked very poorly sewn. That was due to mistake number 2. I made darts on the front and the back to fix these, but because I didn’t press it, they still stuck out.

And I wore it that way, even to work, since at the time I was too lazy to get out the ironing board.

But now I want to actually wear it, so out of the corner the ironing board comes…

Uganda

Out of all of the places that you can choose to study abroad, one of my friends chose Uganda, and had a lovely time in Kampala, the capital city, and toured some of the countries that have been in the news for not-so-great news over the years.

When she got back, she was just as bubbly as ever, but having read her blog of her adventures, it was clear that the experience had changed her deep down, which is really what such and adventure is meant to do.

Our schedules didn’t match up much for that winter break, but the one time we were able to get together she gave me this lovely African wax print cotton fabric that she had picked up there! It’s a gorgeous color and feel and just plain lovely.

front

I’ve worked with batiks before, when I’m quilting they’re my favorite, but this was different. This was special. What was I going to make?

So I delayed, I waffled, I forgot about it for a while, and I waffled some more.

My mom suggested a suit, like a pencil skirt and jacket. Now that I know more about construction, I know that would likely have been difficult construction-wise, since I would end up wanting a long sleeve jacket, and pencil skirts out of wovens take up fabric because the grainline really does matter… And I don’t like pencil skirts, which counts against this plan too.

back

I did like the idea of a jacket, and in the future, I may use the scraps to manage that. But in the meantime, I made a dress.

I happened to be muslin-ing a pattern for my Susan costume, and realized that the corset pattern I used for that costume, when actually fitted to my body without the insane ease, had pretty nice lines. So I muslined half the pattern for Susan, which I have not continued working on yet, and the other half for a woven dress.

My methods from this point on grow a bit…sketchy. I managed to get the bodice made up quickly, and even cut out a lining and sewed that up too. Then I started on the skirt. I measured the fabric and it was only 40 inches wide… Which was not anywhere near long enough to make a 3/4 circle skirt, which is definitely my favorite kind. It was barely going to be decent with a full circle skirt (at least in my mind). So I cut out a waistband, which hadn’t been planned. Even with that addition, I’ve still got to wear tap pants, mostly due to the sitting-down factor. I like to sit down, and I especially like the extra insulation of not sitting down and getting my legs and maybe butt stuck to the seats. Just a personal preference.

pockets

But the dress is lovely, and I’m so glad I was able to use my special fabric in such a pretty and useable way!

And… pockets.

Oatmeal

If you’re a long time reader of my blog, you may have noticed my love of cardigans.

There was the pink one, and the blue one. I also made two green ones pre-blog.

Plans were made for two more… And I made one of them!

The other should be made up shortly… but will I blog it anytime soon? Not likely!

front

So here’s my beige sweater, or Oatmeal.

zero waste technicals3

You may remember this picture, which I got from Pinterest. Isn’t Pinterest cool? Full of fun ideas and things that I have no interest in making, but just look so darn pretty!

I loved the idea of this, and I don’t mind the execution, but once I look in the mirror I start pulling and fiddling to make it look “right.”

If I move, or breathe maybe, the back seam rides up, likely because I’m a sloucher, and pulling my shoulders forward drags the fabric up.

back

You may notice from the pics that I wore this with my black dress (which is definitely the most comfortable thing I’ve made, and once I fix the straps I think it may be a weekly wear option.). IĀ  also made it at about the same time, but I haven’t gotten around to posting about it.

That seems to be a theme for me.

I got the fabric from a Fabric.com haul last year, or early this year. I’m not quite sure anymore. But its a viscose tissue knit with some rayon, I think. Maybe some lycra, maybe not. Very breathable feeling and soft.

I tried to follow the “pattern” but I made changes. Like attaching the entire “skirt” to the “bodice” and shortening the cardigan. I made it up during the summer, and a shorter drapey cardigan makes for better summerwear.

It works very well with jeans, though. Quite nicely, though I think I’ll like it in early fall and late spring for a slight addition of warmth without sleeves to interfere with flow.

So I like it, and I’ll wear it definitely, but its one of those staple cake items that I’ll stay enthused but not excited by.

front2

Hybrid

Do you remember when I made a wristband out of this nice minty aqua yarn? I still love that thing. I told you that I had plans for the rest of the ball, but if I remember correctly I told you my plans were top secret… or something like that.

frontcolor

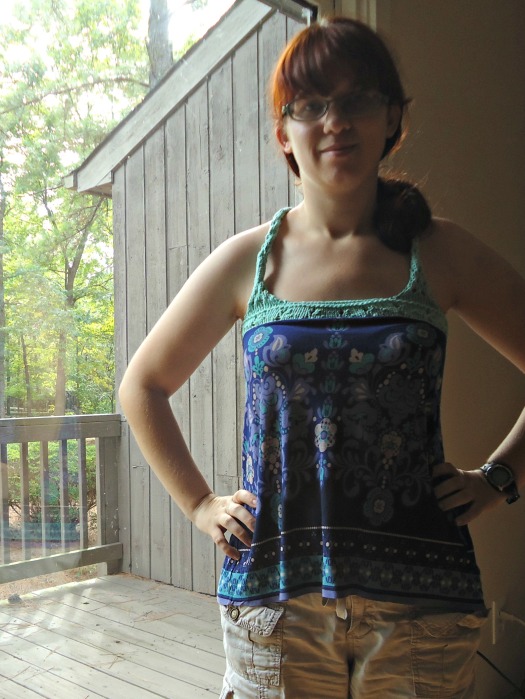
Ta da! I present my knit and sewn hybrid!

I had most of the knit part finished before I posted about the wristband, but I was really more interested in figuring out how to attach it to the part of the knit fabric I had previously cut off a dress.

topofdress

The story of the dress: I got this dress in Germany on a visit with my aunt, who I rarely get to see. It was love at first sight with this dress. It was also about seven years ago. The dress didn’t fit well by today, and I would always have a serious case of panty lines. And who wants that. So I cut the skirt off to make this shirt, which is well cropped at just hitting the waistband of my jeans, so better with high waisted bottoms, and I had this leftover fabric. I had been planning to make it into a color blocked shirt with a yoke.

But then I saw how close this yarn was in color. Match made in heaven.

backlight

I used my wristband as a pseudo swatch and just cast on a bunch of stitches. Throughout the entire make I waffled on construction details and sizing and how much yarn I would need. mostly the latter, as I had a finite amount to work with. Because of this I used stockinette stitch with a small openwork pattern, mostly for the yarn conservation reasons. I was banking on the idea that the sewn part would flatten the stockinette stitch roll. It mostly works.

frontdark

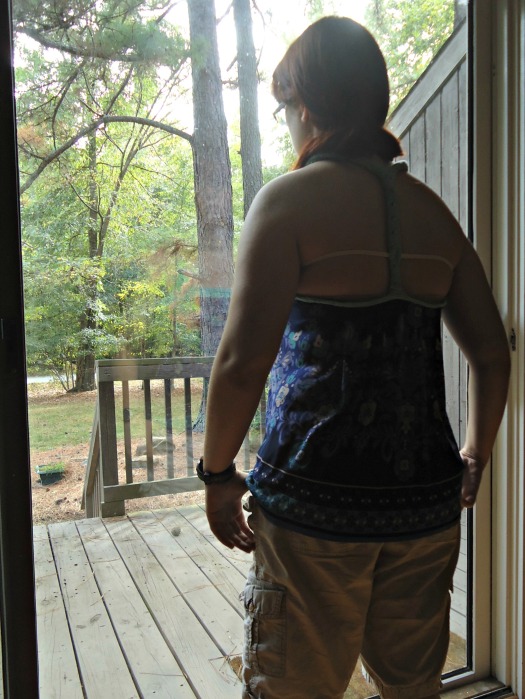
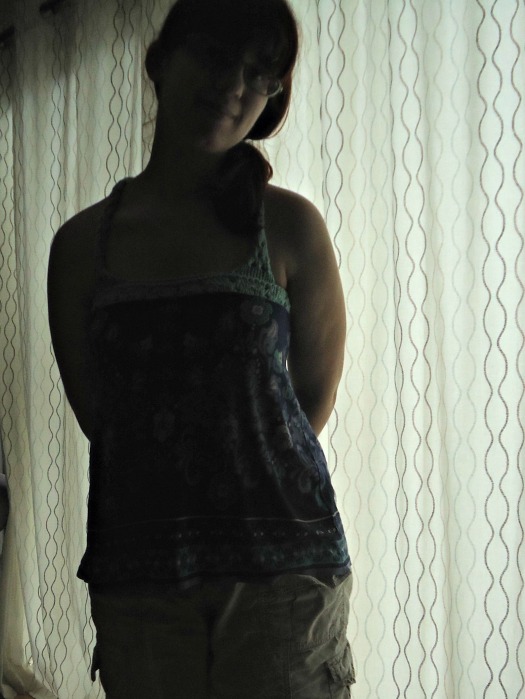
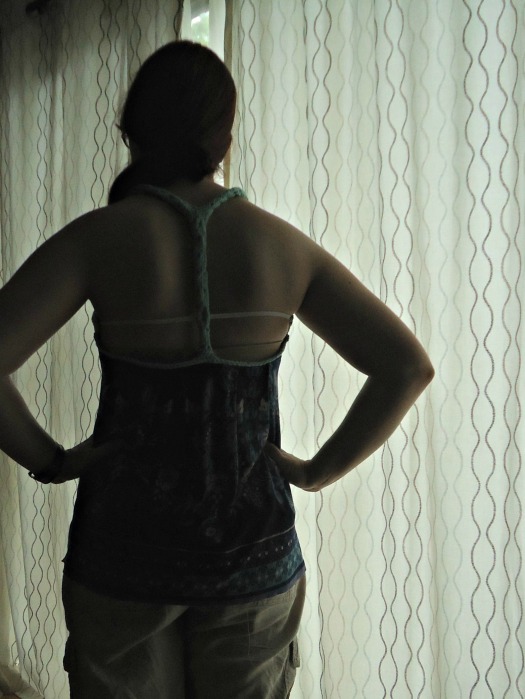
I measured how far apart the straps would need to be, then I realized I just how little yarn I had. Racerback it would be then! Once I got to a reasonable back length, I bound off and used the remaining yarn to cast on for i-cord. And that’s how I finished the ball. Originally I used a bit of some peaches and cream top add some length to the i-cord and more “seamlessly” connect the segments. I wore it for a day, but by the end of the day the back had stretched out way too much… Waaaaay too much.

braback

So I procrastinated for a month. And now I’ve finished it. Took out the peaches and cream and used a different attachment method for the i-cord which helped to shorten it. And I used elastic to keep the top corners of the yoke tight. And it fits nicely and is cute, and because the seasons are changing probably won’t get much wear this year, but next year! Except now that I’m looking at photos the back falls below my bra strap… Any suggestions? I might need to get more creative with elastic.

Lesson of the post – I-cord is super duper stretchy.