Warmth, in this incredibly Warm Winter

full

So after the large winter storm passed by here, it got warm.

Like really warm. There were some people wearing shorts. Winter, even around here, should not be that warm.

So its a fitting time to be knitting with wool, right?

In reality, both of these projects were conceived earlier in the month/last year.

Knowing that its supposed to be winter, I had decided that I needed a warm hat. I’m not a hat person, really, but I walked home (about 2 miles) one night when it was near freezing, and I only had a thin scarf and my “fall” coat (because its lighter than my winter coat, but still normally warm enough), and I’m pretty sure that I nearly died. It took me about 45 minutes to warm up enough to function like a human being, and then another hour past that to eat and drink enough hot stuff to warm up enough to fall asleep.

side

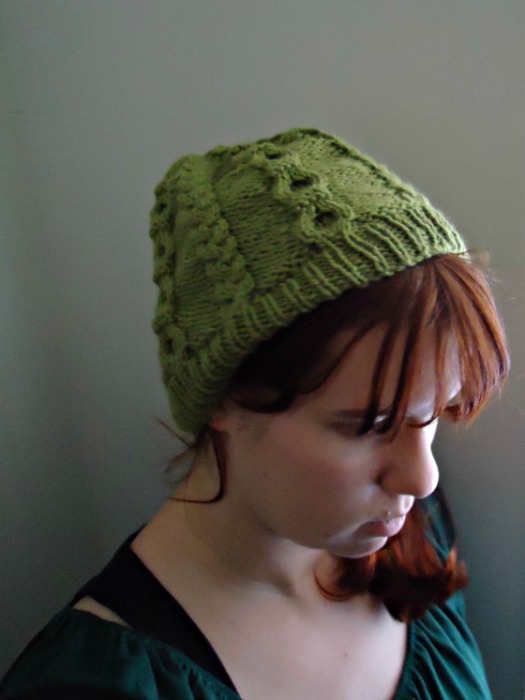
The next day I started this hat. I had this orphan skein that I got on sale when I was looking for sock yarn. I couldn’t find any on-sale sock yarn, but even with my full-price sock yarn, this still fit into my hobby budget. It may have been 4 dollars, and I’ve got a couple of yards left.

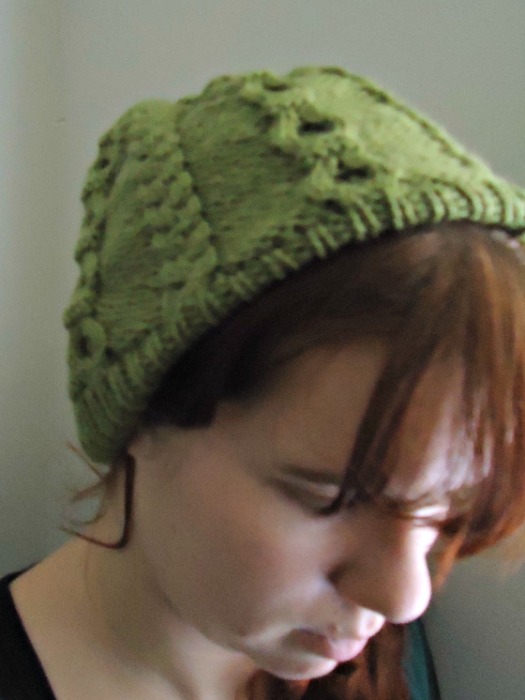
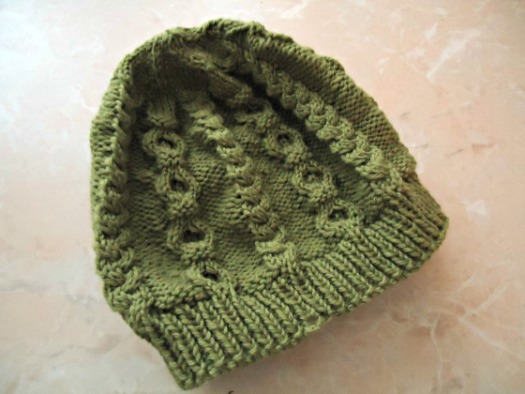
So the pattern is Helios, free on Ravelry. It’s a pretty good pattern, though I stuck with the size 7 needles throughout, since I don’t have a slightly bigger needle. It makes it more of a globbular slouchy hat, instead of a beret/tam kind of slouchy hat. The one thing I’m afraid of is blocking it, since it’s a tad big, and I don’t want to stretch it out any. My other green knit hat was too small, so I gave it away to my cousin, so I guess I overcompensated with this one, and made it too big.

top

Oops! Its still wearable, which is perfect. Because I was not going to admit defeat and try again.

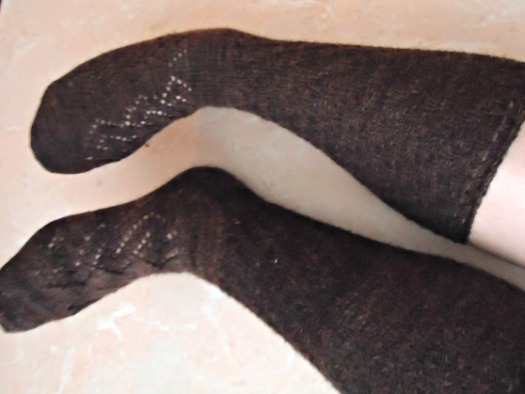
And the second knit project is this pair of socks! This project can be described in three words:

Second Sock Syndrome.

full

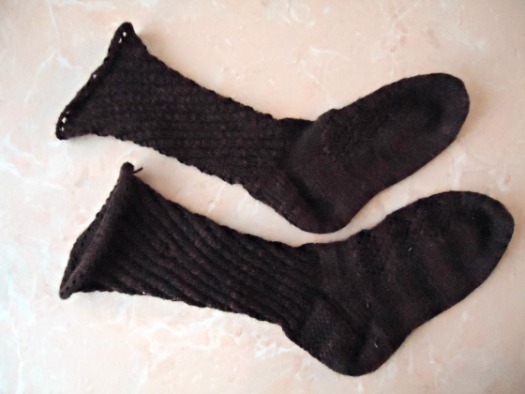
Yes, this time I fell prey to SSS hard. Really hard. There was a thought in the back of my head that I should somehow work both socks together, and my circular needle collection does not include a skinny enough needle with a long enough connection. So I planned it that once I got to the ankle of the first sock, I’d put it on stitch holders, and start the second. Which worked perfectly.

Yarn-wise this is an alpaca merino blend that I intended to use for socks for my dad… last year. Meaning 2014. Sorry dad. It’s also not machine washable, so perhaps its best that I made them for me, since I’ll be more likely to remember that…

The pattern is ish-designed by me. Meaning, I used this book I got, Socks a La Carte 2 Toes Up to plan it out, with a rotating rib leg, technically a double picot cuff that I’m too lazy to fold over and seam. But once I made the toes of the first sock, I realized that I would get super bored doing a simple stockinette for the foot, so I found this.

lace-diamond-knitting-motif-chartTo be honest, I’m not sure where I found it, but I think it was on a Russian stitch pattern website, and since this was before I started the sock, so I never anticipated needing to cite the source. If you know who’s this is, please let me know! Because its a beautiful lace pattern, and I’d definitely suggest it!

So after finishing both feet of the socks, I started in on the rotating rib of one of the socks, and I got a long way through when I realized that I should weigh out the yarn so I could maximize the height of the sock. Once I double checked that, I ribbed until I got to the cuff, made the double picot cuff, bound off, and then the socks sat there. For months. And months.

What I haven’t  told you yet, is that these socks were started over the summer. July or August.

Oh yes.

These took me about 6 months.

leg

When I went home for the holidays I brought these with me, and didn’t even make it a row. So once I got back I vowed that I would finish before the semester started. Which also didn’t happen. I made progress, but didn’t finish it.

It was during the first week of the semester, and I told myself that I couldn’t start any new projects until I finished these. Trust me. These got finished really quick after that. I even took them with me to the movie theater when I saw Star Wars the second time. I had the whole row to myself, so I didn’t even feel (too) self conscious about KIPing. There are some advantages to itsy bitsy theaters.

And then I started on the hat! So a happy ending finally. Plus, the hat got done in less than a week. All that pent up knitting energy I guess!

Got any SSS, or longtime knitting projects?
My name is Agent

peggyskirtPeggy Carter is the master of well tailored shirts. Most of them are soft and drapey, and a few are structured. I’m excited to see whatever the next season brings, but from the first there were many good shirt examples, and mine is a combination.

This shirt post is long overdue. After all, I first wore this shirt in an unfinished capacity on Halloween… But then didn’t get around to actually finishing it until December. And it’s very wordy…

peggy-sideI started drafting in late September, and it went through a number of muslins (at least 4) and an incredible amount of drafting variations (meters and meters of Ikea drawing paper), some of which got scrapped before a muslin was even cut.

peggyfrontThe many alterations that I made for this shirt included a full bust adjustment, rotating and then eliminating darts, removing the back darts, adding a yoke, raising the armscye, moving the shoulder point up, doing a full back adjustment, and then taking some of that out, making a swayback adjustment, removing it, and then adding it back in, adding room to the bicep, adding room to the sleeve cap. Etc.

I had bought this lightweight linen at the same time I bought the linen for my Merida outfit, so I knew that it wouldn’t be super drapey, but not 100% structured either.

peggyback

This is also the time to infodump my many sources for patterning and fitting this shirt. This was the website I used to draft the initial block that I drafted the shirt from. I used this article to help explain and draft my one piece front/collar and facing. I’m fairly certain I tried this forward shoulder stuff too… This placket tutorial is awesome! And this explanation of sleeves and drafting remains my favorite reference, and one that I re-read often.

sleeve upper back

front lower back

The front darts were replaced by three tucks, which do a good job of dealing with the dart-replacement, but make hemming the shirt a bit miserable. I eliminated the darts in the back, and tried to use a center back seam to solve swayback issues… It only worked a smidge, and the execution needs to be improved on my next version.

peggy-raised-armsLook look look! I can raise my arms! The armscye is super close to the base of my arm, which I’ve learned is the key to a shirt that doesn’t pull out of a tucked-in state, and since I knew that I would be tucking the shirt into the 40s style trousers, this was very important to me. Because of the size and shape of the armscye, though, this shirt is oddly uncomfortable to take on and off. The sleeves are ginormous at the top, but because the circumference of the base of the sleeve is about the same as my bicep at its fullest fat level, the sleeve base pulls a little as I put it on. The sleeves are ginormous mostly because slimmer set sleeves were creating extreme draglines, so I overcompensated and made a super large sleeve cap instead, since I was running out of time. I’m hoping to slim them down slightly for the next version.

peggy - back-skirtThis was supposed to be my Halloween costume, if you remember. And a version of it was in fact done for Halloween… One that wasn’t hemmed, no cuffs, no placket, a very ill-fitting back, and I sewed the top three buttons on when I was in the car on the way to the party… Also, I was sick-ish.

So most of the finishing was done post-Halloween. It’s currently a bit too chilly to wear the costume out of doors, but I anticipate that once spring comes, I’ll have more opportunities to photograph and show you the full costume! Maybe with a second version, that’s a bit neater and more crisp.

peggy-front-skirt

In fact, I can’t actually wear this version as is… The cuffs don’t overlap, and for these pictures I’ve managed to pin them close with these tiny treble clef pins that I got in high school. Unless I take those off, and attach new ones (if I can find any remaining scraps of fabric), then this shirt won’t really leave the house.

I keep talking about this next version… I have the fabric, a white shirting material, and I’m just working up the motivation to cut it out and make it.

First I’ve got to finish this homework assignment due in four hours…

Chase the Wind

I posted two weeks ago about my Merida skirt, which I’m super proud of… all that embroidery…

front full

Today I’m going to tell you about the top that I made to match it. I was never really into two piece sets, because most of the ones I found consisted of shorts and a top. But when I had the idea to make the Merida themed outfit, I knew that I didn’t have a need for a black dress. I wanted to have a more versatile outfit, so a two piece set of a skirt an a top it was!

The peplum craze is still going, and excepting my Belle Mark 2 (where it was “accidental” because it as a dress was too short, so I cut it shorter) I don’t have any in my wardrobe, so I wanted to try one out…

Verdict: I don’t really like it, but I’ll talk about that more later.

side

The top is made of the same heavy black linen (from Joann’s) as the skirt, but its got a green lace layer over the peplum, and is lined with a forest green “posh” lining from Joann’s. The lace is this gorgeous stuff from my stash, and is the same as I used in the Dandelion suiting dress and the Dandelion linen sleeveless top. I actually think that this linen might be the same weight as that sleeveless top

front

I self drafted this top from the same general “block” that I started with for Peggy. The block itself is quite… wrong, but it was a good starting point for the moment. Since it was wrong, I had a few adjustments to make. I had to raise the armscye since it was drastically too low. I also made it sleeveless, so I raised the edge of the shoulder and made the shoulders a little more snug. I had to adjust the front and back darts in order to get it to hang properly. Using a side seam zipper seemed like a good idea at this point, especially since I only had a deep green, not a black one, but I’m not sure that it was the right call.

The muslin I made out of the same linen was pretty terrible, so I had to make changes. Namely change some of the darts, and fix the side seams, which were leaning to the front. The back of this version is now both tight and loose, with a bubble above the darts… I’m not sure if its that the fabric is super finicky, or if its a problem with drafting that I’ll need to fix for next time I make one of these, but I guess time will tell.

front smile

The peplum itself is a 3/4 circle skirt, and is hemmed with black bias binding. It’s got a lot of body, because the linen is so heavyweight. That’s probably why I don’t really care for this peplum. I do like the idea of it, and I like the Belle version, made out of a fairly thin knit so it hangs flat, but I think the body of this version is too much. Especially with looser bottoms like these jeans. I don’t own any pencil skirts, because I feel like I can’t walk in them, but I bet such a skirt would be a great match for this. I’ve mostly worn it with skinny jeans, and I think it balances well.

back side

Looking at the pictures, I can’t tell if the horizontal waist seam is bubbling or whether its an unfortunate trick of the light. Now that I have a full sized ironing board this will probably be easier. My tabletop ironing board was too small for its own good, though I’ll keep it around for small scale things like quilt top seams and the like. I’ve been thinking about adding some embroidery up by the neckline, but I think I’m just going to leave it alone. More versatility. The neckline doesn’t always lie flat, which is something that I will need to improve for future drafting projects, but when its tugged at, it will, so once rigged up to the skirt, or any skirt for that matter, it should help.

Realistically, this top will mostly be used with skirts, since its a plain but structured top above the peplum, but if I ever go on a trip and bring it along, I can see wearing it alone. Only time will tell!

I’ll be back soon with pictures of the two parts together, but before that, I need to actually rig up a way to fasten the two together… Procrastination is my specialty, after all.