It’s time to talk about the gauntlet.

So picture the scene: I have been waiting for a year to see Avengers Endgame. In some ways I’d been waiting for this movie since I first saw Iron Man in 2008. The whole year I was trying not to speculate and guess what was going to happen. I’ve tried to not watch trailers, since I was going to see it no matter what. I caught a couple pictures, by accident, but other than the white team up suits I didn’t see much. I wait until the weekend post premiere to see it and manage to avoid spoilers on the internet.

I’m in the theater, one of my small local theaters which has thin walls, but my movie is going to be the loudest anyway. There’s a pretty good crowd, but there’s only about 4 people in my row 3/4 of the way to the back.

I am shocked by the time jump, but liked the plot device. I enjoy the Bruce Hulk combo, and Scott’s time travel banter. I like Morgan. I can see why Clint has changed. I cry over Black Widow. And then they create the gauntlet. The Iron Man/Hulk/Nano gauntlet to take the strength of the infinity stones to make another snap. It’s a great team up of all the sciencey people of Marvel!

20190827_10114721

And then the “twist.” Thanos comes back to the future from the future past, and wants the stones, so he blows up the Avenger’s HQ. And suddenly, the person who has possession of the gauntlet is the least powered person on the team. Clint Barton.

In the MCU, he’s survived on wits, on archery skills, and on hand to hand combat. But he doesn’t have a super suit that flies or shrinks. He doesn’t have sorcery or superpowers. He’s just a guy. A guy with skills, but just a guy.

That was the image that stuck with me when I left the theater. Sure, I cheered over the “We’ve got this” moment, I cried over Tony, I was heartened by the win, and was pleased by the dance. But a guy playing keep-away with a seemingly unbeatable alien. That’s what stuck.

So when I realized I could go to DragonCon in August, I decided to make a Hawkeye/Ronin costume and carry around a gauntlet to recreate that moment. It’s maybe two minutes of the story, and probably only 30 seconds of screen time total. But that’s what DragonCon is for! Recreating beloved moments, and someone will get it.

Even before making the costume, I knew I needed to make the gauntlet, and I knew that would take the longest time, mostly for drying and waiting and mistakes.

Foam was new to me. I found my local Harbor Freight and bought the two different types of floor mats they had, and used both for the costume, but only the thinner rolled one for the gauntlet.

I found this awesome 3D Pepakura model for the gauntlet from MasterMod, and printed off a cardstock copy so I could test out the size and how it fit together. Cutting those pieces nearly broke me, and I hadn’t even gotten to the foam yet.

20190730_12162003

Deciding to size up a bit, I printed out a new copy, and set to work cutting the foam. I was using a couple of fresh X-acto blade, and was still having trouble, so next time I’ll follow suggestions to use a scalpel.

I would cut out some pieces, and glue some pieces, and cut some pieces and glue some pieces. At the time I was living in a townhouse where I only had one room for both living and crafting, so I didn’t have the space to cut and arrange all the pieces at once.

Contact glue was my weapon of choice for assembly, and boy is it smelly and sticky like mis-made caramel sauce. The stick, not the smell. Something I didn’t consider until it was too late was that the edges of the foam should probably have a specific angle in order to fit together properly. Oops!

Also, don’t let the can of contact glue fall over and spill into the bottom of a bookcase. I got lucky, and the carpet underneath the case wasn’t affected, but it could’ve been disastrous. And eternally smelly.

Cut and glue and cut and glue and cut and glue.

Okay, so then it was assembled and I needed to get a move on, as DragonCon was coming up quick.

20190827_10121926

Plastidip and North Carolina humidity in August doesn’t work well together.

Average spray paint is actually worse.

Masking off tacky spray paint and mildly tacky Plastidip is less than ideal.

20190827_10120123

So I grunged it up with some black and brown acrylics.

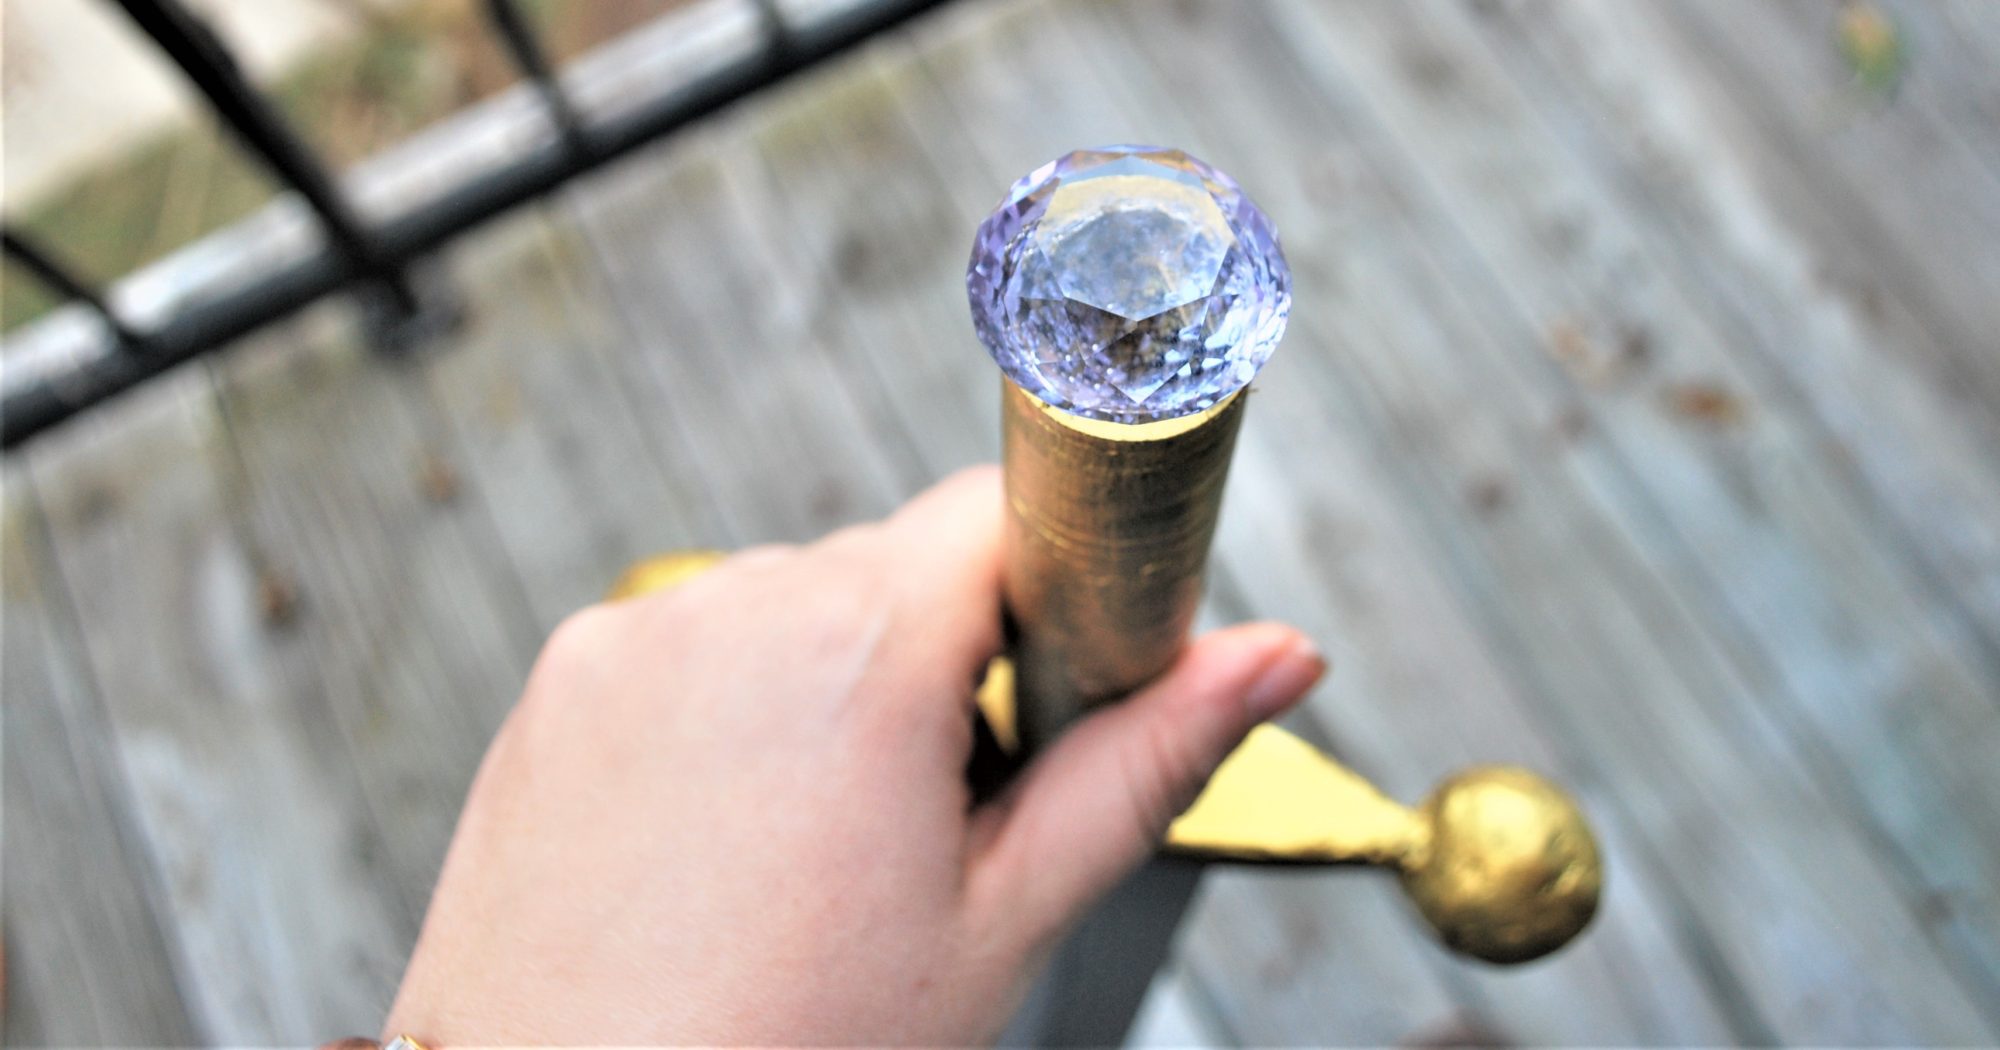
The jewels. Those were a treat. I found them in a grab bag of rhinestone jewels at Michael’s. I spent about 20 minutes sitting on the floor of the young craft kit section one night after a work shift making sure that I had the correct colors and shapes if I was going to spend 15 dollars after a coupon on a bag of jewels I might never use afterward. Massaging a bag of craft jewels 15 minutes before closing is… not a pretty look.

20190827_10122627

I think I used contact cement to attach them, then used some kind of puffy paint (craft supply hoarding for the win!) to really cement them in.

For the inside, I decided to keep my super glue, and my wallet inside the glove, which would mean that I needed a pocket inside.

20190922_07485904

I found some scraps from the Merida skirt, made a zippered pouch, then glued in the pouch and some lining to black out the inside of the glove.

And that rounded out my Nano Gauntlet! It now graces my curio cabinet in a tribute to Ironman.
Jasika Blazer – Take 2

Now that it’s been nearly a year, I think I’ve finally processed making this blazer.

Last year after the Jasika Blazer was released I jumped on the bandwagon and made a “wearable” muslin. As in, it was wearable, but not particularly professional in real life, and at the time I had an interview scheduled, and I really wanted to wear a blazer, and I didn’t want to try to go and purchase one if I knew I could make one myself.

So the second one was made in just about a week, and I’m super proud. Also, I haven’t worn it since. More on that later.

fabric options

The fabric for the main body of the blazer is a lightweight cotton from IKEA (Main fabric). Honestly too lightweight for it. Hindsight. The lapel is made with a brocade from Joann Fabrics (Option 1). Also not my favorite. When I moved, something must have caught on it, because there’s a big pull of thread on one side. And the lining is from stash.

Looking back at my Instagram posts that I made during this period, it seems to have been pulled together smoothly, and sure, it seems like I took a day off after I saw Avenger’s Endgame, but I didn’t announce to the world that anything went wrong, at least?

vest phase

I remember wearing it made me feel both like a powerhouse, and self conscious when it buckled in weird places.

The first one was made from a true medium weight fabric, and so it stayed solid in areas that caved in this second one.

I also think I should have shortened it a bit further, and maybe used a different cup size, as when it’s buttoned I get some weird gaping between button and bust.

So you are seeing it unbuttoned, as that’s where I’m most comfy photograph-wise.

meinit

If it seems like I’m feeling down about it, I’m not. I’m proud of this blazer. I’m proud of the journey that both of them took me on, because I’m definitely more comfortable with speed-tailoring.

But I just don’t wear blazers in real life, I did not get the job that I interviewed for right after making this blazer, and that’s hard. The job that I’m currently working was possibly my next interview after the blazer one, and it involved an online interview, so I ended up wearing a nice sweater instead.

Plus, I just now tried on both blazers a year later, and they’re more snug at the waist than I’d prefer. We’ll see what happens when the world has reached an equilibrium again, but I think these might be destined for a thrift store.

I think it’s also that I’m really enjoying a more cropped silhouette for my upper body garments. And these blazers are full length, which hit me (in my eyes) at a weird place and makes me feel and look shorter.

But I learned so much, especially with this one, and the next time I make a blazer (that’s more my style) I’ll have the confidence to make it! Now that I’m up north, and I found a store that sells reasonably priced wool, I might even try to make a tweedy one! Not anytime soon, but you never know!

2019: Another Year in Review

It’s that time of the year, the time for review and the time for goals!

Okay, let’s start with the review. I posted 20 times in 2019, and ranged from sharing my history of mandalas (as well as how I make them by hand and digitally), to some knitting projects, my absolute new favorite pair of Flint trousers, and then a long hiatus.

kick

There’s many things that happened this year to cause that hiatus, and for a short description of that I’ll direct you to my previous post. But if you’re missing me on a more regular basis, feel free to follow me on Instagram where I post marginally more. Marginally.

Okay, now onto the goals from last year. Did I make it, did I not?

This time I got four out of five!

  1. Make another pair of Flint trousers. They’re the most comfortable things I’ve worn in awhile. Oh yeah I did! And they’re just as comfy!
  2. Determine what to actually sell on Etsy. As in, what I make that can sell. I’m still working on producing them, but I’m working on a few beginner sewing patterns!
  3. Finally dye, make, and embroider the fabric I bought to make more Onyx tees. Maybe change up patterns if I feel like it; after all I have 10 yards to work with… (Yep, still working on this. Two yards were used for the green Flints, and I think I’m making the SOI Teadress and Onyx’s with the rest. Just need to do it.)
  4. Share more of my art on the blog. I’ve been sharing a lot on Instagram, but I’d like to post about it here too. Here’s my three mandala posts, a fabric design post, and my watercolor set in blue.
  5. Loosen up and breathe. I’m looking for a job right now, so I’m super anxious, which is no way to start off a new chapter in my life. Taking this time to breathe and open up to new experiences is what I hope will help bridge the gap. I alternated between breathing and being anxious, but in the end I was successful.

So I’m calling that a total win!

20191031_115347(1)

My top 5 hits:

  1. Green Flints. Best Thing Ever.
  2.  My two Jasika blazers! They’re purdy.
  3. Miss Frizzle! I’m excited to show you the costume, and Liz!
  4. Hawkeye and my Nano Gauntlet. While I have much to redo, I’m proud of what I created.
  5. My recent knits. I’ve made a sweater, a shawl, a pair of gloves, and a hat in the past two and a half months. I’ll be warm this winter!

Top 3 misses, since I only have three it seems!

  1. Jean jackets aren’t my thing. I tried it though, and I’m proud of that.
  2. I made an Ogden cami dress and the straps broke because they were delicate and it is heavy… Once I fix that, I doubt it’ll be a miss at that point. But it’s been a few months and I haven’t followed through.
  3. I made a warm hat that doesn’t fit on my head… I should tink the ribbing and redo it. Maybe that’ll be a January thing.

Next up, goals for 2020:

  1. Get the blog current, and choose what that means. Do I need to feel bad if I don’t post stuff, or is it alright to skip some things?
  2. Make one or two new costumes. I really want to make the Iron Man couture gown by ToughTink on Instagram, and I have a few other ideas bouncing around. Plus I’d like to redo/update Hawkeye.
  3. Revisit the trousers I’ve made. My most worn jeans (both pairs from this post) were made in October 2016 (gasp!) and they are dying after three years of heavy use. They’ve got holes in the thighs that I’ve been badly mending for the past five months or so, so there’s a great need for a new pair of jeans or two, and I’d like to make yet another pair of Flints. Still super comfortable!
  4. Write at least 200 words a day. I’ve been working on a novel, am about to start on a fictional online journal project, and I am so bad at keeping up with the blog. That’s three different things that require putting virtual pen to paper, so I’m hoping to make it a daily habit (finally) this year.
  5. Finish and debut the sewing patterns I’ve been drafting and workshopping in 2019.

I’m hoping to post at least once a month this year, not including this one, and will see how these goals go!

This is also the best time to thank you for following me through my adventures through the last decade (college, since I started this blog in the last year and a half of that adventure, grad school, post grad employment woes, and the personal growth in sewing and crafting that I’ve been working on throughout!) and here’s to another ten years!

Happy New Year to all!

Hello there!

It’s been awhile, hasn’t it?

I can’t say I’m surprised, and those of you who have been around for some time know that I’m always popping in for a few months, and then out for the same time or longer. Some times with warning, and sometimes it’ll just pop out without realizing it.

But oh boy have the past few months been crazy for me.

I rarely talk about my personal life on the blog. Maybe I’ll mention it in passing, or I’ll make an offhand comment. And I’m going to keep it that way, but while I don’t want it to sound like an excuse, I think updating you on some of my life things will help set the stage for my next couple months of posts.

I always run a few months (and sometimes years) behind on posting my makes, but that also assumes that I’m doing a lot of making. And I have, but it’s been a bit more sporadic. Long stretches of rest, and then short frenzies of progress.

When I last posted, in June, I was still frantically applying to jobs, doing interviews, and working on side hustle ventures. (Embroidery patterns, flower photography, sewing pattern development, new journals, oh my!)

Then I had a whirlwind late summer.

I took a job at Spoonflower, which is a print on demand fabric company that is headquartered (in the States) in Durham, NC. I loved the experience, and the job was unique and enlightening, and the creativity that passed through my hands was endless. I also now have a lot more fabric. A lot. So a post soon should talk about what I’ve made/want to make with quite a bit of it.

During August, I frantically (and I do mean frantically) worked to make two and a half new costumes for DragonCon. I worked with foam. I stunk up my townhouse with contact cement. It was a whole thing. These posts will be upcoming and hopefully detailed. While looking back I wish I had done X, Y, and Z, I’ll try to post about it as it happened.

My time at Spoonflower was brief because just before Labor Day Weekend I got an offer from a college in New England, and accepted it, and moved up to New Hampshire a few weeks later, then started the job the Monday after the week I moved.

Since the move, I’ve been focused on making warmer clothing. Because of the long distance move I almost completely missed that “early fall” period that I love temperature-wise and am trying to make suitable long sleeved gear for the winter that I’m currently living in. After I reach a good stock, maybe I’ll redo some costume pieces from DragonCon or another costume. We’ll have to see how the next year goes!

My job up here is very rewarding, but it is all about digital media, so I’ve been trying to take the opportunity to focus on the not-digital stuff when I’m not at work. I don’t know how much of a difference it’ll show on the blog, but it’s a welcome change for me and I’m enjoying it so far.

I’m going to wrap it up with saying that I’m going to try to post once a month at minimum, more when I have the time, but if I disappear again, you can follow me on Instagram, where I post a bit more regularly than I do here on the blogosphere!

Watercolor in Turquoise

A little over a month ago I found myself at an art supply store and decided it would be cool to buy a tube of watercolor, and I landed on a turquoise.

What other color would I have chosen?

watercolorcoralcurves2lilypadv2mug

Last week I bought a couple other colors, so expect some color variations in the future!


Jasika Blazer

When the Jasika Blazer was announced, it almost felt like the release was timed for me, because I was just starting to get some good job nibbles in motion, so I purchased the pattern, gathered some of the materials and stalled. Not for too long, but I definitely waited until about halfway through the big CCP Blazer of Glory sewalong before I started to catch up.

I’ve made two of these blazers since then, but this post will be about the first one (I’m still in recovery mode for blazer number 2).

button

All of the materials were stashed for this first blazer, but that also means that a lot of different fabrics went into it. Six in fact. Six fabrics.

1 – Navy blue twill that makes up the bulk of the jacket. I think it’s polyester, and it’s pretty heavy.

2 – Green cotton, possibly flannel for the side panels

3 – Green velvet, which later became crushed for the collar and lapels

4 – Navy blue brushed twill for the bottom sleeves… Because of an interfacing error the original twill pieces became unusable. So I cut more out of the only navy blue twill I had left!

5 – Light blue lining with painted blobs, otherwise known as the only lining fabric in my currently limited selection I could get the back pieces out of.

6 – Turquoise/green lining, because it almost kind of matches. Not really. But kind of.


20190327_114027

But before I cut into the fabric I made a muslin. For the muslin, I cut out size 12, with the C cup FBA pattern piece for the front, I think. Size 12 was good, but in ultimate hindsight (one muslin and two makes in) I think I’m probably halfway between the normal pattern and the FBA pattern, and should consider dealing with that next time… If I need a next time.

When I tried on the muslin, though,  I realized that I needed to take in the side seams a little, since I’m a petite person and the side seams were doing nothing for me. I also removed about two inches of length from the body and sleeves, and could probably stand to remove more. And finally, I did a swayback adjustment, which ultimately was successful on the outer, but less on the lining. Now that I’ve stepped back, that segment of the lining caused problems solely because of improper adjusting of the lining piece. But the altered muslin did look pretty good!

In making the garment, I did want to do it all from stash, so I did cheat a little and used a double layer of lightweight fusible in place of the hair canvas… Looking back, I don’t know how much of a difference it is. It is definitely stiffer than my hair canvas shoulders on v2, but not super stiff.

handstitching


I ended up doing a lot of hand sewing in this garment because of sheer determination and lack of willingness to see stuff on the right side of the jacket. Like with the lapel easing… You are very unlikely to see the underside of the lapel, but I decided to hand sew the required ribbon in anyway because what happens if my machine spits out a threadball… Then I’d have to unpick it and hand sew it anyway, right?

(In hindsight, I still think this is fair, but also it was a bit fussy.)

smudge.png

Then I found out that the marker I had used to mark most of the front was waterbased, and that steaming would smudge it. Silly Jess. I only have white chalk at the moment, because most of what I sew is dark or colors, but the interfacing I had for the fronts was a light grey, so I needed to mark it with something darker. Luckily for me the actual jacket front pieces were navy, so the red smudges would never show through, but it was a good lesson to learn.

welt.png
Let’s not talk about pocket 2…

Sewing the welt pockets was fun, to a degree. I’m not a precision sewist, so I wasn’t sure how it’d go, but I just jumped in and went for it.

For the record, I’ve done double welt buttonholes before, so I felt pretty confident going into it. Thank you coat that I’ve rarely worn because NC is too warm for it!

And then after the welt pocket, it was basically smooth sailing! I have pictures for before and after the collar/lapel insertion, and then the finished garment! I definitely remember completing the lining in one sitting, in maybe 4 hours tops (from cutting to assembling to break to sewing in with very careful detail to the instructions).

guts

I made my own shoulder pads and sleeveheads out of cotton batting from my quilting stash (hip hip hooray for stash!),  and because I have what I consider very sloping shoulders, I made them extra big. I don’t think it looks like 80’s shoulders big, so I’m not worrying about it, but just to bring it up: very sloping shoulders may need to adjust somehow…

backlining


frontlining

And yeah, I think that’s it. It was a worthy garment to make, and really boosted my skillset. Plus… very soft velvet lapels/collar.

Sadly it’s too warm for NC, which started believing it was summer in mid April, so I’ll have to give this blazer a second opinion in fall.

sleevesin

Aqua Butterflies

So this story begins in my favorite “second hand” store, the Scrap Exchange in Durham NC. (Second hand is in quotes because most of the materials are new, just pre-owned).

shawlout.png
Okay guys, this is too far away to see detail…

I introduced my parents to the space a couple visits back, and now it’s always on the agenda when they come down (Hi Mom and Dad!), and they visited back in January. So naturally we visited the store.

tooclose.png
Too close, you can see the focus issue…

Checking out the yarn bins, I hit gold in the greens bin with this Malabrigo sock yarn for $5. It had never been caked, and it still had the original $18 price tag. I snapped it up, and I got super excited.

back
I guess it’ll do. Dear Reader, please do not try to zoom in!

I should mention that the ‘rents were visiting to help me move. So when I was unpacking I obviously wasn’t originally interested in finding my swift and winder, but still somehow I managed to cake it up within the first two weeks or so of moving, and then looked for a shawl pattern to match it with.

spread

On Ravelry I found the beautiful Dancing Butterflies shawl, by Carfield Ma, and it felt like a match.The pattern is well written, and working it up was great! I did have to alter it near the border since I only had the one skein available. I played multiple games of yarn chicken  before finally finishing it maybe 10 rows before expected.

Then came blocking, where I was able to block it to a rather huge size, but it did show me that I was not loose enough binding off, so I got curly edges. Not that it matters, because I now have Butterfly Wings!

folded
I take all my photos with a camera and tripod, and this is one shoot where I should’ve asked a passerby to stand in for focusing… Lessons hopefully learned!

I love this shawl, but I’ve found myself only reaching for it when I’m wearing blue or green. Good thing that makes up so much of my wardrobe!

Emerald Flint Trousers

A month or two ago the Sewcialists announced that they were going to put on a mini challenge over a weekend, and that it was just for fun, so no pressure or anything to join up.

front
These are not the right shoes for this length… Oops.

So of course I put a ton of pressure on it.

But in reality, I knew that I didn’t have anything else on my plate that weekend, and that I could probably spend the entire time sewing.

So I did.

The mods announced the challenge on Thursday, so I dutifully took the incredibly entertaining quiz and received the word “Spicy” as inspiration.

minichallengespicy

Because I am not a spicy person, and spicy food disagrees with me, I thought about what would spice up my wardrobe. I remembered a passing thought I had a few  months prior when I was wearing my grey Flints, that it would be awesome if I had some green Flints to change up my wardrobe. And thus, a plan.

I had not yet cut into my lot of rayon-linen blend from Dharma Trading, so I cut off about 2 yards (in hindsight should’ve done a bit more) and prepped to dye the fabric.

back

Got out: 5 gallon bucket, dye, soda ash fixer, canister of salt, desk chair, wooden spoon, fully charged computer with a show playing.

(My roommate must have thought I was nuts, since this was my first time dyeing fabric since I moved in.)

And I sat and stirred for what felt like hours. And was probably an hour and a half.

Then comes the requisite wash and tumble dry before I could find out what color I actually had was. The suspense was killing me! I used two color catchers on that load, and both came out pretty blue, so I’m glad I used them.

The fabric came out the perfect green. So the next day I ironed (ugh), did some small pattern alterations to fix the weird wrinkles in the back (meh), and cut out the pieces (so wide, so many), and started piecing together the pants. Just like the grey ones, I bias bound every single seam, which did not take up as much time as I thought it would, because by Friday night I was done, excepting hems.

details

The next day I waffled about the length to hem, so I decided to put some trim on the side, and found this cool black crochet trim in my stash that has little bobbles along the edge. I aligned this with the side seam and sewed it down, and then I hemmed the pants. They’re skimming the ground when I’m in my normal shoes, 1 inch off in my dance heels, and I try not to wear anything flatter.

They got the swing dance seal of approval that night, both with others’ compliments, and how fun they were to dance in. So comfy, so swishy. Just so good.

kick

I’ve found that the fabric has terrible recovery, and the waist will bag out massively as time goes on, but I keep a safety pin in the waistband and adjust as needed.

Secret pajamas for the win!

Guess who made an app?

Quick post today…

Over the weekend, I rediscovered the MIT App Inventor, and ended up with an app!

Now, I want to note that I have about three years of programming experience, but the App Inventor is a block programming system, so if you know how what if-statements are, then you can program… I mostly got bogged down when I was writing scripts about things like semicolons and colons… So many semicolons.

But back to the app. I made my perfect row counter for things like knitting and crochet. I’ve tried so many such apps, and they’re either too complicated for my needs, or they have annoying ads, etc.

rowcounter

So I’ve made one that fits my needs perfectly! It’s called “Row Counter” because I am incredibly creative.

Screenshot_2019-02-19-09-07-19

It holds data on four or less projects, as a motivator to not have too many WIPs, and it’s a minimalistic design, simple buttons words, and a blank canvas to work with!

Screenshot_2019-02-19-09-04-28

It’s only available for Android phones, because that’s what I own and love, so sorry Apple users!

Screenshot_2019-02-19-09-08-12

I’d appreciate it if you give it a look see, and see if it’s right for you as well!

It’s free, so there’s no pressure either way… If it works for you that’s awesome!

See you next week for (perhaps) a yarn post, unless something even cooler comes up!

Semi-Beginner’s Guide to Fabric Design

You know the idea of a side hustle? I’ve had (and have) many of them, and one of the ones that most intrigued me for a long time is designing fabric.

multi

I love doodling, and always thought it would be awesome to have those doodles on fabric. So when I moved to North Carolina in 2014 for school, I found out that there was a way I could actually put my designs on fabric (aka Spoonflower!)!

I had been designing things for my Redbubble shop at the time for a year, but fabric was a game changer (in my head, at least).

Quickly I realized that fabric repeats are challenging. So for most of the designs I posted and tested early on I went the easy way and made a small design and let Spoonflower’s design “software” handle the repeats. Which was great!

This has not been a lucrative endeavor for me, but my Stargate inspired designs have gotten a lot of love (thanks to the geeks and geek-loving family members for supporting them) so I had some Spoondollars saved up and I wanted to upload some more of my designs, specifically my mandalas, while also expanding to maybe other things!

ocean

So I did some research and learned some techniques for making repeats both physically and digitally. You can see the fruits of that labor in the pictures throughout this post, and I can’t believe how adorable this ocean creature print I made is… I don’t care that I’m bragging. It’s so cute, right?

The paid thing I found was this series from Creative Bug… Kinda like Audible, you get to “keep” one workshop a month (or something like that), so I still have access to these (darn you autopay!), but I found it soothing and fun to watch. Basically 3 or 4 designers give a peek into how they make their fabric designs, how you can make it on paper, and how you can make/translate the designs to digital means in Photoshop, though the idea should be pretty much the same for Gimp, if that’s more your speed.

I also know there’s some courses on Skillshare, but I haven’t given them a try yet.

If you want to stay entirely in the physical world, Megan Nielsen had a great set of posts out a couple months ago about a screen printing class she took, which you can see here!

Spoonflower has a handy tutorial for doing repeats by hand, which was specifically what I followed for the artwork above, of cutting up your sketch and taping back together to distribute your pattern. And here’s a post of repeat resources Spoonflower put together!

Then I scanned it, edited all the animals, and then used a tutorial for Photoshop to get the repeats to work… but I’ve now checked every bookmark on my browsers and I can’t find it… (edit: it’s now linked!). There are many options if you google repeating patterns in photoshop, so I’m sure you’d find a great one!

seedpod

I’ve now gotten the proofs, and I’m ready to sell more of my original designs! I’ve made a bunch of my mandalas available for sale in different scales, with the same technique of letting Spoonflower make my repeat for me. I did find that washing dulled the colors, or at least made the black background of some designs more of a very dark grey, but overall it’s still great to see my designs on fabric in person!

undertheseaspoonflower

What’s your favorite kind of design to see on fabrics?