Not a Background Lannister – Prop Shield Tutorial

first

So I started with the trousers last Wednesday… The shield on Friday… Next up in the lead up to the costume reveal is the shield.

And boy am I proud of it!

I have access to a laser cutter, at my job, so I put together a “quick” file (it’s never quick) for a shield that would fit on one piece of plywood. I could’ve made a bigger one, but I was trying to be material conscious, and I’m glad I kept it at that size. The laser in question is technically two feet “wide” in material dimensions, and 4 feet long, but it’s a little bit smaller in both directions due to crookedness and use  over time.

I worked with 1/8″ plywood, and made this as solid looking, but light as possible. There are two fully solid pieces, with multiple border pieces, one set in between the solid pieces, and two sets on the front, and then the decorative pieces there too… This would be better explained in pictures…

alanna_pullapart

Yeah… Like that.

So I layered and glued everything together. It took awhile. What I should have done then, is sand those edges. I didn’t. Moving on.

edge

On the top of the shield I used wood filler and a putty knife to shove material into the seams so it was a fake beveled/routed edge. That’s honestly what took the longest. I’d put on wood filler, wait for it to dry, sand it, apply more when it inevitably chipped and repeat.

bevel
Yeah… not meant to see it up close.

I’m kicking myself that I didn’t get progress pictures as I went. So then I painted the shield. Chestnut brown on the back and sides, then red and gold on the front. The gold is Bright Gold Lumiere Jacquard fabric/universal paint, and the others are stash cheapo acrylic paints. Oh, I so love the Lumiere paints.

lioness
Gaah. I’m gonna stop it (mostly) with the close ups on this one.

On the back are two more sets of laser cut pieces, the main point of which was to provide some material for screws to connect to. Then I guesstimated sizes of leather to attach the shield to my arm, screwed it into the top and bottom bracers. I had to reattach the bottom ones to make them tighter so I could control the shield a bit better, but then I was completely done with the shield!

Lightweight, blocky and just what I needed.

It did mean that I hit a bunch of people accidentally, but… that’s being at a con, right?

I was not too surprised that this wasn’t the recognizable part of the costume (It looks too much like the Lannister crest, or Peter’s from Chronicles of Narnia), but I was surprised what was! You’ll have to tune in on Wednesday to figure out what I’m talking about!

corner

That probably sounded like a ending, but I’m popping back in again to say that though I made this with a laser cutter out of plywood, you could totally do something like this with a craft knife and some stiff foamboard or foam, and come out with similarly awesome results!
Is the pen really mightier? – Prop Sword Tutorial

first

The first prop I needed to make was a lightweight sword. It had to be a short sword (so the double handed sword I bought at my first DC was out) and it had to be me-sized. So smaller.

full

I went to Michael’s one day to scope out the small plywood situation, and ended up with Basswood, I think with the dimensions 24″ by 4″ by either an 1/8 or 1/16″ but I’m not sure which. I also purchased an 1/8″ diameter dowel, which gave the sword it’s structure. That was the cheapest Michael’s trip ever, because with a coupon, the main part of the sword cost $2.50. Craft stores never work out that well for me, so I definitely gave myself a pat on the back for a good job. Or rather, I took myself out to see the Incredibles 2 (this was late July/early August. It was still in theaters.

I’m pretty sure I cut the basswood in half lengthwise, then I cut the pointy bit out, and tried to match on both sides. Most of this was done at night, so cue the bad phone pic here:

DSC_6980

I then taped the dowel to one of the sword pieces. Then I applied wood glue around the edge of the sword outline, and used every single clamp and binder clip I own to keep the pieces together.

DSC_6986

Then I left it for a few days, even though it probably only needed one.

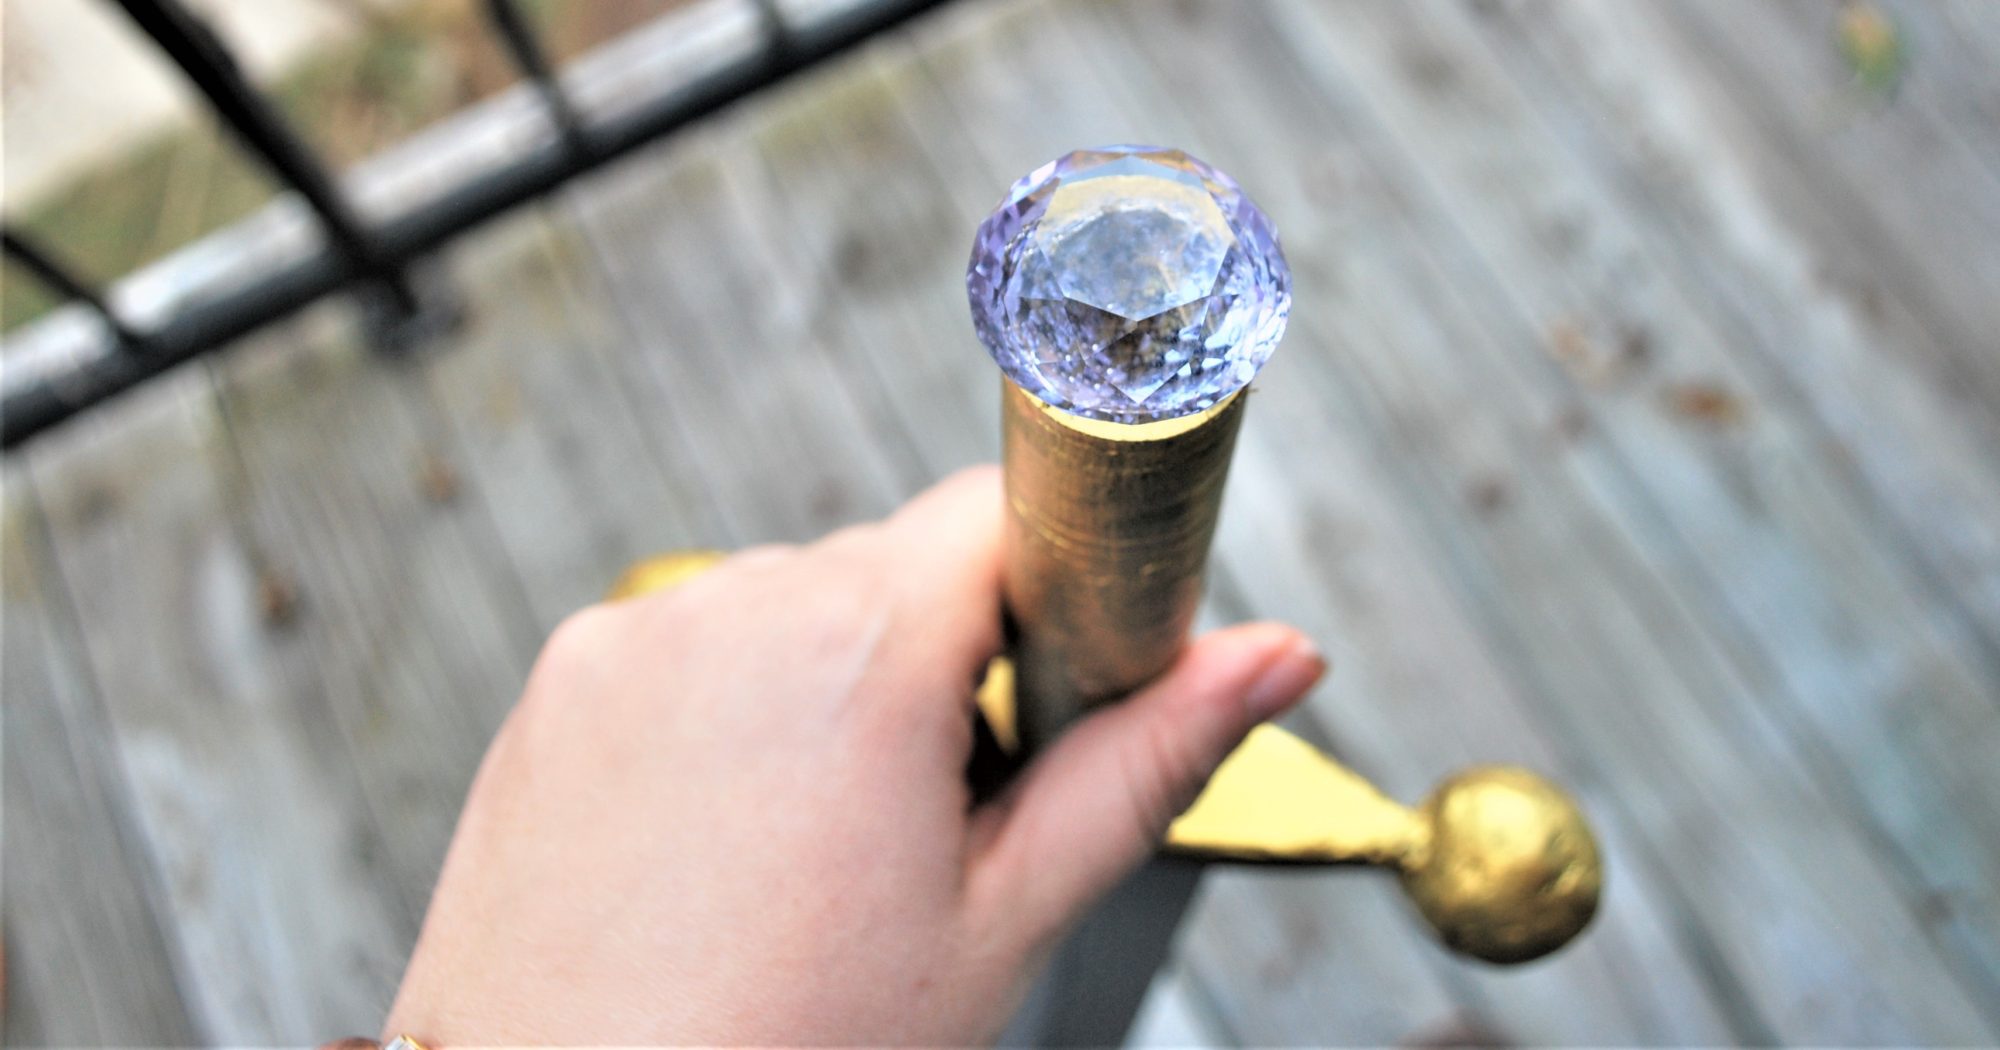
I used a laser cutter to cut out pieces for the hilt from 1/8″ plywood that would slide onto the wooden dowel for stability, and I aimed for a hand and a half length. In the end I got a stacked result, then used wood filler to fill it in and round it slightly. It worked pretty well, though it might’ve worked better if my filler was wetter. It has gotten rather gummy over time. Regardless there was a lot of back and forth between gooping and sanding. Using cardboard would work pretty much just the same way, if you cut some layers and used wood filler and glue and tape to hide the corrugated edges!

hilt.jpg

Then came painting and sanding. I painted up the “blade” with white acrylic first, then with Lumiere Jacquard paint in silver. Then it was too shiny, so I sanded it. Repeat once more to see if anything changed. Add the line down the center (kinda… don’t look too close) and then sand again to blend that in.

For the hilt I first painted everything brown, then painted it with Lumiere Jacquard paint in bright gold.

jewel.jpg

And the jewel. Still the biggest pain in the butt of this project. When I was designing the laser cut part of the hilt I made pieces for the end that would allow the jewel to nestle in.

Then I tried hot glue, then superglue twice, and now E6000. It’s sticking for now.

point.jpg

So that’s how I made my prop lightweight sword!

Stormy Grey Flint Trousers

grey flint - frontsmile

As of yet, the only garments I’ve made from the Flint trouser pattern by Megan Nielsen have been grey… Like flint.

Coincidence? Yeah. Funny? Probably only to me.

I’ve found myself lacking interest in fabric shopping. **gasp** When I have something to make and already know what kind of fabric I want to use, it won’t be at the (big chain) fabric store when I need it, and the hours at my (more expensive) local fabric store are inconvenient now.

grey flint - wide

But since i know how to dye fabric I’m choosing that option more and more!

For fabric i used this linen cotton blend from Dharma Trading and used their fiber reactive dye in 150 GUN METAL GRAY.

grey flint - sidewide

I bought 6 yards of the fabric for my stash, and probably used just over 2 yards for these trousers. Then came the evening when I spent two hours leaning over the tub and the paint bucket I use to dye the fabric. When the fabric came out of the bucket I was convinced I let it sit too long since it was almost black, but after putting it through the wash it turned up as this lovely stormy charcoal blue grey.

grey flint - pocketses

As for the pattern, I made a few alterations. First the same ones that I used for the shorts I made last year, cutting out about two inches from the rise. Then I lengthened it to full length by adding about 8 inches to the hem.

grey flint - front

I interrupt this broadcast to remind you that this is a linen cotton blend. This is to say, naturally relatively wrinkly, and also this is the third wear since it was last washed, and although it’s been hung up in between, that doesn’t mean it wasn’t being wrinkled… It happens. This public service announcement has been brought to you by “Jess just looked through the pictures for this post and grew concerned for her sanity.”

grey flint - back

I was banking on the hopes that the weird crotch and butt wrinkles I got with the shorts would be smoothed by the weight of the extra fabric. I think I was mostly right. There’s a bit of room for improvement there. I’m pretty sure I made a curved waistband.

When the trousers came together, though, the waistband still needed to be taken in, like with the shorts.

grey flint - buttons

I found these really cool plastic buttons in my stash, and I’m pretty sure they were bought in NYC at one of the shops that specializes in notions.

grey flint - bias binding
Can we pretend you don’t see any loose threads?

Oh, and did I forget to mention that I bound every seam with bias binding? I want these suckers to last!

Swishing around in these makes me so happy!

grey flint - neighbors

Soon, I’ll share what costume these trousers were made for!