Jasika Blazer

When the Jasika Blazer was announced, it almost felt like the release was timed for me, because I was just starting to get some good job nibbles in motion, so I purchased the pattern, gathered some of the materials and stalled. Not for too long, but I definitely waited until about halfway through the big CCP Blazer of Glory sewalong before I started to catch up.

I’ve made two of these blazers since then, but this post will be about the first one (I’m still in recovery mode for blazer number 2).

button

All of the materials were stashed for this first blazer, but that also means that a lot of different fabrics went into it. Six in fact. Six fabrics.

1 – Navy blue twill that makes up the bulk of the jacket. I think it’s polyester, and it’s pretty heavy.

2 – Green cotton, possibly flannel for the side panels

3 – Green velvet, which later became crushed for the collar and lapels

4 – Navy blue brushed twill for the bottom sleeves… Because of an interfacing error the original twill pieces became unusable. So I cut more out of the only navy blue twill I had left!

5 – Light blue lining with painted blobs, otherwise known as the only lining fabric in my currently limited selection I could get the back pieces out of.

6 – Turquoise/green lining, because it almost kind of matches. Not really. But kind of.


20190327_114027

But before I cut into the fabric I made a muslin. For the muslin, I cut out size 12, with the C cup FBA pattern piece for the front, I think. Size 12 was good, but in ultimate hindsight (one muslin and two makes in) I think I’m probably halfway between the normal pattern and the FBA pattern, and should consider dealing with that next time… If I need a next time.

When I tried on the muslin, though,  I realized that I needed to take in the side seams a little, since I’m a petite person and the side seams were doing nothing for me. I also removed about two inches of length from the body and sleeves, and could probably stand to remove more. And finally, I did a swayback adjustment, which ultimately was successful on the outer, but less on the lining. Now that I’ve stepped back, that segment of the lining caused problems solely because of improper adjusting of the lining piece. But the altered muslin did look pretty good!

In making the garment, I did want to do it all from stash, so I did cheat a little and used a double layer of lightweight fusible in place of the hair canvas… Looking back, I don’t know how much of a difference it is. It is definitely stiffer than my hair canvas shoulders on v2, but not super stiff.

handstitching


I ended up doing a lot of hand sewing in this garment because of sheer determination and lack of willingness to see stuff on the right side of the jacket. Like with the lapel easing… You are very unlikely to see the underside of the lapel, but I decided to hand sew the required ribbon in anyway because what happens if my machine spits out a threadball… Then I’d have to unpick it and hand sew it anyway, right?

(In hindsight, I still think this is fair, but also it was a bit fussy.)

smudge.png

Then I found out that the marker I had used to mark most of the front was waterbased, and that steaming would smudge it. Silly Jess. I only have white chalk at the moment, because most of what I sew is dark or colors, but the interfacing I had for the fronts was a light grey, so I needed to mark it with something darker. Luckily for me the actual jacket front pieces were navy, so the red smudges would never show through, but it was a good lesson to learn.

welt.png
Let’s not talk about pocket 2…

Sewing the welt pockets was fun, to a degree. I’m not a precision sewist, so I wasn’t sure how it’d go, but I just jumped in and went for it.

For the record, I’ve done double welt buttonholes before, so I felt pretty confident going into it. Thank you coat that I’ve rarely worn because NC is too warm for it!

And then after the welt pocket, it was basically smooth sailing! I have pictures for before and after the collar/lapel insertion, and then the finished garment! I definitely remember completing the lining in one sitting, in maybe 4 hours tops (from cutting to assembling to break to sewing in with very careful detail to the instructions).

guts

I made my own shoulder pads and sleeveheads out of cotton batting from my quilting stash (hip hip hooray for stash!),  and because I have what I consider very sloping shoulders, I made them extra big. I don’t think it looks like 80’s shoulders big, so I’m not worrying about it, but just to bring it up: very sloping shoulders may need to adjust somehow…

backlining


frontlining

And yeah, I think that’s it. It was a worthy garment to make, and really boosted my skillset. Plus… very soft velvet lapels/collar.

Sadly it’s too warm for NC, which started believing it was summer in mid April, so I’ll have to give this blazer a second opinion in fall.
sleevesin

Nettie Tee Dress

This post is going to be short! In late October I went on a cutting spree where I cut out a tooooon of garments, some of which have still not been sewn up…

rustfront

This was one of them. I took my altered Nettie tshirt pattern (standard versions of which don’t even get a mention on the blog because its my go to for daily t-shirts), and just extended the hem as far as I could. I gave it a flat hem, so the sides do hang down a little lower than the front, but I kinda like that.

This fabric is one of my last pieces from a Hancock Fabrics going out of business shopping spree.

sidefront

When I was getting it cut, the lady blanched and said,  “I don’t know who would ever find this an attractive piece of fabric.”

And I replied, “Well it kinda matches my hair.” I think she realized that she had said that thought out loud and didn’t say anything after that… For four more cuts.

back

It’s a polyester textured lace pattern in a rust brown. Which does mean that it has holes in it, so I have to use a slip. This one is made from a cotton broadcloth, and is cut on the bias. It peeks through just a little, and I love it!

slip
Oof, the drag lines make me look pregnant… “Contorting” to get this picture made those, I promise!

Simple sweet dress, easy to sew, easy to wear, I wish it had pockets, but I still haven’t figured out how to make that happen for this design…

Revisiting High Waists

My first version of Closet Case Files’ Ginger Jeans pattern was high waisted, but out of some bad bull denim which did not have enough stretch. So I couldn’t really sit, and I couldn’t bend my knees more than 90 degrees, which was not fun when I was trying to sit.

My second version, I accepted defeat, and used the lower waisted version, which worked, with caveats. The denim stretches out, despite being pretty pricey and good quality.  I should have used a more curved waistband, since they continually slide down my hips, and I had to sew wedges into the waistband. But I did this well after I added belt loops and started using belts (daily for the first time in my life) for a month or two, and got fed up with needing a belt to take out the trash comfortably. I also cut them rather short, which means they are perfect for summer in sandals and flats. Boots too. But shoes and sneakers, not so much. They definitely look like high waters in those. And they let cold air in. And cold air is not my friend in winter. I still love them, but at the same time, they work best in certain situations.

So when I got my package of Cone Mill denim from CCF last December, I wasn’t sure what I wanted to do with it. At that point, the high waisted option didn’t feel viable, and the low waisted would take a lot of work. Making new jeans was very high on my to do list, but it took an extra ten months to do it.

This is a long winded way of telling you that I have two pairs of high waist jeans to show you!

The first is as drafted high waisted skinny jeans (with the lines on the pocket and pictures outside), and the second is slightly less high waisted and more bootcut (with the anchor on the pocket and pictures in the corner). I don’t prefer super skinny jeans anyway, but the bootcut ones are straight from knee to hem.

As suggested, I used the heavier weight to make the bootcut, and the lighter weight for the skinny jeans, and I think it worked out lovely that way. I’m not sure that the skinny ones would be as comfortable with the thicker denim, and they are super comfortable as is.

The skinny ones I made in October, as a celebration after this huge presentation I had to give, and I finished the bootcut this past weekend. The skinnies have pockets and facing from the same fabric I used to remake my grandmother’s project bag, and the bootcut have this cool batik and metallic quilting cotton as pockets.

The bootcut pair, made out of the thicker denim, has the same issue as my Ripples pair of stretching out. Because I finished them the day before I left to visit my family for the holidays, I made this large dart up the center back and dealt with it, but I’m debating on cutting a new waistband and attaching it. I realized a few wears in that both stretching out pairs are self faced and not interfaced, which could be the problem. My new skinnys have quilting cotton as a facing, and they don’t stretch at all. Which is good and bad, but overall more of what I want. But I wanted to post these anyway!

Overall, there’s not much more I can say about these. I altered the yoke a bit on the bootcut, since it was very high on all high waisted pairs for me, but beyond that this is the version of the pattern I’ll use in the future for more pairs, when needed!

**Post 2 of the last minute 2016 crunch… One more tonight, and another tomorrow! Then the wrap up will commence, right in time for the new year!

Nausicaa in the Valley of the Wind

But, you know… In summer…

I love Miyazaki films so much, and one of my first introductions to his and Studio Ghibli’s works (other than My Neighbor Totoro which I rewatched over and over on VHS as a kid) was the Nausicaa graphic novels.

And then I was introduced to all the movies. But Nausicaa is still one of my favorites…

So when my friends and I decided to do a Miyazaki day, I jumped on the chance to make a Nausicaa outfit. For one thing, Nausicaa doesn’t wear heels, so I could get away without such silly shoewear, and also I could make her outfit out of knit fabrics.

Yay for knits!

And then I realized that her full outfit would be really hot, and way too much work with about a week free before the con. So I decided to remove some items. And by some, I mean a lot.

The first item I made was some leggings using Cake Patterns’ Espresso pattern. I got this white rayon spandex knit from Joann Fabric’s. It doesn’t have a lovely amount of recovery, and its definitely translucent, but it worked well enough at the time. They certainly are warm and comfy!

Then I made the belt, mostly because I was not really looking forward to making the tunic. I got out some wide navy blue elastic, and this belt buckle I got from a trimming shop in New York City, and made the belt for my natural waist.

At some point in the last week pre-DragonCon, I decided to just go for it, and I created this new Closet Case Nettie hack (I made a muslin first, I promise!).

The neckline was adjusted to swing upwards to create that cut-on collar look, which I estimated from the crew neck version of the pattern. Then I created a “slit” down the front for a few inches. This necessitated a lining or facing of some kind, which I ended up doing as a half lining (so a kind of glorified shelf bra without the elastic) to give it a clean finished edge.

The sleeves were one thing I debated over. I originally thought short sleeves because of summer, but if I ever wanted to reuse this costume for a more comprehensive Nausicaa outfit, the sleeves needed to be longer, so I went with elbow-3/4 sleeves.

You might remember (from a long time ago) that I wasn’t sure which version of Nausicaa I wanted to create. I ended up going with “normal,” where she has ammo holders where shirt pockets would normally be, rather than trying to applique a bird emblem, for which I just took rectangles of fabric and sewed them to the proper places with spaces for three tubes on either side.

When I realized that I needed to make ammo to put in the ammo holders, I stalled. The night before I left I pulled out some dowels that I had bought with other projects in mind, cut some pieces about chapstick size in length, and then glued three together at a time. When they were dry to the touch I mixed together some cheap red and yellow acrylic to create a nice orange and I painted all of them. I made six, but when I wore the costume I used an orange chapstick in one place, which is what is sticking out a bit… It was handy but also slippy and kept slipping out of place.

Teto completed the look!

I’ve worn the tunic a few times now without costumes in mind, and I think it’ll get a lot of wear in winter. The leggings have gotten a few less wearings, but I am not the biggest fan of white clothing so it isn’t surprising. And Teto has been looking down on me from a bookcase, keeping me company!

Stay tuned for more on my Ariel costume, as well as some more TARDIS stuff! And some of those regular clothes things too. Lots of that.

Compression Coil

My backup costume is pretty much done!

Woot!

I figured I’d get the backup costume done as quickly as I could, but realistically this has been mulling around in my brain for awhile.

The flightsuit/jumpsuit got to me in April, I think. Maybe March, but a long time ago. I actually went to my local surplus/costume/knick-knack store, and the owner sized me up and said that I would probably fit well in the child’s extra large. Which worked out nearly perfectly!

Realistically though, when I found the adult flightsuits at the back of the store they were as tall as I was. So the child’s size made sense.

It’s a lightweight poly-cotton, and straight from the package it fit well in the shoulders, and the chest, etc. Even the length from the crotch to the hem was good. The problem was the four inches of extra torso length. Four inches!

It did take me three or four months to actually fix this. And to be perfectly honest, I might have gone a little too far, but it looks great when I’m standing. And I can deal with it pulling a bit when sitting. There aren’t sleeves to deal with after all.

The patches are wonderful! I got them from Ebay, and here’s the teddy bear, and the heart/flower combo. You can get the combo of all three here…

I sewed them on using a normal back stitch, but around the teddy bear I also added some fake blanket stitching. Then I took a normal marker to draw on some Chinese characters. Luck and love, if I remember correctly…

I made the top using the Nettie pattern from Closet Case Files, like I do all my t-shirts, and this weird stretchy fabric. It’s rather plastic-y even for polyester… But it is very Kaylee!

The sandals are not nearly the same as Kaylee’s but I did make them! There will be more on those later this week though.

Add in some pigtail buns and my parasol, and it makes a pretty smashing Kaylee!

Plum Drop

If this was made out of a yellow fabric, I’d call it Lemon Drop, because it’s sweet in the front, and slightly sassy in back.

I modeled it after this dress I found on “The Stylish Geek” when I was searching for inspiration for the Monthly Stitch’s RTW Challenge that’s on next week.

And I decided to hack Nettie to do it!

So here’s what I did:

patternhack

1. Cut the front bodice pattern at the lengthen/shorten line. I think I cut it at the top one, since I’ve got a very short torso.

2. Trace out the full back, then draw new cut lines for the crossed back.

back

3. Cut out one front and two backs, and then the two sleeves. Also, I cut out a full circle skirt and two pockets.

4. Attach the bodice to the backs at the shoulder, attach bindings, sew in the sleeves, overlap and sew up side seams. Assemble the skirt and pockets.

front

5. Attach the skirt to the front bodice. Cut and sew elastic to the waist.

6. Decide not to hem the skirt because you’re already late for your weekend trip with your best friends.

The fabric is a lovely four way stretch jersey, which I believe is a rayon spandex blend, but there wasn’t a listed fabric content when I bought it, so I can’t be positive. I put it on immediately after finishing it, and refused to take it off, even though I’d be spending the next seven plus hours in a car. That’s how much I adore this fabric and dress.

back2

This plum version is actually the second try, since the first one was out of a two way stretch in a peachy color. Actually, I consider that my Hamilton Angelica tunic, since the color matches her dress. And I’m minorly obsessed. The two way stretch created more folds and wrinkles at the underarm to bust, so I made itty bitty darts, which look weird but it’s still wearable.

pocket

And the obligatory pockets.

Birthday Dress

It’s been over a month since I made this dress, and yet I’ve only worn it once or twice. But it’s special, cause it’s my birthday dress.

style

The week before my birthday I was finishing up the TARDIS sewing, so I didn’t get a chance to make the dress. The day before my birthday I got back from a ballroom engagement and didn’t have the energy or willpower to start. I think I got as far as retrieving the fabric before I gave up and collapsed on my couch.

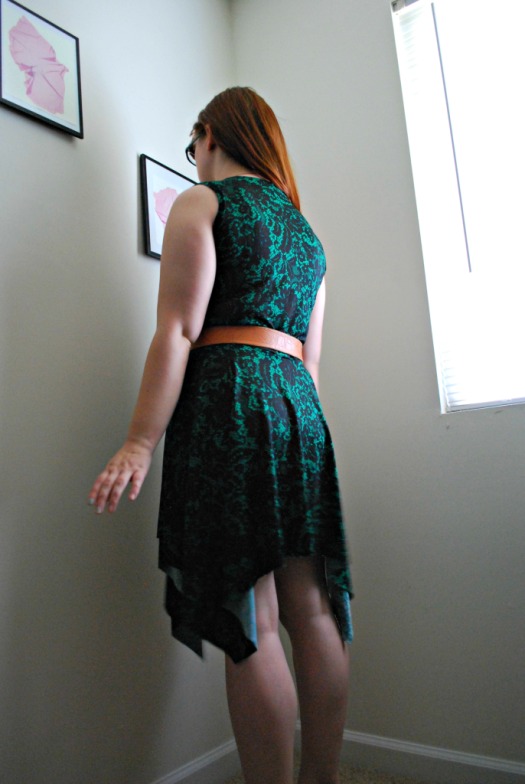
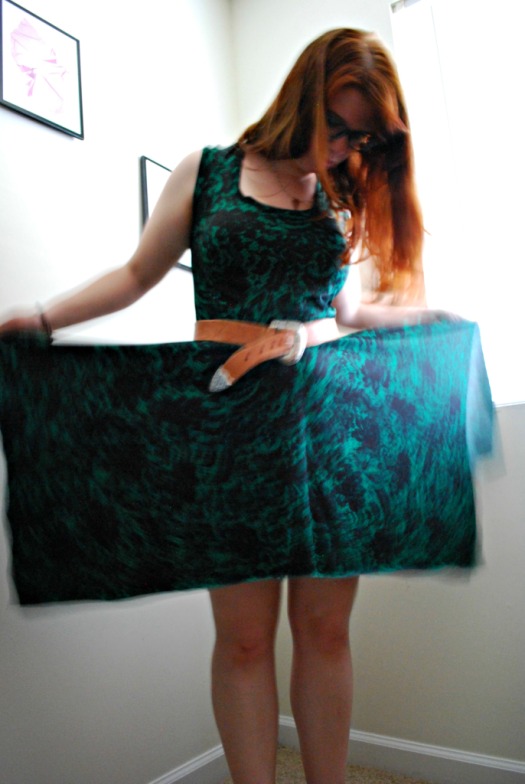
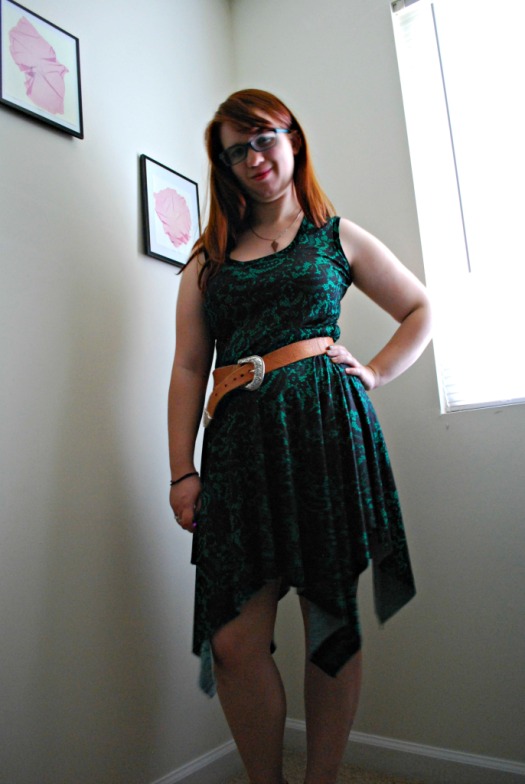
This green lace printed polyester jersey had been in my stash for  a couple months, after I picked it up because the print was so cool despite the polyester-ness. I knew I wanted something sleeveless (so my armpit sweat wouldn’t be cooped up {is that too much info? Sorry}), and I’ve been wanting a handkerchief hem dress for a while now.

back

So on my birthday morning I pulled myself out of bed and cut out a square for the skirt, and then used the Nettie shirt pattern I’ve manipulated to make a front and back. I remembered to cut out the arm and neckbands at this point, instead of having to go back and get them later.

I managed to get it sewn up, eat both breakfast and lunch, and get to campus for my class with caffeine in hand. And with time to make more caffeine for class, which is always a plus.

wide

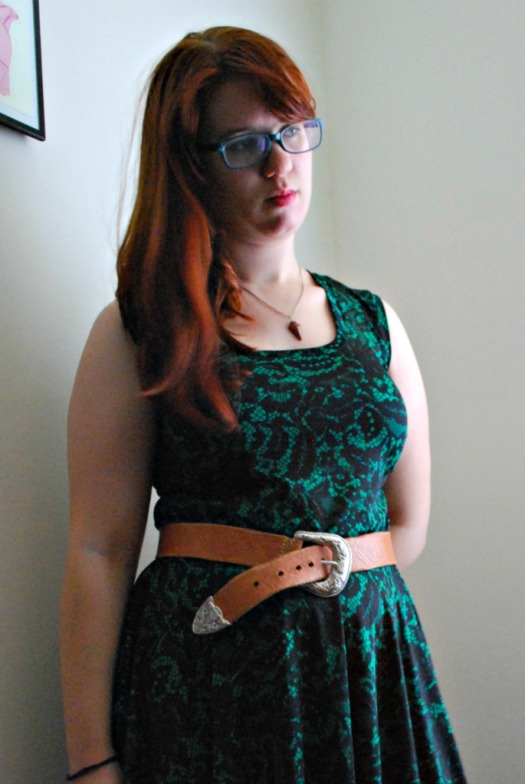
Wearing it that day, though, showed me that I had miscalculated the length I’d need in the bodice, and it just got longer as the day went on. It was too short to be dropwaist, and too long to wear without some sort of waist definition, so I have been wearing it with my life belt.

closer

About a week ago, I added some elastic to the waist seam, which helps with the droop, but it’s still loose at the waist. Maybe I should take it in some more.

Anyway, the armbands instead of sleeves are definitely comfortable, and it looks nice sleeveless. I’m probably going to be making more this summer! And I have a nice amount of fabric left, so I’m thinking a short sleeve Nettie hack. I’m going to cut that out now, I think!

sass

Ripples

Having an almost all handmade wardrobe is not necessarily a dream of mine, but I’ve always thought it would be neat. And that dream is no longer across the Pacific Ocean (in terms of dream distance), or the Atlantic for that matter. More like the Indian. Big enough to count as an ocean, but small enough that it’s realistically attainable.

Because I’ve told you before that I live in jeans. And I mean that literally. There have been (far too many) days where I wear jeans all day, and then I’m too lazy to change into pajamas, so I sleep in them… And then I change into a different pair the next day, so I don’t feel guilty about wearing the same pair two days in a row.

And I’ve now thrown a pebble into that Indian Ocean sized barrier… creating ripples.

few wears past wash

(Get it? Okay I’m done now…)

So these are Ginger Jeans, made with some good quality denim that I got from my LFS. (New interjection… Do us fabric people call local fabric stores LFS? Because I caught onto LocalYarnStore pretty quickly when I started buying real yarn, but I feel like LFS doesn’t have the same ring).

Because of this, I’ve now got a comfortable, (mostly) well made, and fairly well fitting pair of secret pajamas. That cost me about 50 dollars, which makes them the most expensive jeans I’ve ever paid for. Thrift stores and yard sales have been my sources for jeans forever, including the month before I made these when I was supposed to be making these and not doing it. I think that I’m currently wearing my only pair of good quality denim RTW jeans, which were thrift store finds, but that’s 15ish years of poor quality stretching out terrible denim. (Oh yes, I bet I never told you that when I was little I refused to wear jeans. I was a different person then.) Do you want to know how I know these RTW’s are good quality? Well I bought these after trying them on, and they were snug at that point. So I assumed that they would stretch out, like every other pair I own, so I was counting on it. And look where that got me.

right after wash

In the hierarchy of my closet, I now only have taper/skinny jeans. My one bootcut-y flare pair kicked the bucket after 10 long years, and they were also my “fat” jeans, as in the ones that stretched out the most to accommodate any fluctuations in weight. Also, the one pair of low rise jeans I have constantly plague me in awkward belly hanging out feelings, so I knew that low rise was not for me. But at the same time, I had already made a pair of the high rise and it was too high, so I tried view A this time, and just increased the rise using Heather’s tutorial here. I also made a size bigger than I had for my terra cotta pair, and I’m kinda regretting it now. I suspect some of my problems with my first pair was more related to the lack of stretch in the fabric rather than the size.

few wears past wash

I raised the waist of view A by an inch. I like the height, but I can’t help but wonder if I’d prefer lowering view b. My topstitching is done in a nice ocean blue, and I had some fun with the back pocket. I’m thinking I may need a swayback adjustment. And don’t get me started on the knees.

few wears past wash

Perhaps there isn’t as much stretch out as I thought… Looking at the photos, I’m wondering if the rise is a bit too long. Otherwise, though, this is a lovely pair of jeans that I’ll love until the seams break!

Princess-Style Fake Corset Knit Top

side front

This may be my favorite shirt. I may say that a lot, but this time it is more likely to be true…

It’s also a Nettie hack. Or really, I guess its a hack of a hack. It’s a hack that I’m making t-shirts from the bodysuit pattern, and then taking that pattern to make the new hack with the fake corset appearance. Really its just a colorblocking option that is vaguely shaped like a corset

Starring in this shirt is a black drapey knit that I used in a shirt Nettie, and some kind of cream colored tissue knit. To be honest, I forget where I found both of them.

So I took my altered tnt version of my Nettie shirt, shortened it slightly (and perhaps a smidge too much), and then drew in the hack.

pattern

I pulled on a Nettie version, and traced out where the seamline should be. I took this and transferred it to a traced copy of the pattern. I then added seam allowance to the top and the bottom of the new pieces, shown here.

Then I managed to squeeze the lower portion out of the remains of the black drapey knit. It’s amazing what you can do with 1 yard of fabric if you’re super (painfully) thrifty. In this case, I’d like to say I made 2 shirts out of that yard.

And the rest of the fabric was minimal, but luckily I had plenty of that fabric!

I sewed together the top and bottom of the front and back, and then sewed it up like normal!

front

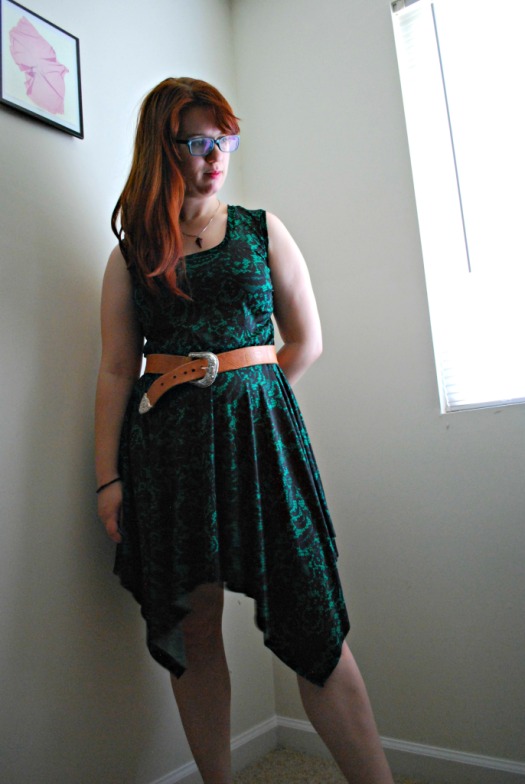
To be honest, I sewed this up the week before Halloween in about 3 hours, and wore it that night to a costumed swing dance.

I like to think of it as a Disneybound level Ariel. Definitely got lots of compliments on it that night. It would also work nicely for an Aurora one as well.
ariel

Subtle cosplay is my jam!

Also, I am definitely out of tune with slang these days (which is ridiculous because I’m still kinda the age to get the slang, I think, maybe…). Do people still say that? Or is it just me?

Regardless, I love this version, and it will probably not be my last!

Iron Man Jeans

Look look look! I made jeans!

Real ones this time, with a useable front fly zipper and everything, unlike the last time… I don’t wear those anymore.

These are the Ginger Jeans from Closet Case Files.

And they’re terra cotta colored.

What else is nearly that color?

Iron Man is.

Okay, I know I’m stretching. Like mad. But Joann’s didn’t have denim in a bright red or bright yellow. So…

Terra cotta it was!

And if I’m being honest, I probably wouldn’t wear bright red pants anyway…

I was using these as a muslin, since I had bought very good quality denim that I was afraid to cut into. And I did learn a few things from the muslin. Including how bad VPL can look…but here’s the more sewing related ones.

Firstly, the high waisted-ness of these is great, except that I’m going to need to reduce the height a bit. Because its over my bellybutton (otherwise known as pivot point level on my body) I can’t bend enough to sit on the floor. What do you think I did a lot of during the first week of wearing? Lots of floor sitting…

This summer, I also gained a lot of bellyfat, so on one hand the tummy-stay front pocket was a lovely help, but that combined with the high waisted bit means that I was not terribly comfortable bending all the way over to pick things off the floor when I was sitting in a chair… And looking at the pictures of the back, I’m not convinced that its fitting right there… I’ll need to look at that further when I fix up the pattern, but  it could just be a back pockets problem.

There were tons and tons of wrinkles at the back of the knees, so I utilized a design feature from my favorite trousers: a curved “dart” of sorts in the back leg that took a few wrinkles away. Not all, and perhaps not many, but enough. I like this, but if my next pair are tighter it might not be required.

I also need to shorten the legs. One thing about being short, I do get to save inches of fabric, which is great. I cut these off the bottom, and I did it in a rush, so I don’t quite remember how much but it was at minimum 4 inches… I may have cut a bit too much, but it’s a muslin, right?

Then I’m debating whether or not to take these in more. All of my non-skinny jeans recently broke (one with a hole and one with a zipper), so I’ve been craving not-super-skinny jean options, but all the wrinkles around the legs make me a bit sad. So do I give in to the style, or do I deal with the wrinkles?

But my favorite thing ever about these jeans is really the back pocket.

(Iron Man theme/song intensifies!) But really, I’m truly proud of these jeans, and I can’t wait to make the adjustments and cut my expensive denim!