Not a Background Lannister – Prop Shield Tutorial

first

So I started with the trousers last Wednesday… The shield on Friday… Next up in the lead up to the costume reveal is the shield.

And boy am I proud of it!

I have access to a laser cutter, at my job, so I put together a “quick” file (it’s never quick) for a shield that would fit on one piece of plywood. I could’ve made a bigger one, but I was trying to be material conscious, and I’m glad I kept it at that size. The laser in question is technically two feet “wide” in material dimensions, and 4 feet long, but it’s a little bit smaller in both directions due to crookedness and use  over time.

I worked with 1/8″ plywood, and made this as solid looking, but light as possible. There are two fully solid pieces, with multiple border pieces, one set in between the solid pieces, and two sets on the front, and then the decorative pieces there too… This would be better explained in pictures…

alanna_pullapart

Yeah… Like that.

So I layered and glued everything together. It took awhile. What I should have done then, is sand those edges. I didn’t. Moving on.

edge

On the top of the shield I used wood filler and a putty knife to shove material into the seams so it was a fake beveled/routed edge. That’s honestly what took the longest. I’d put on wood filler, wait for it to dry, sand it, apply more when it inevitably chipped and repeat.

bevel
Yeah… not meant to see it up close.

I’m kicking myself that I didn’t get progress pictures as I went. So then I painted the shield. Chestnut brown on the back and sides, then red and gold on the front. The gold is Bright Gold Lumiere Jacquard fabric/universal paint, and the others are stash cheapo acrylic paints. Oh, I so love the Lumiere paints.

lioness
Gaah. I’m gonna stop it (mostly) with the close ups on this one.

On the back are two more sets of laser cut pieces, the main point of which was to provide some material for screws to connect to. Then I guesstimated sizes of leather to attach the shield to my arm, screwed it into the top and bottom bracers. I had to reattach the bottom ones to make them tighter so I could control the shield a bit better, but then I was completely done with the shield!

Lightweight, blocky and just what I needed.

It did mean that I hit a bunch of people accidentally, but… that’s being at a con, right?

I was not too surprised that this wasn’t the recognizable part of the costume (It looks too much like the Lannister crest, or Peter’s from Chronicles of Narnia), but I was surprised what was! You’ll have to tune in on Wednesday to figure out what I’m talking about!

corner

That probably sounded like a ending, but I’m popping back in again to say that though I made this with a laser cutter out of plywood, you could totally do something like this with a craft knife and some stiff foamboard or foam, and come out with similarly awesome results!
Ocean Waves Purse

front3.jpg

Purses have not often been my thing. I’ll carry them, find a perfect one for that month or year, and then drop them.

The closest to perfect I’ve come is a small leather purse that I bought for 17 euros from an Aldi near Duesseldorf about 10 years ago. I still have it. But this purse was made in the beginning of the smartphone, and does not have enough room for both a phone and a wallet. No matter what the size of the wallet. And forget about keys.

inside

So I set off to make one that would fit the things I might need on a day out when I don’t . I listed the things I needed to fit: keys, wallet, phone. Then things I’d like to bring: a notebook, pouch of markers, maybe my ballroom dance heels. That last one’s a stretch.

front2

I then did far too much research on making a leather purse, and ended up finding this Russian tutorial, which has a pretty clear procedure, and a reasonable looking pattern. I did end up altering the pattern, to make the purse a bit larger and make the front flap larger so it falls closed better, and I put a different pattern on the front, but overall I followed the general step by step.

flap

A game changer for me was to put tape on the suedey side of the leather, so it won’t stretch out when you shape it.

I made this out of nearly all of the leather bellies I’ve got left. Those were carried around with me for about two moves since I last used them, so it was time to get them cut up. I might have just enough to squeak out a strap, but I don’t have the hardware, so I haven’t checked into it.

skive

After the cuts were made, I skived all of the pieces thinner, by about 25%, and also the edges to make it easier to turn them. It did make the inside nice and somewhat even, and less shaggy, but only a little.

top

Then I brought the entire project into my workplace (on a weekend when we were closed) and dampened and stamped the leather for 9 hours… So many hours. Lots of tv while I was waiting for leather to dry just enough to stamp. Lots of punching holes. So many holes.

front

If you don’t know (though I’ve probably said it enough), I got my master’s in marine physics, so I did learn a lot about ocean waves… Most waves do not look like this, but I’m totally okay with it. I know better and I’m ignoring it.Cool?

Cool.

ring

Then I used some wax threads to sew it together, and then also fastened it with suede leather lacing. There’s D rings for the top of the purse to attach the straps, and it used to have a bar at the bottom of the front to hold the flap down, but it broke. Probably never going to fix it, if we’re being honest.

inside2

And then I took some yarn and the remaining leather lacing to braid together a temporary strap. That may turn out semi-permanent.

I coated it with some weatherproofing wax that I used on the belts I made waaaaaaaaay back in the blog.

lasercut

Ooh, and then there was the little bit of laser cutting I did on the back. I had designed the initials a few months ago, and I sometimes bring them out and use them. Inevitably I’ll have the discussion about who K is, but I know that it says JS, even if no one else does.

back

And that’s that!

Sandals of Glory!

Otherwise known as my handmade sandals that aren’t terribly comfortable…yet, but they will be, and they are tailor-made for my feet!

I was looking for sandals appropriate for Kaylee and Nausicaa, since I don’t wear flip flop types and I didn’t want to wear actual boots in the Georgia late summer, and I found a couple in TJ Maxx that weren’t awful, but also weren’t perfect for my feet. I’ve got strangely shaped feet…

So I drew around my feet on tracing paper, and then added some clearance around… Too much in fact, so I ended up removing a lot, then I made paper “straps” to test the pattern, and then started winging it. I cut out four heel pieces, and then three soles and two straps for each shoe. I realized then that slide shoes were also not going to work for me. My feet don’t feel secure unless they’re tied or strapped into things, so I also cut some strappings to add to the heel to secure some ties.

So I had bought a pack of Shoe Goo (side note, did you know it came in colors? I missed that fact when I got it from Amazon, and bought black… not a good plan… In hindsight I should have read the description better) and ended up using all 3.7 ounces of it. And all of the leather was from a couple of vegetable tanned leather bellies from Tandy. I had gotten a couple of extra the last time there was an online super sale of 10 dollars a belly. And by last time I mean a few years ago… It’s been awhile since I really worked with leather. This stuff is thick, but perhaps not quite as sturdy as real sole leather, but it’s working out so far!

The heel came first. I glued the 4 pieces together with a (rough to smooth) and (rough to rough) then glued the sandwiches together rough to smooth leaving a smooth end on either side of the uber-sandwich… I used my swivel knife to rough up all smooth surfaces that were being glued with a crosshatch pattern.

For the straps I skived off the excess thickness and glued them in place to the first of the soles. For the hook at the heel, I couldn’t quite skive the leather thin enough, so I cut out a notch in the middle sole, and glued the top to that middle rough to smooth. And for good measure I glued the bottom as well, rough to rough, leaving smooth sides on the top and bottom.

This might be a good time to mention that I was using HUGE binder clips as clamps. Which might not have been ideal, but they worked out pretty nicely!

A couple of hours later I glued the heel sandwiches to the sole sandwiches, but since my binder clips wouldn’t open that far, I got out my old biology and physics textbooks to weight it down (Campbell Biology for the win!), I think with a can of leather conditioner to help “concentrate” the weight in the proper place. I then left the shoes alone for some time to finish drying.

But when I came back, I found the left one was a little too big around the toe strap, so I glued the strap to the top of the sole on the edge to help reduce the length. I had to glue on both sides of the foot to properly balance it, but it’s been working out so far…

I lace them up with some green leather round lacing that was a Tandy clearance buy a few years ago, and actually the same that I use to lace up my TARDIS corset belt. The ties run through slits I cut in the darker strap, then wrap around my ankle and themselves to cradle my foot. I tend to need to tighten them after a couple of minutes of wear, which I attribute to foot wiggling and leather stretching…

Another thing I’ve been doing is wetting the top of the sole lightly in order to bind to my feet a bit during wear, but also so it starts to take the shape of my feet. I know from experience that wearing someone’s well worn Birkenstocks can be uncomfortable because they start to pattern to their primary wearer’s feet, and that’s where I’m hoping to get with these. But maybe not that drastic. I’m definitely interested to see how they wear.

The other thing I’d bought for these were some rubber soles, but I haven’t actually put them on. I’m currently deciding if I really need to, and so far I don’t.

The past couple of weeks has been nuts with costume flurries, but slowly and surely I’ll be posting what I’m working on! DragonCon is in just over two weeks, and I’m not ready yet! Not even close!

Tardis Corset Belt

right2

I had already told you a few months ago now that I wanted to work on something new with leather, which is why I needed to finish the quiver so desperately.

It really was the need to make my Tardis belt.

right1

As I’ve told you before, I wanted to wear at least part of my costume for Halloween, and a big part of the costume for me at least was the corset-belt, since it was supposed to represent a good portion of the Tardis. Before starting it, I had planned for it to represent the console, but upon further reflection (and me forgetting that was my plan) it all changed.

left2

First up was the “muslin”, in order to see if my design would even work. I used the same cardboard from my quiver, and cut out a pattern that would fit around my hips, go up a bit in the back, and not impede any future bustle arrangements. It took some wiggling and some cutting down before I hit the right shape, but it was worth it.

I took a leather belly and lined up my pattern pieces to fit on it efficiently. My goal with leather is to always keep as much as possible, and since there isn’t exactly a grain this is totally possible, unlike fabric.

left1

I used this funky tool that I had found in a scrap drawer to draw my pattern, and cut it out with a swivel knife very carefully to keep the circles as circular as possible.

I then got to the tooling, which ended up being more strenuous than I thought. I had run into the quandary of how much of this should be in relief, and how much raised. I ended up deciding that the round things should be raised, so I had to tamp down the entire background. Love the round things! A sore wrist later, the tooling was done.

more full

Lacing was kind of required, though, since this was destined to be a corset. But how? I tested a few methods and lacing cords, but punching holes ended up being the best option.

At that point I considered it done… until Halloween morning. Then I decided that sparkles were necessary, and I painted the borders gold and glued on sequins to the round things.

roundthings

And finally it was truly done, at least enough for Halloween! I may end up painting some more, but I’m pretty pleased with it!

Quiver – Part 2

My unfinished quiver sat around for over a month between the first part and todays, but it was mostly because I was trying to determine the best way to sew it up.

I thought I could maybe butt up the two sides so they would form a solid point… My leather was just a bit too floppy for this.

I thought maybe I could fold under and sew it up like a seam. My leather had just too much structure.

And then it became the lace versus waxed thread debate. And where would I even attach the belt?

So I waffled.

initial

But I knew that my TARDIS belt was going to be made of leather, and I have a policy for leather goods and myself, that I am not allowed to cut into leather if I’m still working on a different piece. So I had to finish the quiver.

stitching

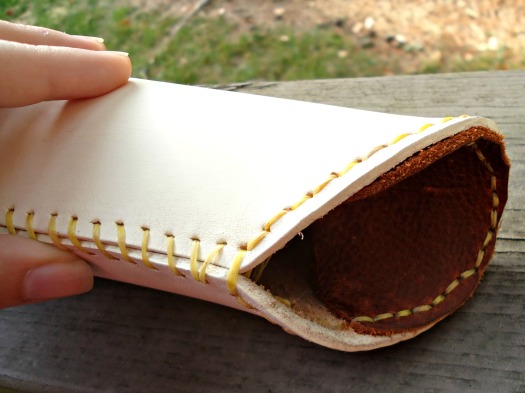
Using my trusty awl, I punched holes every 1/4 inch both up the seam line and around the bottom, since I knew I’d be attaching a cap to the bottom.

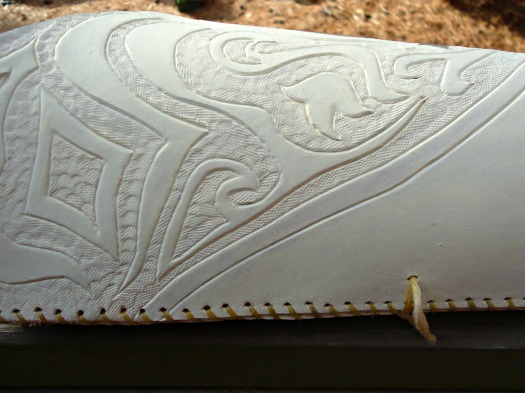
Waxed thread was my “weapon of choice” in the end. I used a whip stitch, I guess, to sew up the seam, which seemed to hold it very stably.

inside

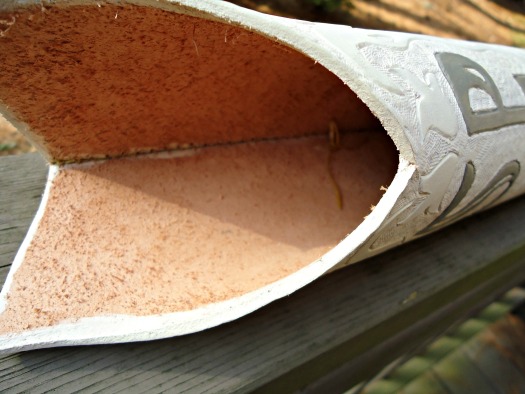
I had intentions of attaching the belt by running it through the quiver itself, but that didn’t pan out. For one, I only had as long as a partially used cow belly, which was not as long as I was expecting. Threading it through like that also made it really blocky and uncomfortable. Comfort is key in the costume game, especially since I’d already be wearing a corset, which is enough comfort-restraint.

top

So I ended up running a few loops of waxed threads to serve as attachments for the belt. It works well for now, but I’ll probably need to adjust it in the future.

Then I actually needed to make the belt.

belt

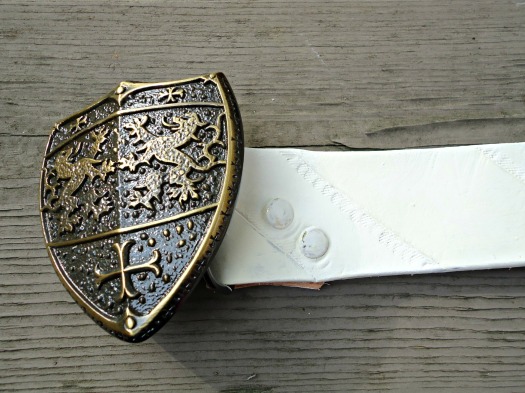
I wanted it to be something I could potentially wear, since I love the buckle so much. Isn’t it just the cutest shield ever? But I also knew the belt had to be long in order to cross my body like a messenger bag. So I made it as long as I could, and punched holes in various places, so I could wear it at my natural waist, or through jeans, or through the quiver. I cut a simple design using my swivel knife, just diagonal lines, and I tooled a few sections for some visual interest. It doesn’t show through the paint though, so I ended up painting a very subtle alteration between cream and ivory, based on my ability to mix paints well, which ended up with a more ivory batch right at the end of the painting cycle.

So that’s it for my quiver! Isn’t it purdy?

Quiver – Part 1

Even though Susan doesn’t actually wear her quiver with her final gown, it was still a must have prop for me.

Though it is very likely that the cosplay I see is not a full indication of people’s geeky interests, I’ve always thought that Narnia fans, of the movies more specifically, are more subdued (aka they don’t cosplay). There have been a few wonderful ones, but altogether the cosplay quantity is rather low.

tease

So the likelihood that I would be easily recognized from the costume alone (and with my hair, not a wig) is slim. I’m already risking the Lucy vs. Susan issue, with the red hair, but anything to make the costume more recognizable is good.

Plus I’ve always wanted a quiver for all the imaginary arrows I have.

The problem with Susan’s quiver is that it is likely meant to be ivory, or rather it was carved in one piece. There have been some good reproductions made with PVC pipe, but I didn’t have the requisite skill set. So I decided to use leather, something I do know a bit about.

I took pictures like this was a real tutorial, at least for this first half…  and then I let it sit for two months before I finished it. But that’s another story.

pattern

I started with posterboard, knowing that I had a limited amount of leather big enough to create this quiver. I drew a pattern, dragged a belt from the closet to “try it on” and fiddled with the pattern until it felt right. It slimmed down a bunch, and shortened as well, so that it would feel proportionally right on me.

Then came time to cut into the leather. I managed to find a big enough piece, and I used my rotary cutter to cut clean lines through… Leather is like fabric, right?

begintool

I had previously drawn designs for the top of the quiver, but they  didn’t precisely fit, so after some tweaking I got a useable pattern and traced it on. I cut into it with my swivel knife, and began tooling.

finishtool

And here it is with the design finalized!

The real quiver has a picture of Aslan carved in the bottom, but I didn’t want to take this that far.

So I began painting. I had both white and cream acrylic paint, neither of which was perfect, so I mixed the two and diluted with some water.

first

The first coat turned out streaky, and it ended up taking 4 coats before I was satisfied. In the tool-work, there’s still some areas of low paint, but I’m learning to give it up.

DSC03285

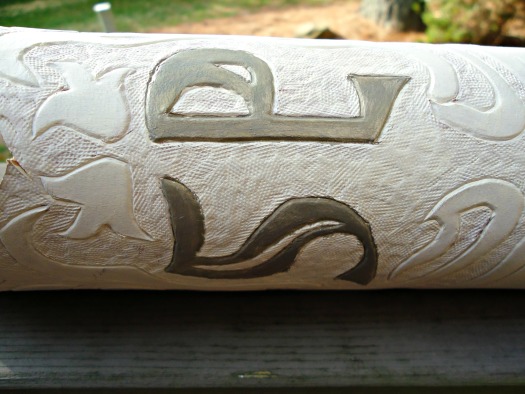
I then painted the initials with a grey and gold mix of paint (though technically it was a mix of cream, white, black, and gold), with the gold added in for a bit of sparkle… Not that its really visible, but it can be seen in real life.

Look out (hopefully) next week for part 2 of my quiver fun!

Catching up!

Last time we spoke, I was making socks.

Scratch that, I succeeded at socks. And actually right now I’m working on another pair.

I’ve been working on stuff since then, but slowly. And at the same time quickly. I seem to have made a lot of stuff, but for some reason it just seemed to come out of nowhere. Blog posts, however, did not.

Individual posts should be coming up soon for these, but here’s a snapshot of what I’ve got:

teaser

teaser

teaser

teaser

teaser

And a few more that aren’t quite completed or photographed yet.

I’ve also begun Christmas presents early… as in the aforementioned socks. I know that most people say that and then promptly fall off the wagon, but I’m a woman on a mission… Objective: finish gifts before November, or at least before December. That really means before finals season. I wish I could show you what I’m working on, but then I run the risk of ruining what little surprise they’ll have left.

Cooking has also come up recently as a thing. I’ll admit, I love to cook and bake and candy-make, but rarely do my concoctions turn out pretty, or appetizing to people other than me, or at all. For instance, the last bit of bread I made turned out tasty, I guess, but dense… Having now watched the video on how to actually make a round bread loaf, I think I’ll do better next time.

Knowing that I’m not a food blogger, and that I have no interest in becoming one, I think I’m going to start occasionally highlighting recipes that I’ve used or want to use. Making food can be cheaper than making clothing and yarn stuffs. And therefore I’ve been doing quite a bit of that this summer, so I’ve already got plenty of fodder for these posts.

Well then… talk to you soon! Err… sooner than the last time I posted.

Defining My Life

So there’s this belt. I finished it last week.

However I was deciding how I wanted to write about it here.

Because, you see, this belt is kind of the story of my life.

Not the life you would see in the papers or in a yearbook, but of my life in hobbies and interests. Some of this is old, some new, some recurring.

It was more of a “things that I can draw and represent me at the same time.” Which I kept running out of.

I only repeated two or three items, the ones I knew would be covered up by the end of the belt.

So first up are a spool of thread, a broadsword, and a Celtic knot.

You may have gathered from this blog that I know how to sew. I first fell in love with sewing in sixth grade, when I learned how to quilt. I had loved embroidery before, and still enjoy it occasionally, but sewing took hold early on, and I love it.

As a child I loved the fantasy genre. And a lot of my favorites involve really big swords. Not as metaphors, mind you, just for hacking and slashing and play.

I began drawing Celtic knots around seventh grade, after checking a book out of the library on it. I’ve never been able to find that book again, since that first time, but I thank it. These can make the best doodles.

Then a notebook and pencil, a gear, and trees and a bolt.

I like to think of myself as an amateur novelist. Lots of people share this title. I also like to think I’m good at it. Maybe one day.

Then comes a gear, which in hindsight kind of looks like a movie reel. So I’ve recently discovered the steampunk trend, though I wish I had found it ahead of the curve. I love the appeal to Victorian times, and the power of steam. I did a project on Charles Babbage’s Difference Engine, which was a fancy mechanical calculator, in the time before calculators, and found it fascinating. In terms of the film reel, I like movies. Not the most, but certainly not the least.

Finally the trees and the bolt. I was in a creative writing group as a kid, and there was this book we used to look to for advice. It was called something like “Asking Why,” but I’m really not sure what it was. You might sense a theme. But one of my fondest memories of this book is that it mentioned that the difference between science fiction and fantasy is nuts and bolts. I thought it was clever, and this is my ode to it.

A bow and a quiver, a badly drawn phone box, and the beginning of seaweed.

So even though the new craze nowadays is archery, I’ve always been fascinated. I think it dates back to yet another book I can’t remember the title of, about a Welsh girl finding out that she is in fact a Welsh princess with a side of magic.

The phone box should be self explanatory. We’re getting close to the fiftieth.

The seaweed is for my love of the seas. There’s some fish next to the plants, for when I wanted to be a marine biologist.

Then a bow. A hairbow. Or a bowtie. Take your pick. I love them.

Now, there’s a flower. Who doesn’t love flowers?

And now for my majors. I may have told you that I’m a science major. Let me clarify, which may clarify this… I’m a physics major…

and a biology major. So DNA…

Then I drew a swivel knife in honor of my leatherscapades.

And some musical stuff. I’ve been a musician since third grade, and even though I haven’t been playing much recently, I still love it.

A book. I love to read. I find it much more imaginatively stimulating that watching TV and movies.

And a teacup. I love tea. I really should have been born British. Or Irish.

Then the candle.  I like drawing, though I’ve never taken classes. The first time I seriously tried to draw a still life in a non-manga format was a candle. I still have and love this first one.

And now we’ve got a sword. Another one, since the first will be covered.

I told you a minute ago that I used to draw in the manga style. I still love drawing the eyes, even if it can be a bit creepy.

Then there is a rough design for one of my favorite necklace patterns.

Remember in grade school when you were required to make Valentines for the entire class? I used to make paper cranes. For at least four years in a row. I started after I read “Sadako and the Thousand Paper Cranes.” See, I can remember book titles!

And there is another spool of thread.

And I knew the next bit was going to be mostly covered by the edge tip. So I made some swirls. They turned out rather pretty!

That end tip is being held onto the leather entirely by these itsy bitsy screws. Impressive.

I hope you liked the peek into my life!

There’s a swimming pool in my library!

So the leather dying didn’t work out as well as I had hoped, so I got out my acrylic paints and went at it.

See? Not lovely, but for the first time working with leather dye, I think I made out well!

I washed it with some blue, but then it was a little too bright.

Then I washed it with a bit of black, forgetting that I still didn’t have any white to soften it to a dull grey.

So I then washed the entire bit in water, and wiped off most of the black. It left a nice marbled appearance to the leather.

Like an aged River Song journal.

This left me in a good mood about the state of the project.

Then I got busy, so I ended up waiting  to sand the altoids tin for a while.

Note to self. Don’t sand indoors. Perhaps wait to do it outside with a slight wind. Breathing in aluminum dust fumes was not my best decision.

By the way, I’m beginning to think that Sharpie products are little bits of miracle.

All summer I’ve been loving the Sharpies with the super fine tips, as I’ve been using them for sketching and stuff.

But my new favorite is this metallic copper one. It adheres rather well to the sanded aluminum, and even looks nice!

Not a whole lot sticks well to this aluminum. I tried to use the gold paint pen I made my Farnsworth with, but it didn’t adhere well. It might have been the pen, or that I was using it over the original altoids paint, but nevertheless.

This looks so much better. But it may need another coat.

Especially after I sanded down the altoids tin. In hindsight, this probably should have been done before the clay “water” was put in, but oh well.

A couple weeks later, meaning this past weekend, I bought some E600, and glued the tin to my leather cover. It took two tries on one of the sides, since the tin was in at an angle, making the leather sides look wonky.

So then I remembered that I still hadn’t painted the inside, so I set to work doing that.

Got it painted with the handy acrylic paints, then I covered it in modge podge to seal.

And here it is:

My swimming pool in the TARDIS journal!

Now off to finish my Belle dress…

Spoilers!

I got the River Song journal on the brain.

opening

Altoids have been a favorite for me, even before I had uses for the tins. I think I’ve had this one for years.

And now I have a reason to use it!

teenyIsn’t the swimming pool cute?

I’ve also been working on the leather outer.

cut leather

Here it is just cut from the hide, before I “squared” it off.

front

It got less square after tooling.

back

I skived off some of the back of the leather, and shaved some beveling into the edges.

Then I got to work dyeing it.

uprightI’ll let you know how it went next time!