Emerald Flint Trousers

A month or two ago the Sewcialists announced that they were going to put on a mini challenge over a weekend, and that it was just for fun, so no pressure or anything to join up.

front
These are not the right shoes for this length… Oops.

So of course I put a ton of pressure on it.

But in reality, I knew that I didn’t have anything else on my plate that weekend, and that I could probably spend the entire time sewing.

So I did.

The mods announced the challenge on Thursday, so I dutifully took the incredibly entertaining quiz and received the word “Spicy” as inspiration.

minichallengespicy

Because I am not a spicy person, and spicy food disagrees with me, I thought about what would spice up my wardrobe. I remembered a passing thought I had a few  months prior when I was wearing my grey Flints, that it would be awesome if I had some green Flints to change up my wardrobe. And thus, a plan.

I had not yet cut into my lot of rayon-linen blend from Dharma Trading, so I cut off about 2 yards (in hindsight should’ve done a bit more) and prepped to dye the fabric.

back

Got out: 5 gallon bucket, dye, soda ash fixer, canister of salt, desk chair, wooden spoon, fully charged computer with a show playing.

(My roommate must have thought I was nuts, since this was my first time dyeing fabric since I moved in.)

And I sat and stirred for what felt like hours. And was probably an hour and a half.

Then comes the requisite wash and tumble dry before I could find out what color I actually had was. The suspense was killing me! I used two color catchers on that load, and both came out pretty blue, so I’m glad I used them.

The fabric came out the perfect green. So the next day I ironed (ugh), did some small pattern alterations to fix the weird wrinkles in the back (meh), and cut out the pieces (so wide, so many), and started piecing together the pants. Just like the grey ones, I bias bound every single seam, which did not take up as much time as I thought it would, because by Friday night I was done, excepting hems.

details

The next day I waffled about the length to hem, so I decided to put some trim on the side, and found this cool black crochet trim in my stash that has little bobbles along the edge. I aligned this with the side seam and sewed it down, and then I hemmed the pants. They’re skimming the ground when I’m in my normal shoes, 1 inch off in my dance heels, and I try not to wear anything flatter.

They got the swing dance seal of approval that night, both with others’ compliments, and how fun they were to dance in. So comfy, so swishy. Just so good.

kick

I’ve found that the fabric has terrible recovery, and the waist will bag out massively as time goes on, but I keep a safety pin in the waistband and adjust as needed.

Secret pajamas for the win!

Year 3 with Ariel

cuteariel

Well guys, it’s my 3rd year of making costumes and actually wearing them (as opposed to year 8 of making long term costumes and not wearing them maybe ever… Because that does still happen… This one’s cheerier), and it’s also my 3rd round of updates to my Ariel costume.

Year 1 was my Ariel with a deep blue rayon skirt, matching bow, and hair extensions.

Year 2 was the Ariel with a pair of light blue rayon lawn culottes, along with Year 1’s bow and hair extensions.

Year 3, or this year, is the year that I made linen-cotton culottes and ditched the hair extenions. I kept the bow though!

Last year’s culottes were awesome! Except, well, except for the hole in the butt. So this round, I decided to keep with the culottes idea, and ditch the way too lightweight rayon. Plus I wanted them to be wearable in real life.

Again, like last year, I dyed the fabric myself. This year it’s this linen/cotton blend as the substrate, though. I dyed it with the same royal blue fiber reactive procion dye, in my trusty five gallon bucket. I’m not sure how much fabric is actually was in there, but it was waaaaaay too much for that bucket.

culottes

I think it was about 4 yards of fabric, though. Those legs are wide…

The fabric is reasonably stiff with almost no drape, which does mean that these culottes come with their own volume. But, since I didn’t bring an iron with me, only a steamer, I didn’t get a sharp front crease at the pleat, so some illusion was lost.

back

It also made problems in the back. See, I wanted to avoid the zipper and corset problem I found last year, and installed an elastic back… But I was a bit willy nilly in the altering, and didn’t think about the large quantity of fabric that’d be gathered on the back, so I trudged through. (I used this tutorial, if you’re interested.)

This was right after Megan Nielsen released pockets as an add on/update to the pattern, so I was lucky to get the huge pockets that I so love about her patterns. They’re fantastic!

Sewing up went quick, and I installed the elastic and tried it on. In hemming I probably cut off at least two inches, and the hem is about an inch and a half deep. But then I discovered that the elastic (two rows of elastic, mind) was not strong enough to keep the skirt up.

So I took off the elastic, cut it down, and then reattached it, and it worked fine enough.

side

When I walk, sometimes the extra fabric “walks” awkwardly in front of me, but I did raise the inseam by about two inches after I noticed that, so fingers crossed that fixed it.

I’m considering unpicking the back and making “artistic darts” to reduce that waistband bulk, but that month is not this month. Maybe next month.

style

My hair was super long this year (comparatively), so I nixed the hair extensions on the day. They always get stuck on stuff and drag my scalp with them, and then I take them off midday anyway.

cuteariel2

But the bow and necklace have held strong! This year, I did stick on some fake earrings, meaning pearly cabochans with eyelash glue. They were cute, and did last all day!

So that’s year 3 of Ariel! I dunno if she’ll make it another year… I had to do some repairs to the corset this year, due to the really cheap “coutil” that I used, but I hope that next year it’ll be around!


Alanna the Lioness

Happy Halloween everyone!

start

Let me start by telling you a story of young Jess…

Once upon a time, there was a house down the road that was for rent, the only house in the neighborhood that was. This house throughout the years contained some of Jess’s most unusual friends, but most of that is fodder for another time.

One year a family moved in with two kids, and one of them was Alison. Alison was three years older, and had done and read so many more things, but still wanted to be friends with Jess (even though in elementary school years three years is a decade). She introduced Jess to Tamora Pierce’s books on Halloween (by dressing up as Alanna, if I remember correctly). And changed her life.

The Song of the Lioness quartet was not the first I read… I think Kel was first since I was closer to her age, then Daine, but the character that I got attached to deeply was Alanna.

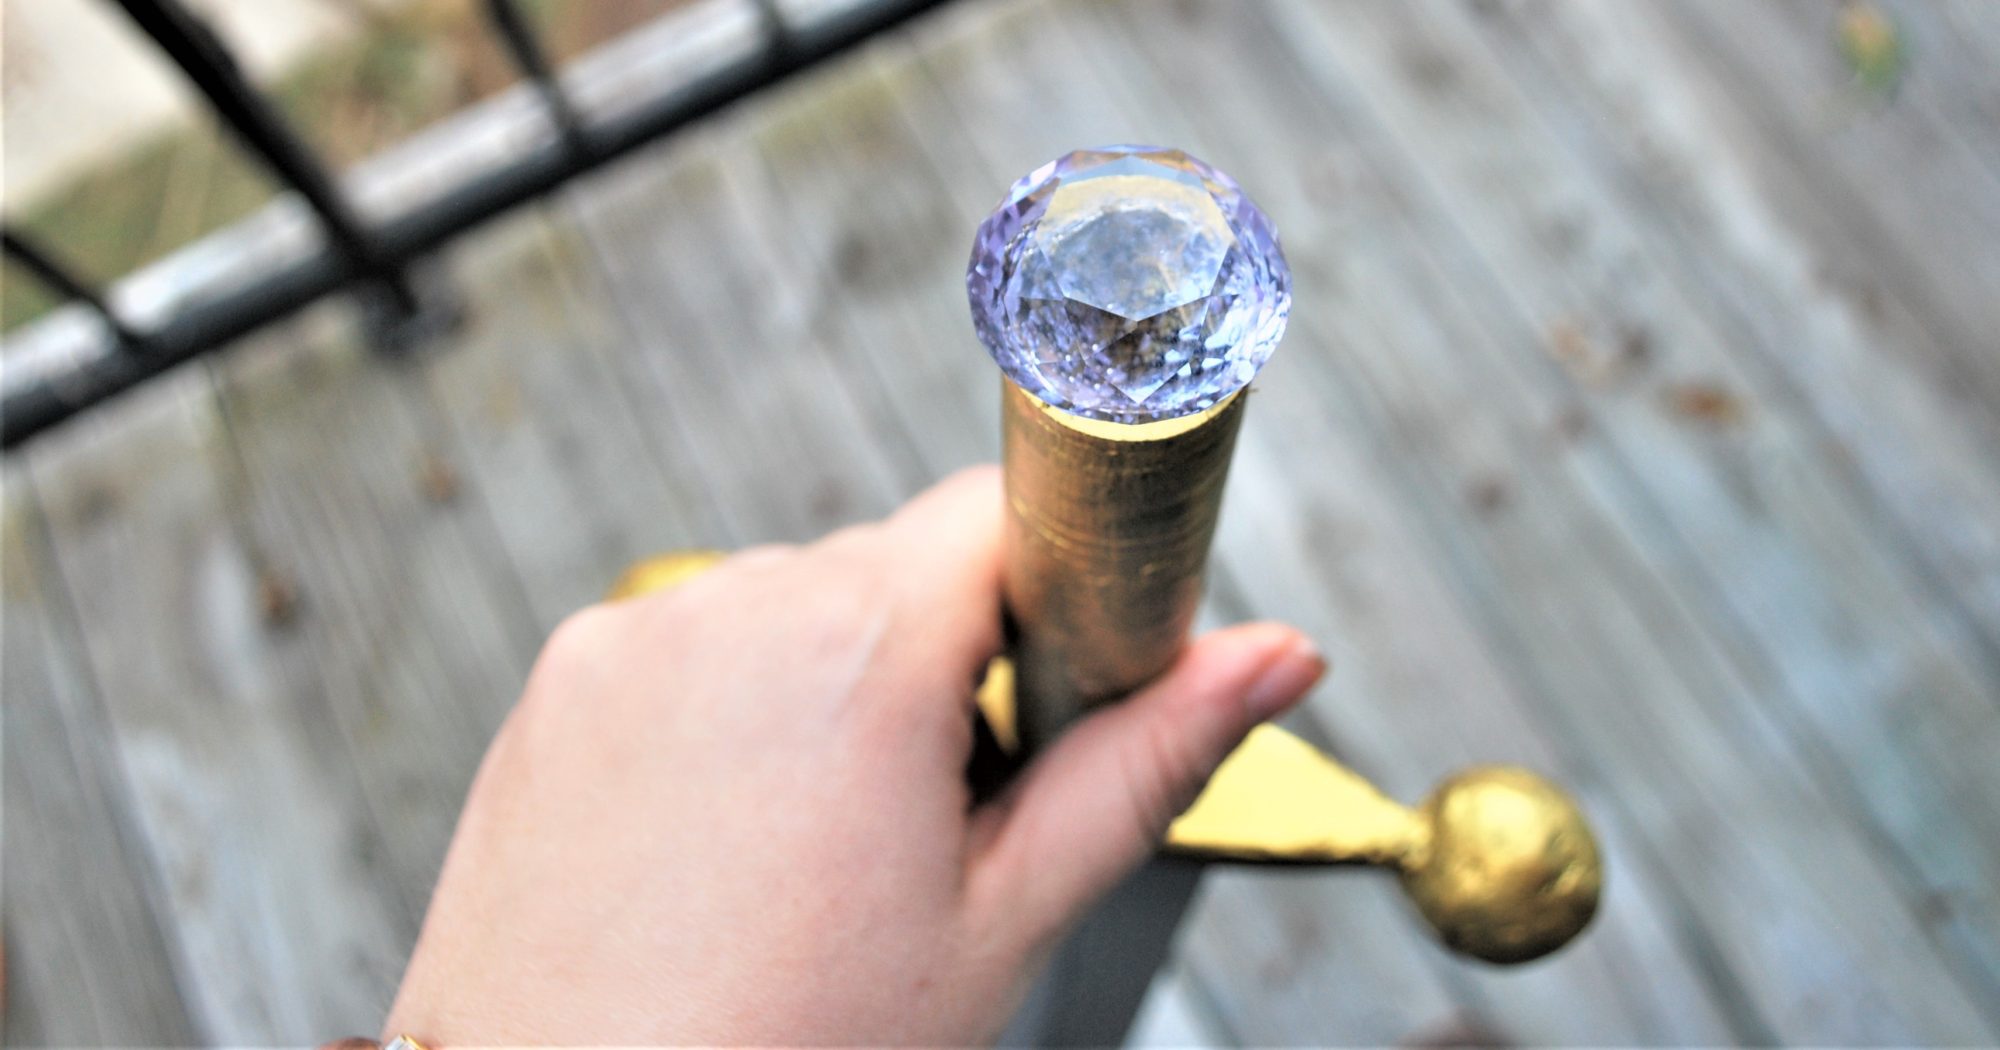
pullingsword

She’s a warrior who’s also magical and has a cat who’s also a bit of a god… and she goes on cool adventures in far off lands… And I was a quiet kid that cried a lot and got bullied to varying degrees emotionally, to the point that I’m pretty sure some of it was imagined (which is essentially me bullying myself). Reading all of Tamora Pierce, but especially Alanna, got me through my child and teen-hood.

doesthisposemakemelookfierce

So I decided to show this love as a costume.

As with many of my costumes, I looked to make part of it so I could wear it in real life, which were the trousers I showed you last week. They’re on heavy rotation…


And I teased my prop sword and shield as well, though those aren’t real life applicable.

But I realized that I will not be able to use much more of this costume in my real life, so when I recognised it I felt free to just make. It also helps that the shirt fabric and all the bias tape was in my stash. The red linen was a purchase from Joann’s.

Both the shirt and the tunic are based on the Onyx top by Paprika Patterns (yay for TNTs!).

shirt

For the shirt, I added length to the sleeves and added cuffs, and raised the neckline plus added a “v” split for easy pulling on and off. The neckline is finished with yellow-gold bias tape, which was mostly applied by hand (because I didn’t have any matching thread. And didn’t want to buy more). Lots of pick stitching.

The sleeves were just lengthened straight from the armpit down, so I could get some volume at the cuffs, which I mostly just eyeballed. To match the cuff width with the sleeve width I pleated in the sleeve volume. The buttons… the buttons don’t work. I put snaps on the inside, and the buttons on the outside… Just in case I couldn’t actually button the cuffs myself. So… Convenience?

tunic

The tunic was basically the original top, just sleeveless and with the neckline raised a smidge. I lengthened the top until it hit “somewhere between hips and knees” but left slits on either side so I could get to my pockets (highly important at a con) and for movement.

patch

I used an embroidery machine to make a patch for the “breast pocket” area, which was so fun to watch. I love watching needles stab into the fabric… Maybe that’s too much.

Two more finishing touches rounded off the costume: the ember stone and Faithful.

ember

I’ve carried around this pendant for years and years now, not really sure what I wanted to use it for, so it was just something fun that I was able to incorporate.

And finally, Faithful. My companion. He is the reason why I was recognized, most of all. And no one was able to tell that his eyes were purple!

Faithful

First I bought this plushie once I realized I didn’t have the time or bandwidth to make a realistic cat. I made him a little “platform” out of denim and a mustard fabric, which I would then safety pin to my tunic. Then I put wire up his leg and tail so it would stay up. And then I painted his eyes so the irises would be purple, which mildly worked. Not well, but if you’re looking for it.

shieldup

And that’s my ode to Alanna. It’s been a long time coming, but I think this is the best time for me to portray her. I need a little of her spunk in my life right now.

(On a semi-related note, Sara Bareilles released a new song recently, and I have been listening to it on repeat.)

((Also, if you really like Tamora Pierce’s Tortall universe, but want to hear a discussion about it from a group of well read friends who are picking it apart from a 2017/2018 point of view, I’d highly suggest listening to the Tortall Recall podcast. While I don’t always agree with their takes, it’s fun and sometimes enlightening to listen to people discuss some of my favorite books in new to me ways. I’m not affiliated with them in any way, I just enjoy listening to them!))

alanna.jpg

Stormy Grey Flint Trousers

grey flint - frontsmile

As of yet, the only garments I’ve made from the Flint trouser pattern by Megan Nielsen have been grey… Like flint.

Coincidence? Yeah. Funny? Probably only to me.

I’ve found myself lacking interest in fabric shopping. **gasp** When I have something to make and already know what kind of fabric I want to use, it won’t be at the (big chain) fabric store when I need it, and the hours at my (more expensive) local fabric store are inconvenient now.

grey flint - wide

But since i know how to dye fabric I’m choosing that option more and more!

For fabric i used this linen cotton blend from Dharma Trading and used their fiber reactive dye in 150 GUN METAL GRAY.

grey flint - sidewide

I bought 6 yards of the fabric for my stash, and probably used just over 2 yards for these trousers. Then came the evening when I spent two hours leaning over the tub and the paint bucket I use to dye the fabric. When the fabric came out of the bucket I was convinced I let it sit too long since it was almost black, but after putting it through the wash it turned up as this lovely stormy charcoal blue grey.

grey flint - pocketses

As for the pattern, I made a few alterations. First the same ones that I used for the shorts I made last year, cutting out about two inches from the rise. Then I lengthened it to full length by adding about 8 inches to the hem.

grey flint - front

I interrupt this broadcast to remind you that this is a linen cotton blend. This is to say, naturally relatively wrinkly, and also this is the third wear since it was last washed, and although it’s been hung up in between, that doesn’t mean it wasn’t being wrinkled… It happens. This public service announcement has been brought to you by “Jess just looked through the pictures for this post and grew concerned for her sanity.”

grey flint - back

I was banking on the hopes that the weird crotch and butt wrinkles I got with the shorts would be smoothed by the weight of the extra fabric. I think I was mostly right. There’s a bit of room for improvement there. I’m pretty sure I made a curved waistband.

When the trousers came together, though, the waistband still needed to be taken in, like with the shorts.

grey flint - buttons

I found these really cool plastic buttons in my stash, and I’m pretty sure they were bought in NYC at one of the shops that specializes in notions.

grey flint - bias binding
Can we pretend you don’t see any loose threads?

Oh, and did I forget to mention that I bound every seam with bias binding? I want these suckers to last!

Swishing around in these makes me so happy!

grey flint - neighbors

Soon, I’ll share what costume these trousers were made for!

Flint shorts

So these grey ones are over a year old… Oops? (Don’t tell me otherwise…)

DSC_6919

There are many things in life that I forget about until it’s pretty much too late to fix it. Like buying toilet paper, laundry detergent, and apparently shorts?

I was surviving with only 2.5 pairs of shorts for last summer. (One pair is waaaaaay too small. Hence the 0.5). I live in a location much closer to the equator than I like, and you would think that shorts would be favorite, but I don’t gravitate to them. I did to gravitate my beloved cargo shorts, but I had to retire them last year…

It doesn’t help that I did my research in an off campus office building with what seems to be a Friday business casual dresscode, so shorts aren’t allowed unless you’re a boss. So I spend my weekday summer days in dresses and skirts to deal with that.

But on weekends I needed shorts. And now I’m in a job that I could wear shorts if I’d like (though I’ll still prefer jeans).

DSC_6927

Let us get down to business then.

I was on vacation when I got the email that Megan Nielsen was releasing the Flint trousers/shorts pattern. When I looked at the samples and the line drawings, I was sold! In fact I had spent the previous couple days explaining to a friend that I really should cut my craft spending, and then had to deal with a judgement stare as I sat there ordering the pattern.

Because I’m in need of shorts right now, I decided to try them first, and it was probably for the best, as I needed to alter the pattern a bit. My muslin was out of some stiff green denim, actually the same from this pair of almost jeans from awhile back. It really emphasizes how wide these are in relation to the thigh. So you don’t get a picture of those.

In terms of alterations, I had to lower the rise (I think… It brings the crotch up higher when I do that, right?) so that the crotch wasn’t 3 inches down my thighs, right in the thigh rub area. I also had to take in the waistband a good deal with some darts on the more recent make, so I should alter the waistband to be much more curved. Both of these are issues I had to address with the Tania culottes too, so I think the fit model for Megan Nielsen patterns is just so different than me, that these will be typical for me with her patterns. I’m thinking that perhaps going down a size might help, but I don’t think it would fix enough problems to be worth it to make my standard alterations again.DSC_6932

The fabric for this first pair is some old cotton chambray that I found in my stash. I had maybe a yard of it, and that was the perfect amount for this project. There were some sections of the fabric that were stained due to someone leaving some ancient tape on the fabric, which I tried to keep to the crotch area, where no one should see it anyway.

Can I just say the pockets are glorious? So the opening for the bottoms is the left pocket, and every review I read as I was waiting for a good time to make the pattern said that the left pocket would not be really useable. When I sewed it up, I did end up sewing more of the pocket closed than was directed on the pattern, so at the end of construction when I went to try them on, I seam ripped the pocket part until I could comfortably wriggle into them, which left me more than directed, but less than I wanted. I can definitely use the pocket, but more for big ticket items like cell phones and sunglasses, than for change and USB sticks and student id cards.

DSC_6928

From these pictures I can see that the back crotch area is a little off, but I so rarely wear this with tucked in shirts that it probably isn’t too noticeable in real life…

I’m working on a second pair, but now that summer is (hopefully) over I am going to put that one on the back burner.

All in all this is an excellent pattern that I look forward to making again. The shorts are not what I would normally consider my style, but they’re so comfy in the “extreme heat,” meaning I hate it but its still not often 95*F, since they’re so breezy.

DSC_6936

Next pair of shorts, I’d like to try out the flat front, since there’s a tutorial for that and that’s more my style, but we’ll see when I get the hankering for shorts again…

Long Tania Culottes

Why hello there!

Ariel2017-2

You were lured in by my first couple posts in a while (plausible), or perhaps by the lovely pics of the culottes in the pictures (perhaps less plausible), or because you did a double take when you realized that I wasn’t in fact going to be talking about my Ariel costume, but about a piece of clothing… Don’t worry. I’ll talk about the rest of the costume at the end!

My 2016 Ariel costume involved a floor length deep blue skirt that was maybe a quarter circle skirt out of some lovely but incredibly flimsy rayon. So I made an Onyx shirt out of it a couple months afterward.

So when I decided to attend DragonCon again in 2017 I wanted to update my Ariel costume, and that meant making a new skirt.

But Ariel is all about getting legs! Why does she get legs, and then suddenly start wearing a tube that she could’ve worn with a tail anyway!

So my theory is that she would be much happier wearing culottes. Still loose and flowy without being a single tube. Two tubes for the win!

front2

Okay, that’s enough now…

I had recently downloaded the update to Megan Nielsen’s Tania Culotte pattern, and had pieces together the knee length version (I think) of the full circle culotte pattern, as opposed to the tapered version.

So I took some of the rayon lawn that I used with my 2017 Birthday Dress and cut pieces a little larger than the pattern pieces would require, and then I dyed them using either Procion Royal Blue or Moody Blue (Moody Blue was a specialty color that doesn’t look like its still available), which came out the perfect sky blue (perhaps because I didn’t use enough dye, as I’m looking at the instructions). I think I used glauber’s salt in the mixture, which is suggested for evening out the color. And urea, now that I think about it. I was dyeing a couple things that night, so I’m not sure..

The fabric dyeing went well, but then I laid the pieces over the rungs of my drying rack, and that left lines in the fabric… Oh well!

back

Then I took the fabric pieces, ironed them heavily and cut out the Tania culottes pattern for real this time. Sewing together was pretty simple, as I’ve made it many a time before (I mean, at least twice). I did have to make really big darts in the waistband, and I put in pockets… They were messy. The waistband was something I over-interfaced, because I knew it had to hold up (literally) when the rest of the garment was so flowy.

This is the time to remind/let you know that this rayon lawn is not meant for real garments. I was just silly to have tried it. I seem to have a habit of trying to force thin rayon into skirt like jobs… Hmm…

culottepose

Once finished, I wore them to work… Which worked okay. The problem arose that they are so flowy that they got caught in my bike wheels. As in grind me to a halt stuck between the brakes and the wheel.

Every time I got in a car I was at risk of tearing the fabric. Especially around the back seam area. Not the seam itself, but the area next to the seam. I had already repaired that area once before DragonCon, and by the time I got to the Marriott apparently the hole had reappeared… Oops? Thanks lady on the escalator for letting me know so carefully!

front

So this was retired about a month after DragonCon, though it was my ultimate favorite swishy swishy make. Fabric eater, I think this had over 3.5 yards in it. But I will be looking into making this again soon, out of a more durable fabric. Maybe I’ll make the tapered version, but I really like the deceptive nature of the circle skirt variation. I had to prove to a number of people (not at the con but in life) that it was in fact “pants”).

So details on the rest of the Ariel costume… Same corset as 2016, but I made a new shirt. I altered the Onyx top pattern to lengthen and widen the sleeves and I embroidered these adorable waves along the neckline. I also made a Flounder plushie who is my new favorite (don’t tell my fox-squirrel), especially because he looks so terrified. I carried him around in a basket, and when one young boy was nervous to come up and touch him, I told him that Flounder was scared being out of the ocean… I’m not good at coming up with things on the spot, so my new and improved quick thinking came in handy. Hopefully it sticks around…

ariel2017

This year I plan to also make a Sebastian plushie. I had all the fabrics ready with the Flounder stuff, but I just didn’t have the time to make it!

Really the first pair of Tanias

Confession time. I’ve been really procrastinating with making up this post. I made these back in May, and I do like them a lot, but actually wearing them to take pictures has been the hold up.

I showed you my second pair of Tanias, since I entered them in the Monthly Stitch contests in June, but I’ve been procrastinating on these ones.

front

Picture taking is getting boring, especially since I don’t have a nice porch anymore. I have a porch, but it faces the inside of my apartment complex, so posing there make me feel super weird.

And there’s no good place inside my apartment as well.

side

But I finally managed the pictures. They’re not fantastic, but here goes!

These are the Tania culottes from Megan Nielsen.

The fabric is a linen mix from Joann Fabrics, and it has a nice body and drape, but before getting washed a few times, they were excessively scratchy at the crotch area.

I think I cut the size large, since that was supposed to be my waist size, and I cut out the XL length. It’s not too short, but its certainly not long.

back

The construction went easily and quickly, and the first time I wore them I noticed two things.

The waistband was too big at the top of it, but fit well at the bottom. And the crotch seam was a bit too low for me. I think its supposed to be low, but with the linen and my lack of thigh gap, my thighs were rubbing against each other and the seam, and they got a bit raw.

So I took in the top of the waistband a little, and sewed the crotch seam another half inch in.

front2

It’s definitely more comfortable now, and it was nice in the heat of summer when I wanted to stay cool, and if I get a fall (it seems like its skipped fall and headed straight to winter here) it’ll be nice to wear with some tights, since the linen is heavy enough to not get too static-y.

So, I’m nowhere near caught up on the backlog I’ve got, but this is a nice start!

The Whole Package

So it’s now June.

That means it’s hot in the South. At least, anywhere that isn’t mountainous.

I was walking home from a ballroom lesson at 9:00PM, and I was still too hot, wearing jeans and a thin blouse, because it was still 85*F.

Any thought of taking up running this summer is quickly fleeing.

front smiley

But that means that when the separates challenge at The Monthly Stitch came up, I knew that there would be no hope of Ginger Jeans, or even Ginger shorts (too tight for the weather). It had to be something skirt-like. Flowy and preferably breathable. And some sort of top.

It’s been windy, though. And windy plus skirts does not always make for a good combo.

Since I lost my pattern for culottes, which was arguable fatally flawed… (Butt length after creasing from sitting is not the best idea), I bought the Tania culottes pattern from Megan Nielsen.

And I love them.

I haven’t shown you my first pair yet, but rest assured its arriving soon.

This pair, though, exists because I went into Joann’s to get fabric for curtains… And came out with this loveliness.

Let’s forget for a moment that I’ve never really patternmatched. Because pattern placement to avoid flowers on boobs is not quite the same  idea. And that I don’t really use patterns with very linear placements. Because it’s been engrained that I would need to be extra careful with those.

But I bought it anyway. Does it help that it was on sale for 50% off? I think in total the fabric cost me 15 bucks for 3 yards…

It might be a deep navy, but I’m considering it black. With the creamy offwhite, it was a warm black tone to it… Or so I’m telling myself. And it’s sheer enough that I wanted to line the culottes. Of course, I decided this after I got home from the store.

Tania culottes with a pocket

So this is my pair of self lined Tania culottes!

I measured a large for these, which surprised me a little, but my tummy did grow a bit from end of semester bad eating habits, so I trudged through it. Like many others, I cut the extra large length to go with the large other measurements. I did have to shorten the crotch curve, which I did uber-scientifically on my last pair (which was already finished) by sewing a larger seam allowance. Since that worked, I just transferred that to the pattern. I also followed the recommendation to raise the seam even more for the lining, which did bring about much confusion with the then four large skirt like pieces, but I think it worked out. Also I don’t have invisible zips handy, so I just put in a regular one. And a pocket. I added a pocket. Because it was very important.

pattern unmatching

Once I had put it all together, before letting it hang for a few days, I tried it on and immediately hated the wide waistband. It just looked so… wrong. Thinking back on it, I remember a pattern that suggests against stripes for the waistband since it was curved. And I’m guessing this was why. But also I’m a fairly short waisted person, but most of my belly fat exists in that lower region below the bellybutton, and with the high waistband, I was going to have to do some excessive fitting to get it to sit close to my body (stay tuned for that in my first version). So I decided to hack off half of it, and pulled out my bias binding collection and used some lovely green to deal with the seam. You can see a peek of it above. Also, look at that pattern almost matching. The lines are at least correct!

Then I let it sit for more days than I care to admit. You see, this week I’ve been having trouble getting to bed before 2AM. But instead of going with that flow, I’ve been still trying to sleep starting at 1, which cuts out a significant amount of available sewing time. As is the waking up late, BECAUSE I WENT TO BED AT 2!

back

I used my rolled hem foot. I think this marks the third time? And this is probably the first time with the right kind of fabric. It was not easy, and the hem is not even. The lining might even have been peeking out a smidgeon. Shush, don’t tell! But it’s pretty darn good for the first time on miles and miles of fabric.

back better

And then the top. I love the Dandelion top/dress, and I figured it was time to make it again. Especially because I’m planning a “super secret” version. But first this one.

My fabric choices were easy. I had just made a Tania pair out of this linen, and it was a perfect amount to use for this shirt. And this lace, I love this lace. I used it on my last Dandelion, to accent the side panels, and the amount used for the yoke here didn’t take away any more yardage. Just into the scrappage from the previous one! I still have quite a few yards, and I’m not sure what to do with it.

Dandelion shirt detail

I cut a medium, like I had done for my first one. The first one is nice and comfy, but it is a little loose above the bust, which I should’ve realized would  become a problem in a sleeveless version. So there were quite a few alterations, including taking in the back, taking up the shoulders, taking in the side seams, changing the back yoke shape, eliminating the zipper, and taking in a wedge of the lace.

It’s still not perfect. I might need to readjust the bias tape, and I should take the shoulders up even more when I do that. But I’m kinda in love with it. It should also get softer after a wash, which’ll be nice. It’s not scratchy, but its also not soft. But soon. Soon it’ll be soft!

front

I like these two options together. We’ll see how much wear they get together. But they will certainly be mix and matchable! In fact this is the first intentional post on the beginning of a little capsule wardrobe. I’ll talk more about it later, I promise!