Farewell to Narnia

It has been a long journey to get here.

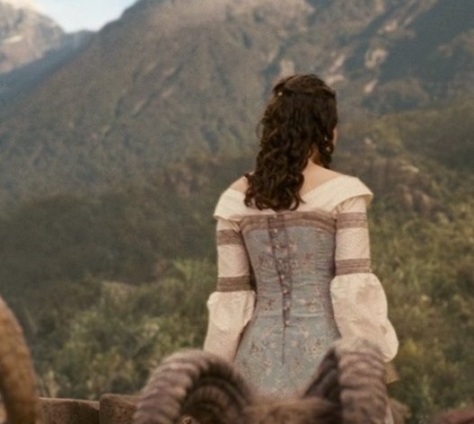
I started planning this costume nearly three years ago, just before I started this blog. I had fallen in love with it when I first saw ‘Prince Caspian,’ and even working in a costume shop, I had never thought about making it for myself.

During my senior year of college, I finished my first overbust corset, thinking that it would be used for this costume… I’m still a little sad that I won’t be able to use it for this costume. I also got the fabric for the underskirt and the dress itself, which was quilting cotton and poly-satin, respectively.

Last summer I made the “sleeves” and the underskirt, and attached the sleeves to the corset. Not my brightest idea.

In late summer, or early autumn, I showed you the two posts about creating my quiver.

Over the past year, I drafted the overdress from the corset pattern, constructed it from the lining fabric (turquoise satin) as a muslin, then used those pieces to cut out the real fabric and sew it up. That was early autumn of last year. Then I stalled for months. At the end of the spring semester I started sewing the trim onto the top, and when I had the trim mostly on, I stalled again deciding what pattern I really wanted to paint. I got so fed up with it mid-July that I started on it with dots and then worked on the pattern as I went. I finished the painting mid-August, right before school started, and happy with myself, forgot that I actually needed to finish it.

I decided on the last Monday in September that I needed to finish the dress and get it photographed that weekend. This costume deserved better than my living room.

So a friend volunteered to be my photographer, and told me about this awesome library, and here are some of the photos!

back quiver back column quiver storybook back up

It’s about time after 2.5 years, right?

Maybe I’ll get pictures outside sometime, but for now I love these pictures, and this library!
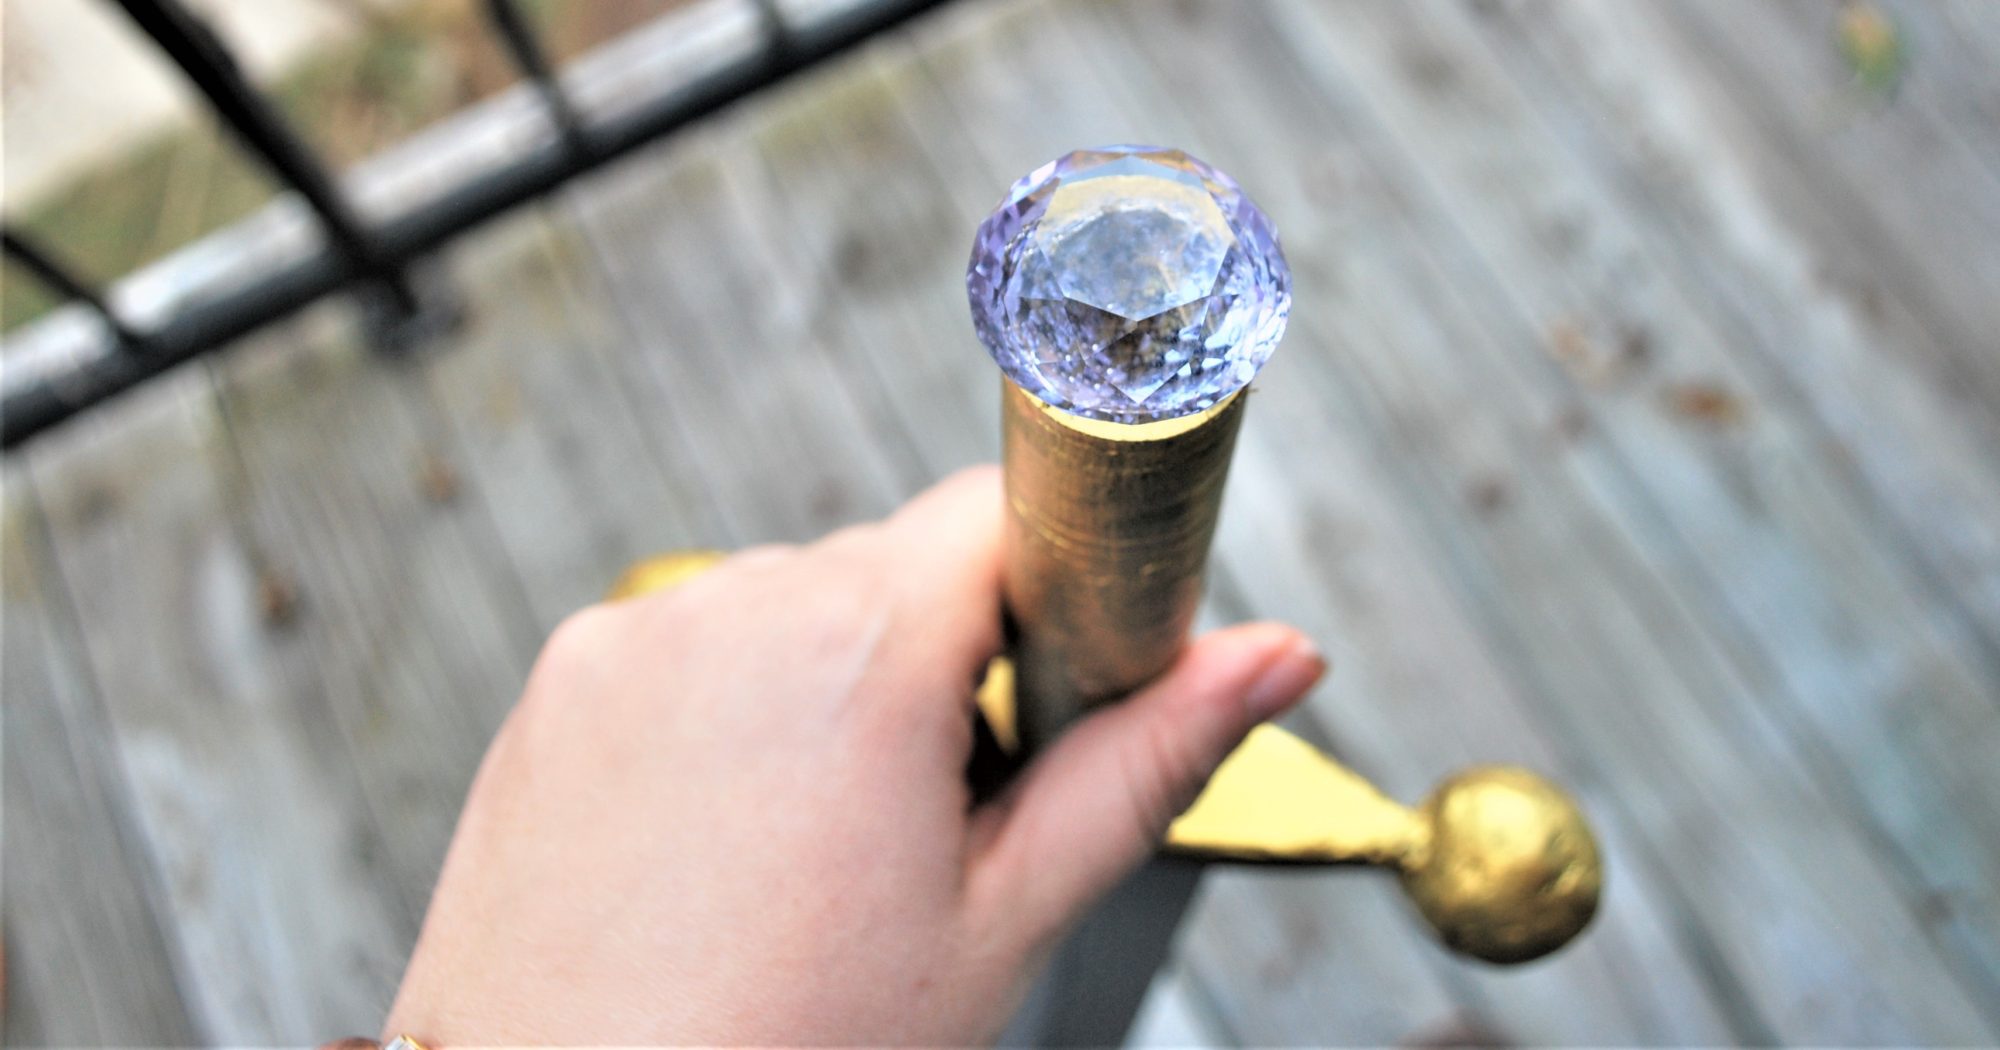
Quiver – Part 2

My unfinished quiver sat around for over a month between the first part and todays, but it was mostly because I was trying to determine the best way to sew it up.

I thought I could maybe butt up the two sides so they would form a solid point… My leather was just a bit too floppy for this.

I thought maybe I could fold under and sew it up like a seam. My leather had just too much structure.

And then it became the lace versus waxed thread debate. And where would I even attach the belt?

So I waffled.

initial

But I knew that my TARDIS belt was going to be made of leather, and I have a policy for leather goods and myself, that I am not allowed to cut into leather if I’m still working on a different piece. So I had to finish the quiver.

stitching

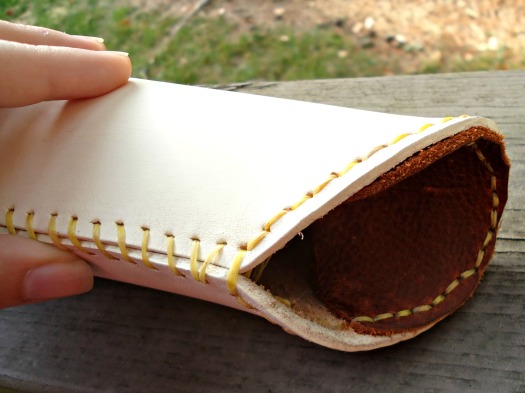
Using my trusty awl, I punched holes every 1/4 inch both up the seam line and around the bottom, since I knew I’d be attaching a cap to the bottom.

Waxed thread was my “weapon of choice” in the end. I used a whip stitch, I guess, to sew up the seam, which seemed to hold it very stably.

inside

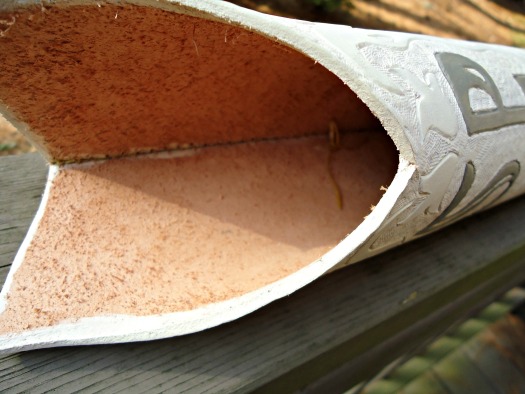
I had intentions of attaching the belt by running it through the quiver itself, but that didn’t pan out. For one, I only had as long as a partially used cow belly, which was not as long as I was expecting. Threading it through like that also made it really blocky and uncomfortable. Comfort is key in the costume game, especially since I’d already be wearing a corset, which is enough comfort-restraint.

top

So I ended up running a few loops of waxed threads to serve as attachments for the belt. It works well for now, but I’ll probably need to adjust it in the future.

Then I actually needed to make the belt.

belt

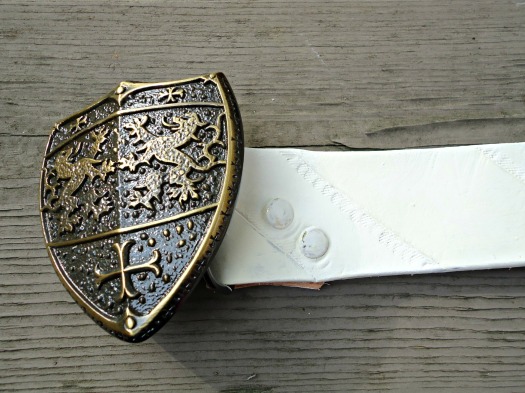
I wanted it to be something I could potentially wear, since I love the buckle so much. Isn’t it just the cutest shield ever? But I also knew the belt had to be long in order to cross my body like a messenger bag. So I made it as long as I could, and punched holes in various places, so I could wear it at my natural waist, or through jeans, or through the quiver. I cut a simple design using my swivel knife, just diagonal lines, and I tooled a few sections for some visual interest. It doesn’t show through the paint though, so I ended up painting a very subtle alteration between cream and ivory, based on my ability to mix paints well, which ended up with a more ivory batch right at the end of the painting cycle.

So that’s it for my quiver! Isn’t it purdy?

Quiver – Part 1

Even though Susan doesn’t actually wear her quiver with her final gown, it was still a must have prop for me.

Though it is very likely that the cosplay I see is not a full indication of people’s geeky interests, I’ve always thought that Narnia fans, of the movies more specifically, are more subdued (aka they don’t cosplay). There have been a few wonderful ones, but altogether the cosplay quantity is rather low.

tease

So the likelihood that I would be easily recognized from the costume alone (and with my hair, not a wig) is slim. I’m already risking the Lucy vs. Susan issue, with the red hair, but anything to make the costume more recognizable is good.

Plus I’ve always wanted a quiver for all the imaginary arrows I have.

The problem with Susan’s quiver is that it is likely meant to be ivory, or rather it was carved in one piece. There have been some good reproductions made with PVC pipe, but I didn’t have the requisite skill set. So I decided to use leather, something I do know a bit about.

I took pictures like this was a real tutorial, at least for this first half…  and then I let it sit for two months before I finished it. But that’s another story.

pattern

I started with posterboard, knowing that I had a limited amount of leather big enough to create this quiver. I drew a pattern, dragged a belt from the closet to “try it on” and fiddled with the pattern until it felt right. It slimmed down a bunch, and shortened as well, so that it would feel proportionally right on me.

Then came time to cut into the leather. I managed to find a big enough piece, and I used my rotary cutter to cut clean lines through… Leather is like fabric, right?

begintool

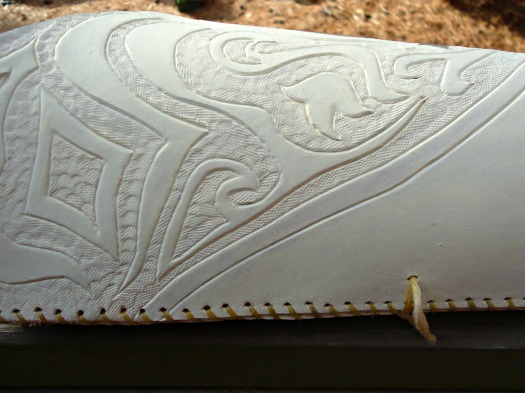
I had previously drawn designs for the top of the quiver, but they  didn’t precisely fit, so after some tweaking I got a useable pattern and traced it on. I cut into it with my swivel knife, and began tooling.

finishtool

And here it is with the design finalized!

The real quiver has a picture of Aslan carved in the bottom, but I didn’t want to take this that far.

So I began painting. I had both white and cream acrylic paint, neither of which was perfect, so I mixed the two and diluted with some water.

first

The first coat turned out streaky, and it ended up taking 4 coats before I was satisfied. In the tool-work, there’s still some areas of low paint, but I’m learning to give it up.

DSC03285

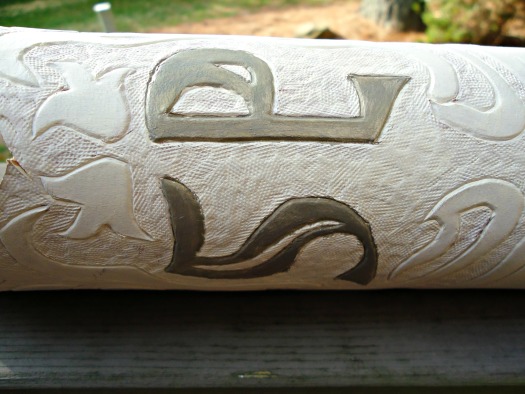
I then painted the initials with a grey and gold mix of paint (though technically it was a mix of cream, white, black, and gold), with the gold added in for a bit of sparkle… Not that its really visible, but it can be seen in real life.

Look out (hopefully) next week for part 2 of my quiver fun!

Phyllis

The farther I get into making my Susan costume, the more I realize that there are not many easy titles for blog posts… I almost named this one Gastrovascular. Then I realized that was creepy.

It has been a while since I’ve worked on this, but I realized it was high time. Now the undergarments are finished, and I’ll be getting to work on the overdress!

So the fabric is quilting cotton, a white on white floral pattern. I had three yards of fabric, supposedly. In reality it looked more like two yards, and maybe a quarter more. I also have a very bad idea of distances, so it could just be me.

front

First I cut off the pieces for the waistband and the “sleeves.”

The sleeves I basically just winged, hemming the sides, and then folding over until it felt right. I cut the full length of the fabric in half, so its about 22 in for each side. I know that when I wear it for real, I’m going to have to Topstick or otherwise adhere the sleeves to a proper point on my arm, which I’ll figure out later, when the overdress is finished.

floor

The skirt then used up the rest of the fabric in pleats, though I ran out of pleating room towards the back. I used a technique I learned for stage costuming for the closure. AKA if it’s never gonna be seen, don’t bother with a zipper.

back

So I just made a simple opening, with a skirt hook and eye. That does cause that gappage in the back, though its never gonna be seen, and I’ll be wearing a slip, just like I am here (in case you were wondering…).

pleats

Look at that pleating job! But I will have to re-iron all of it. Humph.

So that’s it I guess for Susan’s undergarments!

But I shall leave you with the motifs for Belle’s necklace! So one of these days (meaning hopefully today or tomorrow) I’ll finish that up and soon after will have a blog post on it! Yay for costumey things!

motifs

Overbust for Wearing Under

After this moment, this corset is not seeing sunlight…

DSC01716

It’s not that theres’s anything particularly… wrong with it.

It does give me a bit of a flat chest, which is an interesting sensation.

It also does no “lift and separate” favors, which I’ve heard about for overbust corsets.

Perhaps that’s because its a modified version of Butterick’s 5797 corset top pattern. I wouldn’t put it past the patternmaking company to completely disregard such a notion.

DSC01718

I had to take this in at many of the seams. The rounded side panels were fine, but the side seams needed to be less drastically curved and taken in. The bust ended up being much too big, so I had to reduce those seams, as well as reduce the dramatic cup that had been formed. I also took in the seams around the back panel.

Choosing this pattern was more of an endeavor to understand construction of such a garment rather than wanting to make up the pattern. But I did need an overbust corset, for my Susan costume, so I thought I’d take the plunge.

DSC01722

What I’ve decided for Susan, now that it’s been brought up, is that my undergarments will be separates, a petticoat with a pleated front panel, and a removable collar piece which will attach to the corset that I’ve made. By making the corset boned, and not the overdress, it allows me to use the corset in future endeavors.

For the fabric I chose to use two layers of duck cloth, which I had purchased at Walmart last year, and a nice separating zipper. I also had some grosgrain ribbon, which I used for binding the upper and lower edges, and I used heavy duty cable ties for the boning.

DSC01711

So it is zipped in the back. More for ease than anything else. I don’t enjoy wearing things that I can’t remove myself, and because the overdress will have hooks and eyes at the front, I didn’t want to put lacing, busk, or a zipper there, so I would need a back closure. At that point, a zipper would be perfect!

I do get a bit of reduction at the waist nevertheless, which is both a nice feeling and a bad one at first.

The real reason why I’m a bit embarrassed about this is that I basically used up all of my bobbins on this corset when I was tacking down seam allowances and boning channels. So when you get close it’s quite colorful and messy. But I love it anyway.

DSC01719

Second corset completed!

One day I’ll tell you about the first.

February Project #1

Stashbusting Stats: 7 fabrics used

I am thirteen hundred years older than you.

This was really my first idea, as this dress was my favorite from the Narnia movies the minute I saw it.

front

link

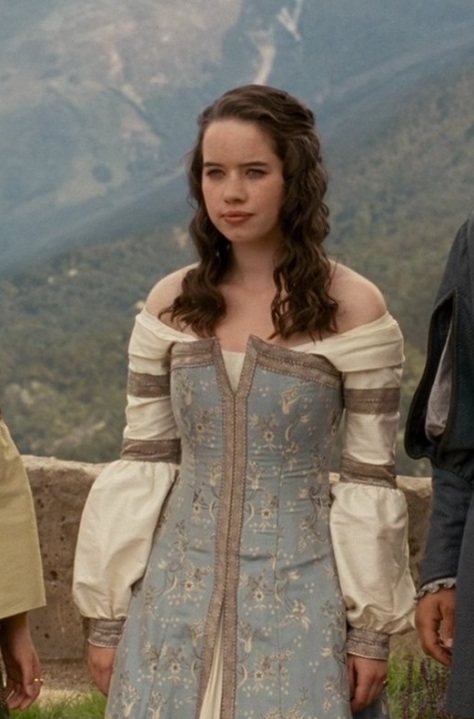
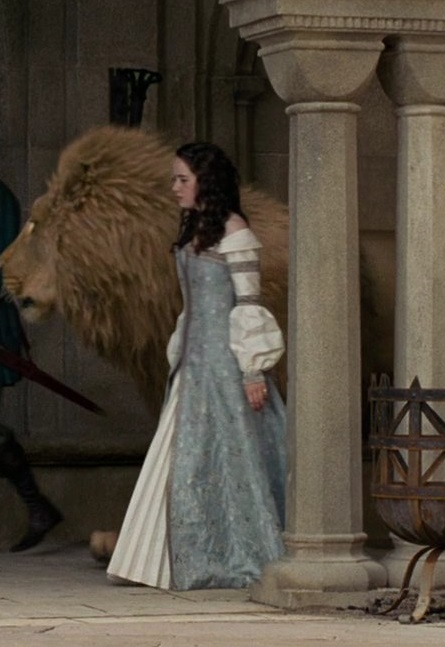
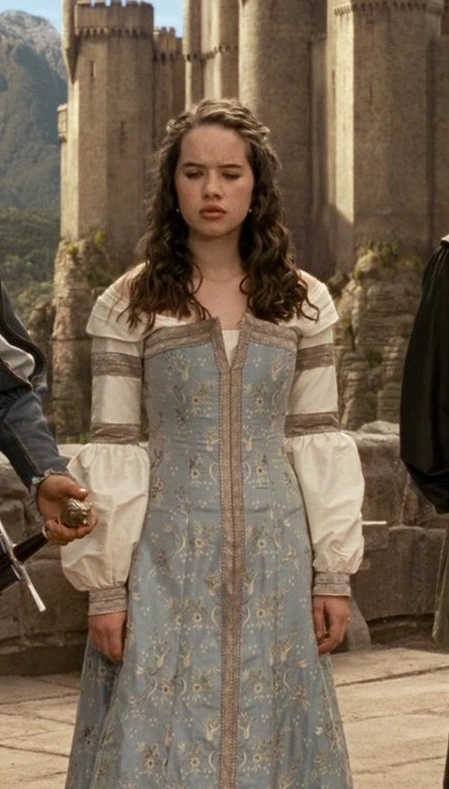
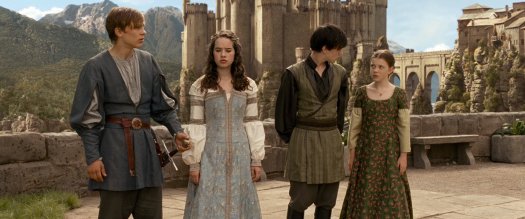
It is the dress Susan wears at the end of the Narnia movie Prince Caspian, as her farewell to Narnia. It’s not even in the movie for very long! Just the ending.

side

link

But its absolutely lovely!
A few people have recreated this dress brilliantly, but I just want to try it out!

front22

link

Because its pretty…

And I think I can.

back2

link

So here’s the deal.

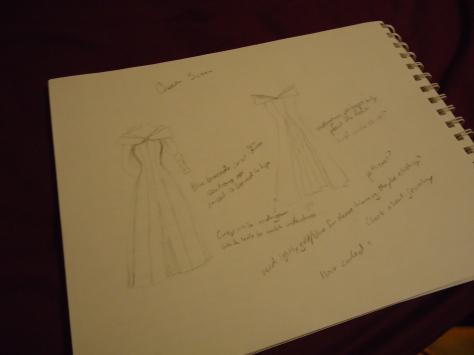
Underdress: A crisp white undergown, which has a few folds at the neckline, and the neckline itself is far off the shoulders, and slopes to a small V at the front. There are sleeves on the original, fitted to the elbow, and then they puff out and are brought back in with a cuff at the wrist. I’m considering making my undergown short sleeved, because of the warmth in San Diego in summer… and I wouldn’t have to figure out the sleeves. Big advantage. The front of the underdress, at the least, is pleated but for my ease and ironing pleasure I’ll only be pleating the front of my dress. It’ll be easier if I do need to iron it after it being in a suitcase and all. And finally, the undergown is nearly floor length.

Overdress: The overdress is made of a dusty blue stiff fabric with brown embroidery. Its constructed with princess seams, and is boned up until the hips. The front of the dress is mostly open, and the area from near to the top to the hip is closed with what seem to be hooks and eyes. The back is closed with buttons and loops attached to a matching modesty panel. Its also nearly floor length, just like the underdress. I’ll be probably trying like an idiot to recreate this part of the dress and closely as possible. The dress is also trimmed with a lightly gold colored thick ribbon.

Shoes: I’ll be obtaining white or matching blue flats, or sandals, or I’ll be making some sort of slippers in the same fabric. Its up for grabs at the moment. The shoes in the film cannot really be seen, so I can take liberties!

Necklace: I’m sure I’ll make one. It’ll likely be either a simple single stranded in a color, or a clear beadwoven necklace close to my base of my neck, so it doesn’t take away from the dress itself.

Hair: I’m not going to get a wig, but I’m going to style my own hair to as close to the proper style as possible. Hopefully that’ll work out!

Purse: Cause I’ll need one… So I’m either going to get a brown leatherish pouch or backpack, or I’m going to be insane and make a quiver-purse. Using help and inspiration from this site. I might take the crazy route, just to see if I can!

DSC07354

In case you wanted to see my… lovely sketch.

Any tips?

I’m totally not being… hypocritical.

Not at all.

But I had to tell you about my fantastically big project, that can’t even really happen until I return home from my time abroad. But that doesn’t mean I haven’t (completely) planned out this massive project. Well, I guess its kinda four projects in one.

I’m going to Comic Con, or at least planning to. But not this year. No, that would require much more extensive planning, as it would only allow me to have one month of actual sewing machine and fabric time before the Con. I’m going to Comic Con 2014, as it will be both a celebration of graduating and becoming what society believes is an adult (of which I am never quite sure of), and it will be a reunion with some of the friends I’ve met while abroad.

But really, let’s face it, that’s not the exciting part. Going to Comic Con means that I have a reason to make extravagant and unnecessary costumes. So I’m making extravagant and unnecessary costumes. Because I can!

Drumroll please! (dzdzdzdzdzddzdzdzdzdz)

My first, and most elaborate, costume will be a Victorian Steampunk dress that recreates the inside of the Eleventh Doctor’s TARDIS.

(link) (ETA – this link is now broken)

Ain’t it purdy? I love the magnificent color scheme and how it all works together to bring up the fun and free spirit that exists as the Eleventh Doctor.

If you don’t know what I’m talking about, watch Doctor Who. You have approximately fifty years worth of episodes to watch, but I’d definitely watch the newer stuff if you are a newbie. Its not only more colorful, but it has better special effects and monsters.

I won’t burden you with a sketch, at least not today, if ever. But its going to be awesome

My second project will be a recreation of the dress Susan wears at the end of the Prince Caspian movie in The Chronicle of Narnia series. Typically its called her Farewell Dress, as she says farewell to the land of Narnia.

08-peter-susan-edmund-lucy

(link)

Its a two part outfit, with the white underdress and the blue boned overdress.

I’d also suggest watching Narnia, if you haven’t seen any of the three movies. They have amazing landscapes and effects.

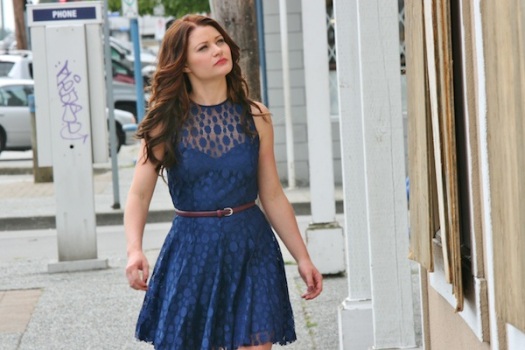
My third costume will be a fall/spring dress inspired by the Belle of ABC’s show Once Upon A Time.

EMILIE DE RAVIN

(link)

In the fairy tale land, she is the Belle we know from legend and the Disney movie, but is a little more, well, kick ass. Her Beast is Rumplestilskin, which I find great, and she goes on adventures and saves lives.

EMILIE DE RAVIN

(link)

In our world, she is just finding herself, and tends to gravitate towards cute, though rather bookish and vintage – inspired outfits.

So my dress will combine the two, so I have a pretty dress that I can wear without it being a costume.

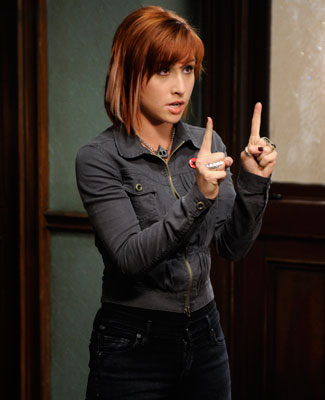
My final project is to make an outfit inspired by the fantastic Claudia of Warehouse 13

warehouse-13-tv-fash-3-325

(link)

This will be the only project that will require the least amount of sewing, but in theory could also involve the least cost involved, if I hunt for good deals on accessories.

For each of these, I’ll be posting about in its own post. First, though I promise I’m going to be working on a post about one of the ufos I have with me. Now I just need to charge  my camera…

So in conclusion, I’m insane. This will be a set of stashbusting projects, but it still isn’t quite planned to include ufos to finish it.

Also, watch all of the above. They are all great shows, which is why I watch them of course!