Not a Background Lannister – Prop Shield Tutorial

first

So I started with the trousers last Wednesday… The shield on Friday… Next up in the lead up to the costume reveal is the shield.

And boy am I proud of it!

I have access to a laser cutter, at my job, so I put together a “quick” file (it’s never quick) for a shield that would fit on one piece of plywood. I could’ve made a bigger one, but I was trying to be material conscious, and I’m glad I kept it at that size. The laser in question is technically two feet “wide” in material dimensions, and 4 feet long, but it’s a little bit smaller in both directions due to crookedness and use  over time.

I worked with 1/8″ plywood, and made this as solid looking, but light as possible. There are two fully solid pieces, with multiple border pieces, one set in between the solid pieces, and two sets on the front, and then the decorative pieces there too… This would be better explained in pictures…

alanna_pullapart

Yeah… Like that.

So I layered and glued everything together. It took awhile. What I should have done then, is sand those edges. I didn’t. Moving on.

edge

On the top of the shield I used wood filler and a putty knife to shove material into the seams so it was a fake beveled/routed edge. That’s honestly what took the longest. I’d put on wood filler, wait for it to dry, sand it, apply more when it inevitably chipped and repeat.

bevel
Yeah… not meant to see it up close.

I’m kicking myself that I didn’t get progress pictures as I went. So then I painted the shield. Chestnut brown on the back and sides, then red and gold on the front. The gold is Bright Gold Lumiere Jacquard fabric/universal paint, and the others are stash cheapo acrylic paints. Oh, I so love the Lumiere paints.

lioness
Gaah. I’m gonna stop it (mostly) with the close ups on this one.

On the back are two more sets of laser cut pieces, the main point of which was to provide some material for screws to connect to. Then I guesstimated sizes of leather to attach the shield to my arm, screwed it into the top and bottom bracers. I had to reattach the bottom ones to make them tighter so I could control the shield a bit better, but then I was completely done with the shield!

Lightweight, blocky and just what I needed.

It did mean that I hit a bunch of people accidentally, but… that’s being at a con, right?

I was not too surprised that this wasn’t the recognizable part of the costume (It looks too much like the Lannister crest, or Peter’s from Chronicles of Narnia), but I was surprised what was! You’ll have to tune in on Wednesday to figure out what I’m talking about!

corner

That probably sounded like a ending, but I’m popping back in again to say that though I made this with a laser cutter out of plywood, you could totally do something like this with a craft knife and some stiff foamboard or foam, and come out with similarly awesome results!
Is the pen really mightier? – Prop Sword Tutorial

first

The first prop I needed to make was a lightweight sword. It had to be a short sword (so the double handed sword I bought at my first DC was out) and it had to be me-sized. So smaller.

full

I went to Michael’s one day to scope out the small plywood situation, and ended up with Basswood, I think with the dimensions 24″ by 4″ by either an 1/8 or 1/16″ but I’m not sure which. I also purchased an 1/8″ diameter dowel, which gave the sword it’s structure. That was the cheapest Michael’s trip ever, because with a coupon, the main part of the sword cost $2.50. Craft stores never work out that well for me, so I definitely gave myself a pat on the back for a good job. Or rather, I took myself out to see the Incredibles 2 (this was late July/early August. It was still in theaters.

I’m pretty sure I cut the basswood in half lengthwise, then I cut the pointy bit out, and tried to match on both sides. Most of this was done at night, so cue the bad phone pic here:

DSC_6980

I then taped the dowel to one of the sword pieces. Then I applied wood glue around the edge of the sword outline, and used every single clamp and binder clip I own to keep the pieces together.

DSC_6986

Then I left it for a few days, even though it probably only needed one.

I used a laser cutter to cut out pieces for the hilt from 1/8″ plywood that would slide onto the wooden dowel for stability, and I aimed for a hand and a half length. In the end I got a stacked result, then used wood filler to fill it in and round it slightly. It worked pretty well, though it might’ve worked better if my filler was wetter. It has gotten rather gummy over time. Regardless there was a lot of back and forth between gooping and sanding. Using cardboard would work pretty much just the same way, if you cut some layers and used wood filler and glue and tape to hide the corrugated edges!

hilt.jpg

Then came painting and sanding. I painted up the “blade” with white acrylic first, then with Lumiere Jacquard paint in silver. Then it was too shiny, so I sanded it. Repeat once more to see if anything changed. Add the line down the center (kinda… don’t look too close) and then sand again to blend that in.

For the hilt I first painted everything brown, then painted it with Lumiere Jacquard paint in bright gold.

jewel.jpg

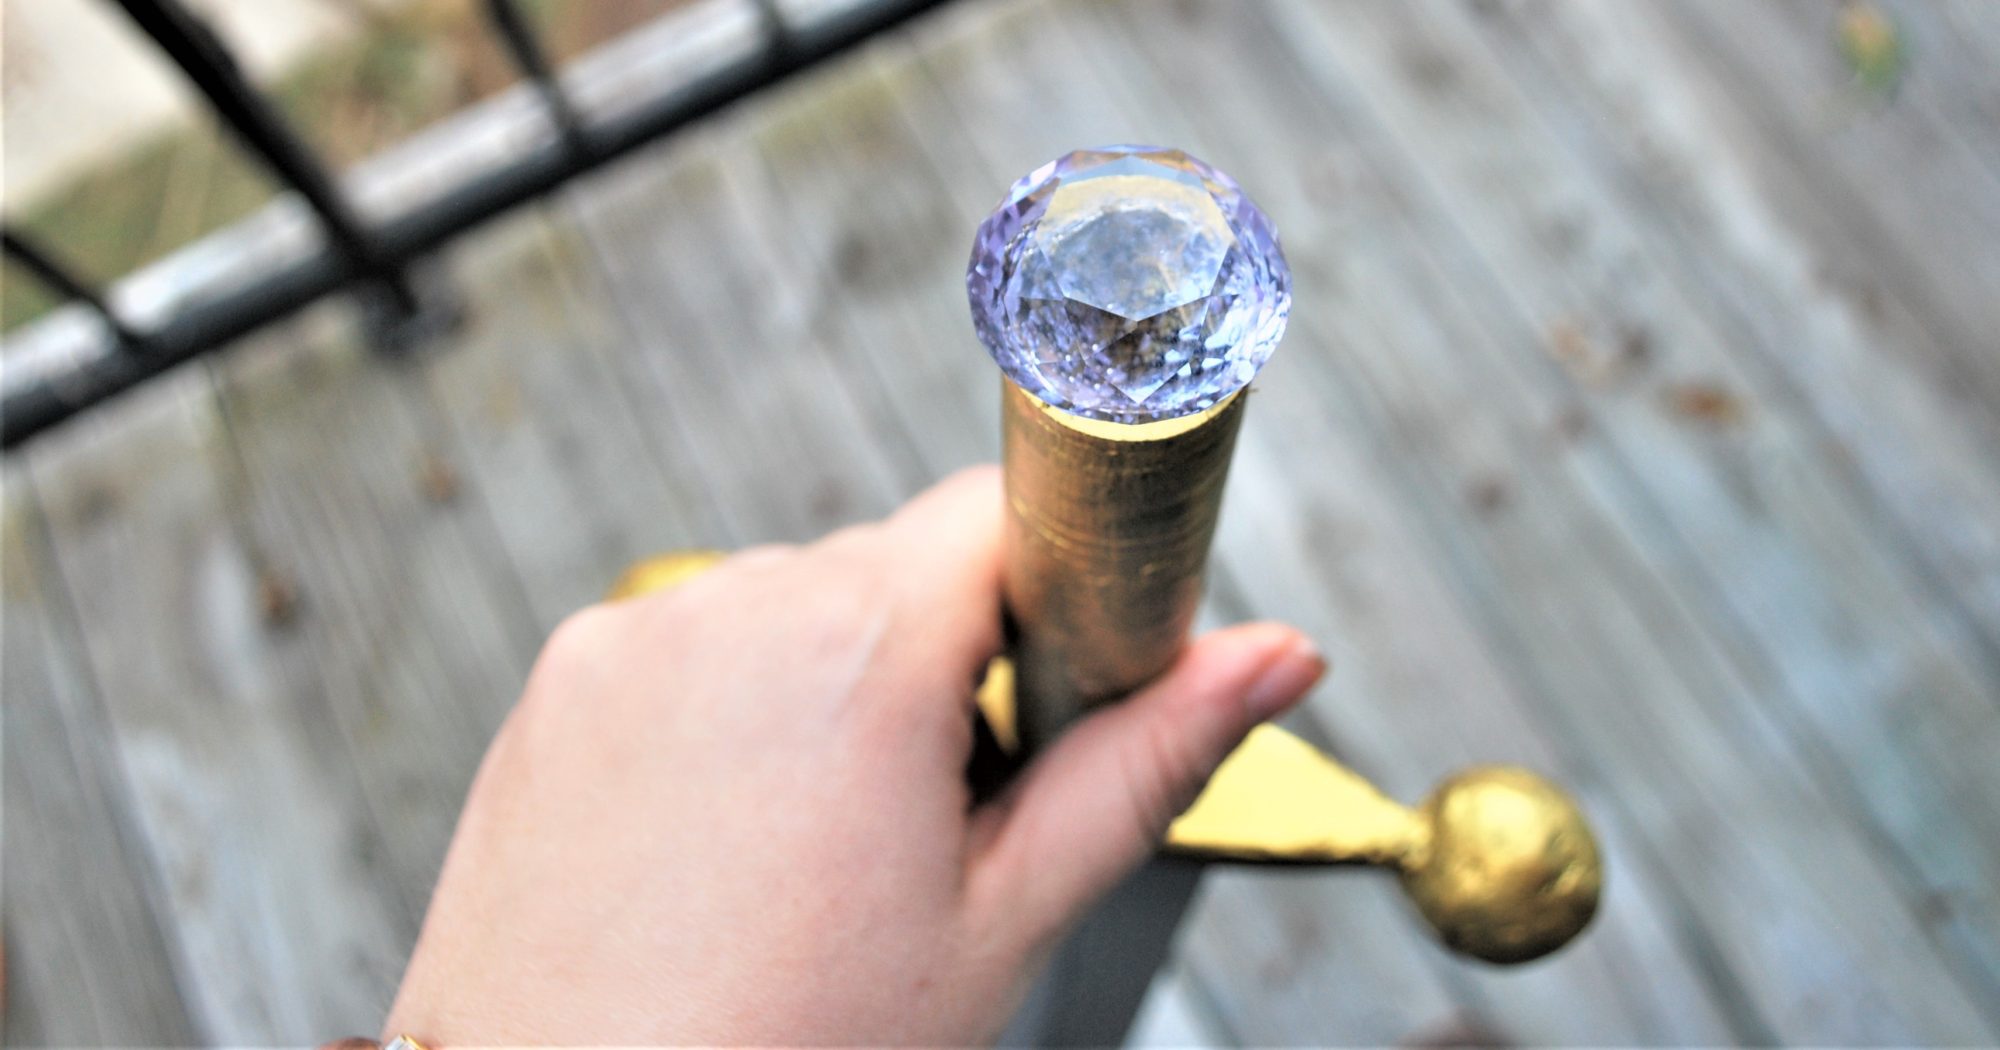
And the jewel. Still the biggest pain in the butt of this project. When I was designing the laser cut part of the hilt I made pieces for the end that would allow the jewel to nestle in.

Then I tried hot glue, then superglue twice, and now E6000. It’s sticking for now.

point.jpg

So that’s how I made my prop lightweight sword!

The Moment

When I posted Spring Updates I wasn’t sure if I’d be posting again about this prop, at least not until I had completed the costume to go with it. But that has been postponed for a smidge, so I think its time to share!

If you don’t recognize this prop, you probably didn’t see the Doctor Who 50th anniversary episode. That’s okay! What you should know is that it’s central to the storyline, as its the most dangerous weapon in the universe, so dangerous that it has a conscience, who just so happens to appear as Billie Piper’s character Rose, or rather her image, but calling herself Bad Wolf. If you find that a reasonable thing, then you should definitely join the Whovians!

Anyway…

Last October I fell in love with a (relatively) new technology: LASER CUTTING!

And when I say fell, I mean I fell hard.

The panels of this prop were the 2-7th things I ever laser cut.

So I was completely new to Illustrator, but this project (and everything I’ve designed since) has taught me so much!

Back to the prop… I used photos found on the RPF (here and here) as references, and then designed all the sides. 5 of them were reasonable, since there would good references, but the one with all the Gallifreyan was more difficult. Only half-ish was ever visible, so I made a lot of fake Gallifreyan… Which was entertaining. And some of it looks reasonable, and others… Don’t. Luckily it’s only about 12 by 6 inches of ridiculous.

And I’ll probably be one of the few that cares.

I went on a week long “bender” of designing and laser cutting. I would design something one night, cut it out the next day, and then turn around and design the next one that night!

Then came time to take them all home and paint them. All the metallics are Jacquard Lumiere paints, and I used some cheap acrylic paint for other bits.  I think I had everything painted by December. And then my project brain stalled. (In January I found myself working 2 part time jobs, plus my grad school research so everything shut down. Like this blog, for the most part.)

In March, when things had mostly settled, I found myself with the inkling to get in the wood shop to make the frame. I ended up splitting two by fours for the final product, and creating an empty cube. I spent a lot of time sanding it down and trying to get many of the imperfections out. Some of the wood I had used had some kind of black paint on it, so I had to sand it down a lot in places.

Then I made the bad decision to wood burn the frame by hand. In the show prop, it was probably laser cut, but I wanted the deeper worn look. I spent 6 hours over 3 nights working on it (from 10pm to 12am) which was not my finest decision…

I borrowed some stain from a friend, and stained the entire thing, which was a kinda messy affair. My bathroom looked like a crime scene for a few hours. The stain was oil based Zar, in color Rosewood.

Then came Easter weekend. The laser cut panels were “installed,” meaning pressing them until they fit and attempting to glue them together cleanly. I had installed a small “door” into the corner of one of the sides, so I installed hinge hardware, and used some foam board leftover from a friend’s project to fill in some gaps between panels.

I was marathoning the project at this point, so I managed to get on Tinkercad and designed the corner caps, which are essentially 3 sides of a cube with a half sphere, and printed them. For a first 3D project, they turned out unexpectedly perfect! I primed each with some cheap primer spray paint and then painted the corners grey with acrylic paint mixed with some silver Lumiere paint. Then everything got glued together and I used a clear coat over everything, from the wood to the 3d to the laser cut stuff.

But this thing is huge. It’s bigger than the actual prop, and I can hardly hold it. So it takes up a remarkable amount of floor space. So I laser cut an acrylic topper, and I use it as a coffee table!

The intention was that this would be a prop useable for DragonCon, but as I said it is huge. I think it measures 16 inches cubed. I have trouble picking it up, due purely to the dimensions, though the weight would be a problem an hour in…

I’m thinking that it might be worth it to make a smaller one. I’ve only got two months, but I think I can cut down the working time to a two week period, if I do it again, since I know all the steps, and the only real thing I’ll have to buy is stain for the frame. I would definitely laser cut the frame though, before assembly, since it was way too much time to burn it by hand…

We’ll see what that idea comes to!

Shiny

This project took me forever.

I was looking up when I ordered the parasol in the first place. It was the end of September. That was a long time ago, wasn’t it?

This is basically the same one I got, which is the perfect size in every way, except it doesn’t fit well on my desk… So painting it sometimes got touchy.

Now, I then didn’t start painting until the first of our snowstorms. Because what else was I to do? So that was February…

I also have nearly no in progress shots, because I worked on it mainly at night, or when it was raining/snowing, neither of which provide enough natural light to take nice pictures. I do have this one though.

For paints, I used the cheap acrylic for all of them. I’m talking the 50 cent paints at Walmart. Maybe they’re a dollar, but either way, very inexpensive.

This might be why I needed nearly three coats to get the green to look solid, not streaky. The yellow and red didn’t have that problem, but the green and I were not getting along.

But the funny thing is, a few days after some snow melted, and we were back in classes, the power went out at home. I’m pretty sure that’s why I woke up before my alarm. Since it may have been three hours till it came back on,  as expected by the power company, I decided to pack up the project and take it into work.

In my defense, I’m still basically only taking classes. This first year of grad school is basically undergrad part 2. So when I don’t have a class until 12, am I going to do work in the morning? Or rather, on a Friday, with no homework due in that class, what am I supposed to do in the early morning?

So I finished it up, and during my mass photography escapade (where I also photographed my shawl, and a yellowtail cami that’s upcoming, and maybe something else too), I got some nice pics.

And there you have it! A lovely parasol in a Kaylee style. Yes, I did wait for the entire post before I mentioned Firefly. Can you notice my restraint?

Because I’ve been squealing internally ever since it was finished.

Quiver – Part 2

My unfinished quiver sat around for over a month between the first part and todays, but it was mostly because I was trying to determine the best way to sew it up.

I thought I could maybe butt up the two sides so they would form a solid point… My leather was just a bit too floppy for this.

I thought maybe I could fold under and sew it up like a seam. My leather had just too much structure.

And then it became the lace versus waxed thread debate. And where would I even attach the belt?

So I waffled.

initial

But I knew that my TARDIS belt was going to be made of leather, and I have a policy for leather goods and myself, that I am not allowed to cut into leather if I’m still working on a different piece. So I had to finish the quiver.

stitching

Using my trusty awl, I punched holes every 1/4 inch both up the seam line and around the bottom, since I knew I’d be attaching a cap to the bottom.

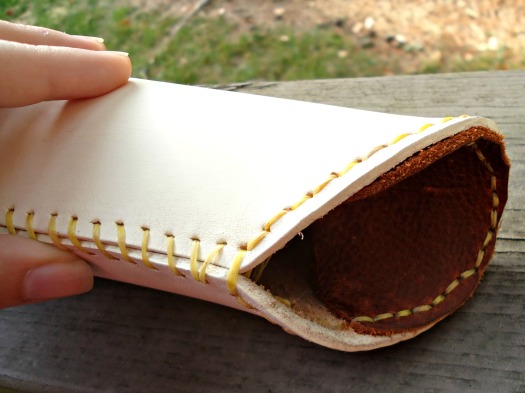
Waxed thread was my “weapon of choice” in the end. I used a whip stitch, I guess, to sew up the seam, which seemed to hold it very stably.

inside

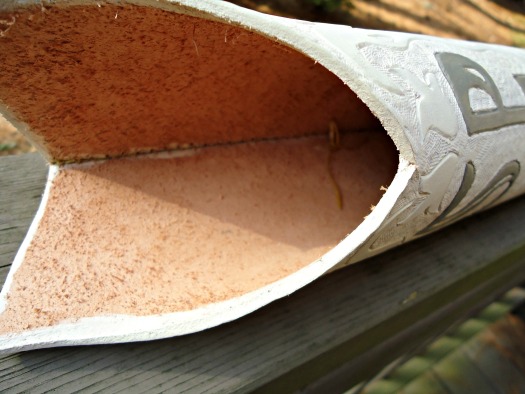
I had intentions of attaching the belt by running it through the quiver itself, but that didn’t pan out. For one, I only had as long as a partially used cow belly, which was not as long as I was expecting. Threading it through like that also made it really blocky and uncomfortable. Comfort is key in the costume game, especially since I’d already be wearing a corset, which is enough comfort-restraint.

top

So I ended up running a few loops of waxed threads to serve as attachments for the belt. It works well for now, but I’ll probably need to adjust it in the future.

Then I actually needed to make the belt.

belt

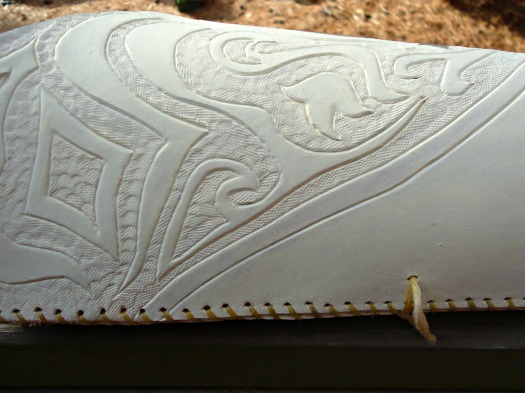
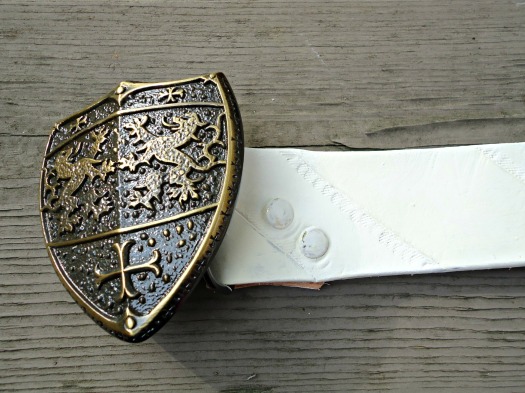
I wanted it to be something I could potentially wear, since I love the buckle so much. Isn’t it just the cutest shield ever? But I also knew the belt had to be long in order to cross my body like a messenger bag. So I made it as long as I could, and punched holes in various places, so I could wear it at my natural waist, or through jeans, or through the quiver. I cut a simple design using my swivel knife, just diagonal lines, and I tooled a few sections for some visual interest. It doesn’t show through the paint though, so I ended up painting a very subtle alteration between cream and ivory, based on my ability to mix paints well, which ended up with a more ivory batch right at the end of the painting cycle.

So that’s it for my quiver! Isn’t it purdy?

Quiver – Part 1

Even though Susan doesn’t actually wear her quiver with her final gown, it was still a must have prop for me.

Though it is very likely that the cosplay I see is not a full indication of people’s geeky interests, I’ve always thought that Narnia fans, of the movies more specifically, are more subdued (aka they don’t cosplay). There have been a few wonderful ones, but altogether the cosplay quantity is rather low.

tease

So the likelihood that I would be easily recognized from the costume alone (and with my hair, not a wig) is slim. I’m already risking the Lucy vs. Susan issue, with the red hair, but anything to make the costume more recognizable is good.

Plus I’ve always wanted a quiver for all the imaginary arrows I have.

The problem with Susan’s quiver is that it is likely meant to be ivory, or rather it was carved in one piece. There have been some good reproductions made with PVC pipe, but I didn’t have the requisite skill set. So I decided to use leather, something I do know a bit about.

I took pictures like this was a real tutorial, at least for this first half…  and then I let it sit for two months before I finished it. But that’s another story.

pattern

I started with posterboard, knowing that I had a limited amount of leather big enough to create this quiver. I drew a pattern, dragged a belt from the closet to “try it on” and fiddled with the pattern until it felt right. It slimmed down a bunch, and shortened as well, so that it would feel proportionally right on me.

Then came time to cut into the leather. I managed to find a big enough piece, and I used my rotary cutter to cut clean lines through… Leather is like fabric, right?

begintool

I had previously drawn designs for the top of the quiver, but they  didn’t precisely fit, so after some tweaking I got a useable pattern and traced it on. I cut into it with my swivel knife, and began tooling.

finishtool

And here it is with the design finalized!

The real quiver has a picture of Aslan carved in the bottom, but I didn’t want to take this that far.

So I began painting. I had both white and cream acrylic paint, neither of which was perfect, so I mixed the two and diluted with some water.

first

The first coat turned out streaky, and it ended up taking 4 coats before I was satisfied. In the tool-work, there’s still some areas of low paint, but I’m learning to give it up.

DSC03285

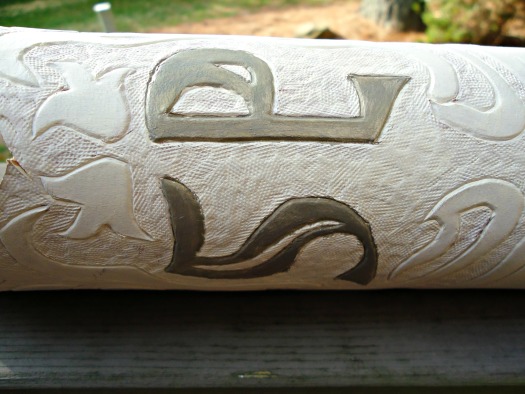
I then painted the initials with a grey and gold mix of paint (though technically it was a mix of cream, white, black, and gold), with the gold added in for a bit of sparkle… Not that its really visible, but it can be seen in real life.

Look out (hopefully) next week for part 2 of my quiver fun!

There’s a swimming pool in my library!

So the leather dying didn’t work out as well as I had hoped, so I got out my acrylic paints and went at it.

See? Not lovely, but for the first time working with leather dye, I think I made out well!

I washed it with some blue, but then it was a little too bright.

Then I washed it with a bit of black, forgetting that I still didn’t have any white to soften it to a dull grey.

So I then washed the entire bit in water, and wiped off most of the black. It left a nice marbled appearance to the leather.

Like an aged River Song journal.

This left me in a good mood about the state of the project.

Then I got busy, so I ended up waiting  to sand the altoids tin for a while.

Note to self. Don’t sand indoors. Perhaps wait to do it outside with a slight wind. Breathing in aluminum dust fumes was not my best decision.

By the way, I’m beginning to think that Sharpie products are little bits of miracle.

All summer I’ve been loving the Sharpies with the super fine tips, as I’ve been using them for sketching and stuff.

But my new favorite is this metallic copper one. It adheres rather well to the sanded aluminum, and even looks nice!

Not a whole lot sticks well to this aluminum. I tried to use the gold paint pen I made my Farnsworth with, but it didn’t adhere well. It might have been the pen, or that I was using it over the original altoids paint, but nevertheless.

This looks so much better. But it may need another coat.

Especially after I sanded down the altoids tin. In hindsight, this probably should have been done before the clay “water” was put in, but oh well.

A couple weeks later, meaning this past weekend, I bought some E600, and glued the tin to my leather cover. It took two tries on one of the sides, since the tin was in at an angle, making the leather sides look wonky.

So then I remembered that I still hadn’t painted the inside, so I set to work doing that.

Got it painted with the handy acrylic paints, then I covered it in modge podge to seal.

And here it is:

My swimming pool in the TARDIS journal!

Now off to finish my Belle dress…

More than just an oversized IPhone

This is my final wrap up post for my Altoids tin Farnsworth.

farnsworth - front


I’ve decided that for projects that span more than two posts, I want to give more of a real goodbye.

Both the projects and I deserve it, in my humble opinion.

Here are the links to each post, in order from inception to completion.

u17162wh1303x040066r103

Oh Farnsworth, my Farnsworth

farnsworth - dsc09302

Busy Bee

farnsworth - dsc09336

Elbow Grease

farnsworth - finished-squiggle

Loving the Fugue

farnsworth - left

I’m not laughing at you, I’m laughing with the horse

farnsworth - top

Proceed with the splaining.

The Farnsworth has fascinated me since I started to watch the show. I’m not actually a smartphone user, so at the time, it was really neat to have a communication device that was more face to face.

Yes, I know that there are apps like Facetime and Skype that will let you talk face to face, but I’m not quite up to date with technology.

Some of my thoughts on the construction:

Next time I want to make an altoids sized prop, I should weigh my choices better. If I’m going to cover the lid with something, like felt or paper, then an Altoids tin is fine, as the embossed lid will be covered. But if I’m just going to paint it, then I should find a tin without embossing.

It’s very neat that underneath the covering of the tin is a somewhat glossy coat. It didn’t even feel all that scratchy even with the sandpaper.

Rustoleum smells. But it does cover well, and I really enjoy the shiny coat from the glossy black paint. I do need to buy a few extra paint brushes next time. Or decide to do painting like this when I have a sink that is not white to wash the brush in. White porcelain and black paint don’t exactly work together. In my previous experience, at least. I decided not to wash out my one paintbrush, so each time I did a new coat the brush bristles were less and less bendable.

Wire requires proper tools to bend and work with it. I have bought some since, but I now definitely know that eyeglasses cases and nail clippers are not suitable.

Check the shipping address to make sure you aren’t sending your purchase to one of the other many addresses you may have on file. It happened to me… three times now. In the past month?

Realize in advance that cardboard is a wonderful substance, and though its not underappreciated, it should be acknowledged more often.

Glass can be quite heavy.baby-farnsworth.jpg

But all in all, the Farnsworth looks really good in my hand, and even in its diminutive state compared to show-accurate ones, I think its a pretty good build!

Onwards!