It’s time to talk about the gauntlet.

So picture the scene: I have been waiting for a year to see Avengers Endgame. In some ways I’d been waiting for this movie since I first saw Iron Man in 2008. The whole year I was trying not to speculate and guess what was going to happen. I’ve tried to not watch trailers, since I was going to see it no matter what. I caught a couple pictures, by accident, but other than the white team up suits I didn’t see much. I wait until the weekend post premiere to see it and manage to avoid spoilers on the internet.

I’m in the theater, one of my small local theaters which has thin walls, but my movie is going to be the loudest anyway. There’s a pretty good crowd, but there’s only about 4 people in my row 3/4 of the way to the back.

I am shocked by the time jump, but liked the plot device. I enjoy the Bruce Hulk combo, and Scott’s time travel banter. I like Morgan. I can see why Clint has changed. I cry over Black Widow. And then they create the gauntlet. The Iron Man/Hulk/Nano gauntlet to take the strength of the infinity stones to make another snap. It’s a great team up of all the sciencey people of Marvel!

20190827_10114721

And then the “twist.” Thanos comes back to the future from the future past, and wants the stones, so he blows up the Avenger’s HQ. And suddenly, the person who has possession of the gauntlet is the least powered person on the team. Clint Barton.

In the MCU, he’s survived on wits, on archery skills, and on hand to hand combat. But he doesn’t have a super suit that flies or shrinks. He doesn’t have sorcery or superpowers. He’s just a guy. A guy with skills, but just a guy.

That was the image that stuck with me when I left the theater. Sure, I cheered over the “We’ve got this” moment, I cried over Tony, I was heartened by the win, and was pleased by the dance. But a guy playing keep-away with a seemingly unbeatable alien. That’s what stuck.

So when I realized I could go to DragonCon in August, I decided to make a Hawkeye/Ronin costume and carry around a gauntlet to recreate that moment. It’s maybe two minutes of the story, and probably only 30 seconds of screen time total. But that’s what DragonCon is for! Recreating beloved moments, and someone will get it.

Even before making the costume, I knew I needed to make the gauntlet, and I knew that would take the longest time, mostly for drying and waiting and mistakes.

Foam was new to me. I found my local Harbor Freight and bought the two different types of floor mats they had, and used both for the costume, but only the thinner rolled one for the gauntlet.

I found this awesome 3D Pepakura model for the gauntlet from MasterMod, and printed off a cardstock copy so I could test out the size and how it fit together. Cutting those pieces nearly broke me, and I hadn’t even gotten to the foam yet.

20190730_12162003

Deciding to size up a bit, I printed out a new copy, and set to work cutting the foam. I was using a couple of fresh X-acto blade, and was still having trouble, so next time I’ll follow suggestions to use a scalpel.

I would cut out some pieces, and glue some pieces, and cut some pieces and glue some pieces. At the time I was living in a townhouse where I only had one room for both living and crafting, so I didn’t have the space to cut and arrange all the pieces at once.

Contact glue was my weapon of choice for assembly, and boy is it smelly and sticky like mis-made caramel sauce. The stick, not the smell. Something I didn’t consider until it was too late was that the edges of the foam should probably have a specific angle in order to fit together properly. Oops!

Also, don’t let the can of contact glue fall over and spill into the bottom of a bookcase. I got lucky, and the carpet underneath the case wasn’t affected, but it could’ve been disastrous. And eternally smelly.

Cut and glue and cut and glue and cut and glue.

Okay, so then it was assembled and I needed to get a move on, as DragonCon was coming up quick.

20190827_10121926

Plastidip and North Carolina humidity in August doesn’t work well together.

Average spray paint is actually worse.

Masking off tacky spray paint and mildly tacky Plastidip is less than ideal.

20190827_10120123

So I grunged it up with some black and brown acrylics.

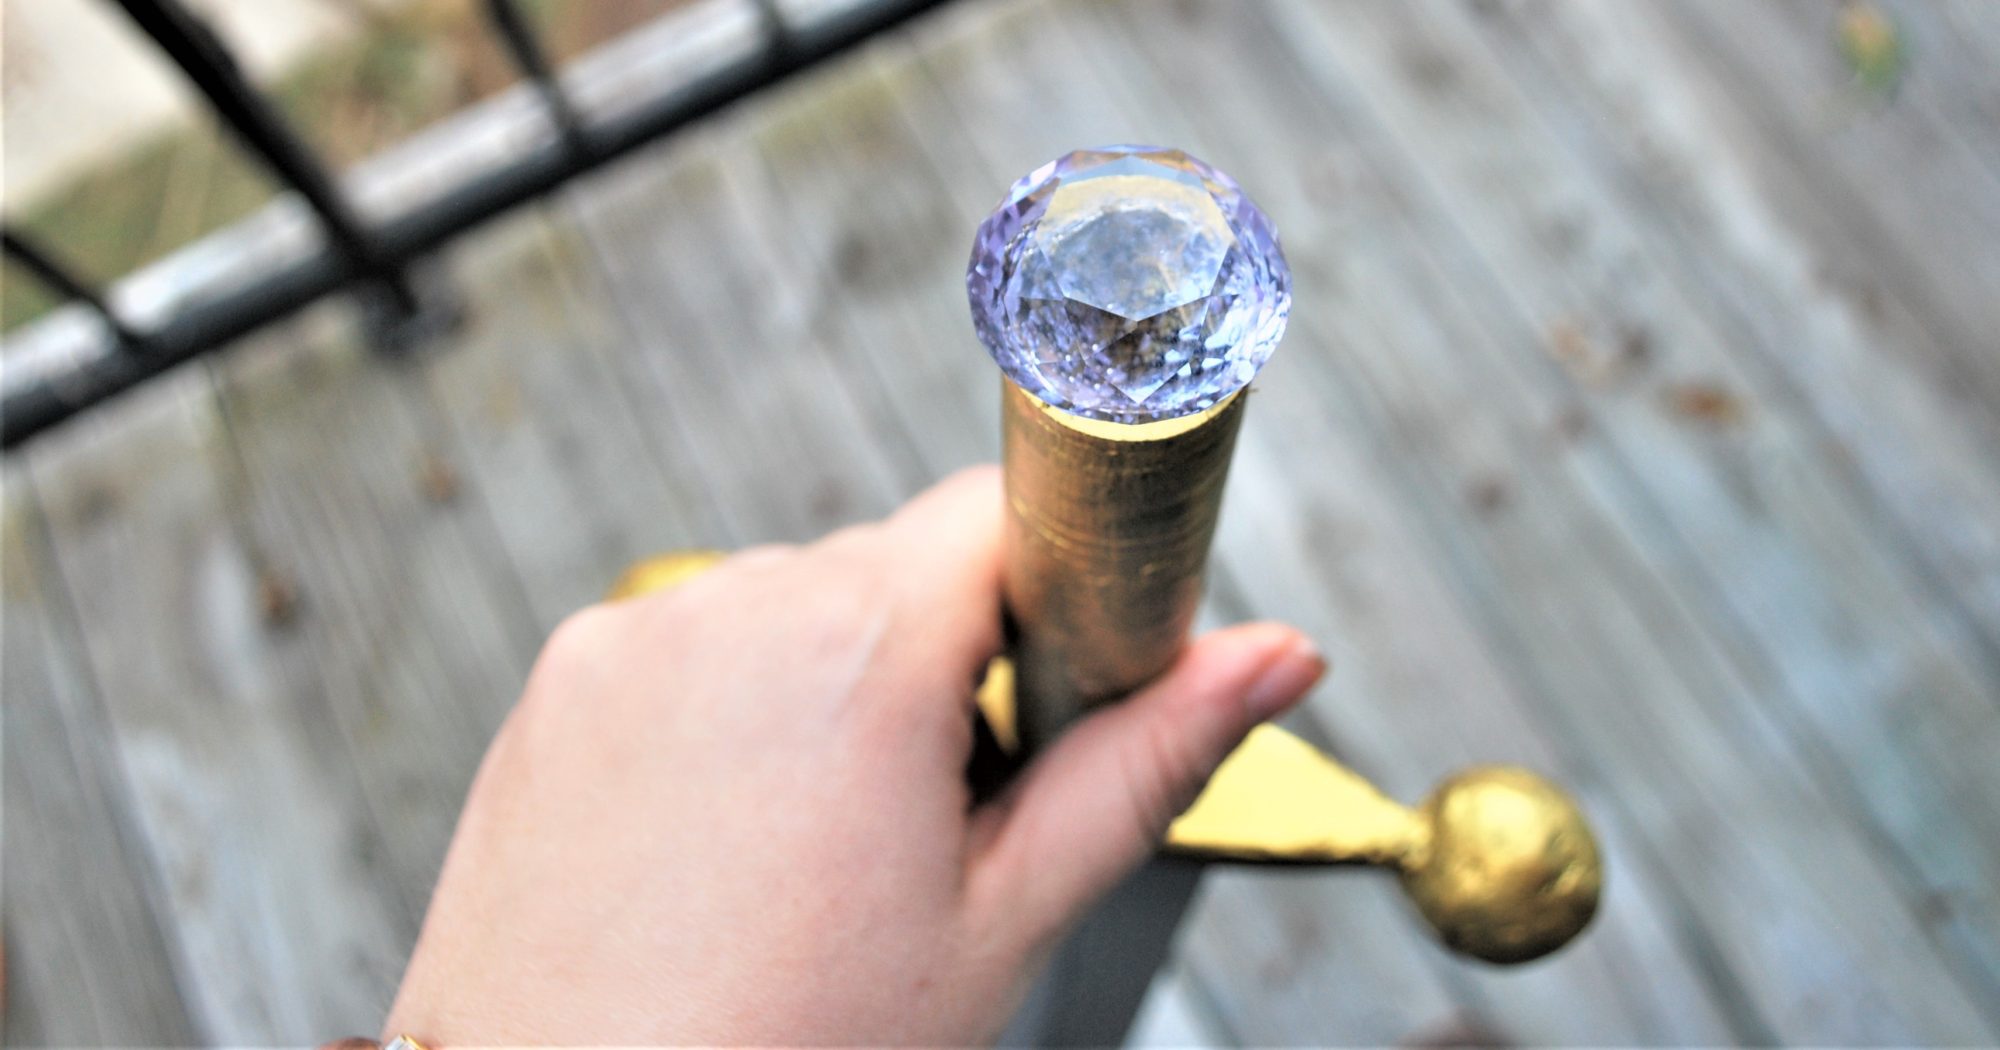
The jewels. Those were a treat. I found them in a grab bag of rhinestone jewels at Michael’s. I spent about 20 minutes sitting on the floor of the young craft kit section one night after a work shift making sure that I had the correct colors and shapes if I was going to spend 15 dollars after a coupon on a bag of jewels I might never use afterward. Massaging a bag of craft jewels 15 minutes before closing is… not a pretty look.

20190827_10122627

I think I used contact cement to attach them, then used some kind of puffy paint (craft supply hoarding for the win!) to really cement them in.

For the inside, I decided to keep my super glue, and my wallet inside the glove, which would mean that I needed a pocket inside.

20190922_07485904

I found some scraps from the Merida skirt, made a zippered pouch, then glued in the pouch and some lining to black out the inside of the glove.

And that rounded out my Nano Gauntlet! It now graces my curio cabinet in a tribute to Ironman.
Proceed with the ‘splaining

Did Claudia’s Farnsworth not disintegrate in the penultimate episode of this season? And then reappear in the season finale?

farnsworth - front

Well, whatever happened, I’m finished my version.

farnsworth - lens

I received my lens yesterday, which nearly completed my prep.

I still had not managed to solve the problem of the combination lock, as I needed to see how big the lens would be within the tin before I could move on to cutting up the microphone tip and making a combination lock.

farnsworth - tools

There were a few circles of the microphone mesh, and a few ideas about the lock that circled through my head.

With a little work from my gold paint pen, I ended up using a rubber piece that I had cut off the microphone while I was taking it apart.

farnsworth - notebook cover2

The plan came together quite quickly last night.

farnsworth - notebook cover


First the cutting out of the black plastic piece. I had the cover from an old black Fivestar notebook handy, which I use to keep wall decals safe as I travel to and from dorms and college and such.

fansworth - mic cut

I had some extra space in the bottom of the tin that I could raise the plate structure up, so it looked more 3-d and still manage to close. I did this with a few layers of cardboard. I had to cut out a space for the wire mesh, though, so it would sit flush with the cardboard surface.

Then I cut out the circle to reveal the wire mesh, and glued on the “tuner.”

farnsworth - lens glue

The lens needed to be glued to some paper, to give it that blank screen look.

The assembly continued, and all pieces were glued together with super glue, which currently is my only adhesive option.

farnsworth - top

And I got my finished product! Do you like it?

farnsworthleft1

Edited: As of right now this is the end of this project. Follow it from its inception, to further planning, to sanding and painting, to the wirework, to the gold detailing, to (this) the gluing of all the components together.

Loving the Fugue

I’d certainly not want to clean out the Warehouse’s neutralizer annex.

My first coat of paint is complete!

farnsworth - dsc09354


Yesterday I had completed the coat on the outside of the tin, and today I painted the inside.

farnsworth - wire

Here’s the wire that I had bought to imitate the squiggle pattern on the left side of the Farnsworth.

u17162wh1303x040066r103link

Did you know there are 13 of those squiggles? I thought it was clever.

farnsworth - cutting-implements

I did my best to straighten the wire out, and then I clipped a piece off. I don’t have my wire cutters on hand at the moment, so I grabbed my scissors and tried my best. Then that didn’t work out, so I brought out a trusty craft knife (which I was super careful with, by the way). Still needing something stronger, I used my nail clippers, which did the trick with some bending at the connection point.

I managed to get the plastic coating off of the wire with the craft knife, and started bending. I ended up using a glasses case for some leverage.

farnsworth - bending

I’m only using seven squiggles because my wire is thicker than I had thought, and this many provides the right aesthetic appeal.

farnsworth - finished-squiggle

If the paint was dry enough, I would have arranged them on the tin for you, but unfortunately its still a bit wet.

I still haven’t quite decided how I’m going to imitate the tube from side to side and the rubber washer like thing, but I will be working on that.

Edited: As of right now this project is finished. Follow it from its inception, to further planning, to sanding and painting, to (this) the wirework, to the gold detailing, to the gluing of all the components together.

Elbow Grease

It’s hard work to sandpaper the finish off an tin.

Satisfying, but it requires a fair amount of elbow grease.

farnsworth - dsc09339


I took a trip to the hardware store yesterday to pick up some supplies.

I started using the sandpaper on the tin, starting on the bottom, which cleaned up fairly well.farnsworth - dsc09333


The sides of the tin were much harder, with the curves and the lid hinges.

farnsworth - dsc09330

I gave up mid-way on the sides and started on the top.

farnsworth - dsc09336

Once I was finished with the entire outside, I scored the inside a bit with sandpaper.

fansworth - dsc09337

If you haven’t gotten altoids in a while, you may not know that the top of the tin is actually raised, both with the banner, and the word Altoids. I want to have a Farnsworth, not a Farnsworth masquerading as an Altoids tin.

I tried lightly pounding the tin with a mallet to lower the raised part. Key word being tried. I think I flattened it a bit, but I decided to stop when it wasn’t working out very well.

farnsworth -


Then I started the painting.

I looked at Claudia’s Farnsworth a little more in a few different episodes and realized that the casing is entirely black, inside and out,  so I had bought some Rust-oleum paint and started working! I’ve got the first coat on the outside, and tomorrow will be working on the inside. Maybe two coats, and it’ll be good to go!

Then comes the inside work, which will be the fun part!

Edited: As of right now this project is finished. Follow it from its inception, to further planning, to (this) sanding and painting, to the wirework, to the gold detailing, to the gluing of all the components together.

Busy Bee

So you know when you’re buying stuff on Amazon and you just need like twenty cents to get your Free Super Saver Shipping?

That was me today. So I bought one of these. And I don’t know what it is. Or how I’ll use it.

But I will find a way to!

farnsworth - DSC09302

I bought an altoids tin, and am working on eating the candy up, so I can use the tin.

We’ll see how long that takes!

u17162wh1303x040066r103link

Do you see that tiny looking lens in the center of the Farnsworth? I’m assuming that is the camera lens, otherwise I would have to wonder how the image is projected to the other person’s Farnsworth.

I’m hoping to use a scrapbook bubbles for that lens, on top of of a mirror-like paper piece. This will then attach to the black plastic I’m hoping to use for the black top layer of the right side of the device.

By scrapbook bubble, I mean one of those little lenses that you can put over pictures to make that part of the picture a little bit magnified.

Well, I’m sorry to report that I haven’t worked on the sweater. But I will. It’ll be happening. I hope.

But I’m happy to report that I’ve finished the altoids, and I’m ready to start working on my Farnsworth!

Edited: As of right now this project is finished. Follow it from its inception, to (this) further planning, to sanding and painting, to the wirework, to the gold detailing, to the gluing of all the components together.

Oh Farnsworth, my Farnsworth

So I want to make a miniature Farnsworth for my Claudia costume, because I’ve always adored them. They’re fantastically intricate and such a cool idea, and Claudia’s is the coolest.

7726033784_0490847b0f_zlink

Artie gave Claudia Farnsworth’s Farnsworth. The creator’s personal creation!

It has such lovely black smooth finishes and gold/copper details, with what looks like a combination lock cover as a dial, and the top of a stage microphone for… the microphone.

u17162wh1303x040066r103link

My Farnsworth will not be full sized, as I don’t have the funds for a larger scale endeavor, and I’ll probably make it out of an altoid’s tin, or something like one. So a much smaller scale, but still pretty fun.

steampunk-altoids-2

There is this wonderful tutorial from TLC about de-finishing an altoids tin to create a steampunk tin.

I’ll be painting the left side black, while leaving the right side as is, with a black piece of cardstock or a stiffer plastic sheet for the center divider line.

farnsworthcinsidelink

I’ve had some luck with making glue “lenses” in the past, though never on this scale. Normally it’s just a bit of Elmer’s glue that has accidentally dropped on a table or something while I’ve been crafting, and it comes up as one nice circle. An alternative could be finding an eyeglass lens, or perhaps the lens from a kid’s telescope or kaleidoscope.

I’ll be getting some copper wire to recreate the pattern on the left, perhaps with a black rubber pipe fitting. I’m not quite sure what to use for the tube right now, but if I take a trip to the hardware store, I’m sure I’ll find something.

For the inner workings of the Farnsworth, I’m planning on raiding the hardware store for wires, washers, dowels, etc. I’m hoping to get hold of a real used watch battery, but I’m planning on faking the other batteries with dowels and little blocks of wood.

Claudia_Farnsworth_Tshirt_CUlink

I’m planning on getting either a metallic Sharpie, or some other sort of metallic marker to write and draw out the lovely details of the Farnsworth.

So that’s my Farnsworth plan. I’m hoping to start work on it soon, even if it is just in patches. I’ll keep you updated!

Edited: As of right now this project is finished. Follow it from (this) its inception, to further planning, to sanding and painting, to the wirework, to the gold detailing, to the gluing of all the components together.