Yellowtail

I’ve had this project done for weeks now.

Maybe even a month or two.
Definitely a month or four.

front

A long while… but I’ve finally fixed it up so I like it and wear it, so ours time to share!

This is my first version of the Yellowtail Cami. It’s a cute pattern and fills in with my wardrobe needs.

I’ve been buying camisoles from Forever 21 for years now… they’re just so comfortable and inexpensive and great for layering. But all of mine are stretching out. The elastic to hold n most of them up had stretched out to twice the normal size. Now, I could just fix it with new fold over elastic, but where’s the fun in that? Plus slippery fabric.

back

I bought this pattern at the same time as the Dandelion Dress pattern (which I still need to show you), since the design lines were so unique. And it looked more sophisticated than my normal ones.

But for my first time through I wanted to use scraps and scraps only, so I happened to have enough t shirt weight fabric, so I started with that! It came together rather quickly, with only some minor confusion involving the top front pieces, and especially with me sewing them in backward.

And I had a top! But I found that, at least for this fabric, the fit was off. Some of this was due to pressing errors, but I think I should have just sized down on the pattern.

I ended up taking in the side seams and adjusting the angle of the front top pieces so it would lie flatter across my chest, but it still gapes a little. With a smaller size and stretchier fabrics this problem will probably go away.

I also will probably lengthen it in my next make as well, since I like my tops to reach at least a couple of inches past my belt. This was in part due to my cutting choices, and partly due to the cut off the pattern.

cover

Most of the time I wear it as an undershirt-type thing… Which is really how I wear camis anyway. But I like that the top is pretty and peeks out nicely at the top, since its a higher cami than I normally wear.

But all in all a nice little top! I can’t wait to make more!

TARDIS Tuesday – Cropped Jacket

I’ve determined that Tuesdays are going to be TARDIS themed here in my little corner of the internet.

You see, I decided the week before Halloween that I wanted to wear my Tardis costume, if I finished it in time. But at that point I had completed less than half of it.

It’s time to share my trials in completing these four pieces of my costume, and maybe by then I’ll have worked a bit on the skirt!

The first part of the total costumeĀ  I made was a bolero jacket. I had just completed my Sorbetto and figured that would be a good pattern to build off of for this jacket. It was actually almost a month before Halloween, but my momentum stalled after I finished it… that does seem to happen a bit.

fixed

I knew it was going to end up over a button up shirt, so it couldn’t be skintight, and it had to be comfortable as well. Remember me telling you about this weird shirting fabric that I used to line my graduation dress? It made another appearance as a muslin and subsequent underlining here! It provides a good amount of weight to the jacket which really makes it lay beautifully.

For the pattern, I just folded the pattern at the pleat and traced the shape off. I rounded the front up to the center and added some darts at the back. Then I realized that in order to use the button that I’ve been saving for over a year I would either need to overlap the front or create a button tab. My buttonhole ended up a bit screwy, and I don’t have matching thread, so I’ll probably redo it, but it worked in a pinch.

Some bars were added on in order to attach the cape, and some beads… the beads. I wanted to incorporate these lovely pendants that I repurposed from vintage earrings, and when I saw Journey to the Center of the Tardis I thought they would be perfect in that context, but I still wanted to use gold fake pearls… until I ran out of them. So I added some silver ones. And then a strand of them fell off during Halloween night. So I need to do some fixing.

closerThe strand that fell off is discreetly on the other side of the jacket in these pictures. Because I was feeling a bit shameful.

But there’s my jacket!

(When I can get pictures of me actually wearing it, I’ll update the post!)

My Most Comfy Tee Ever

This fabric is one of the softest I have ever worn. Especially for a jersey.

I want to live in this fabric. Forever!

Unfortunately, I only have a finite amount, since it’s a mystery fabric find from a discount fabric store in New England.

So knowing that I only had a bit to work with, I wanted to make sure I used it well!

And I made a Nettie. Not this Nettie, which I still love dearly, and should remember to wear more often, but a Nettie shirt.

front

After seeing Lauren’s Nettie shirts, I had a plan to make a few for layering shirts once winter showed up, so I’m glad I started early.

Knowing that I wanted to use the higher back, I printed out a new copy of the pattern, and glued it together. I’ve begun to glue-stick my patterns, so I can easily take them back apart for better storage. Gone are the days of folding bulky taped patterns, at least for future pattern buys!

For sizing, I ended up using a slightly odd combo. I sized up one (from my mid-back pattern) at the shoulders, and through the armscye, but cut the sleeves a little skinnier to my original size, and after the waist I swerved out to two or three sizes up. I cut the bottom off around where the front turns into the bodysuit, and I attempted elbow-length sleeves, which is what all my long sleeve shirts turn into anyway, after I push the sleeves up!. In the future versions, I might even lengthen it, but this is perfect for this version!

back

I sewed it up according to the directions, but I left both the bottom and the sleeves unhemmed. I’ve given myself a policy that if it doesn’t need a hem, it shouldn’t get a hem. Most people around me already know I make my own clothes, and those that don’t will mostly not even notice!

There might even be enough fabric to squeeze out a Yellowtail, in conjunction with some other fabric, so I’m quite pleased!


Knapsack

At the beginning of the semester I ran into this problem…

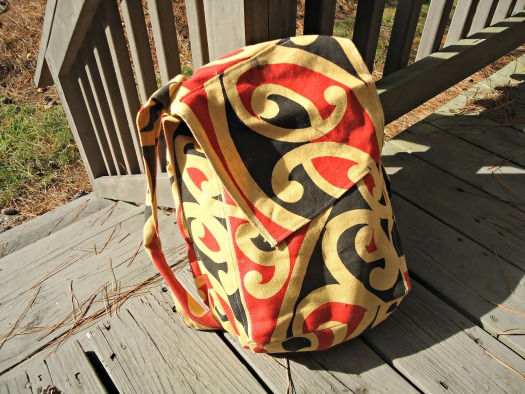
whole

My trusty backpack that I’ve used since 8th grade was just a bit too big for what I needed to bring into grad school each day. You see, I have an office, or rather a cubicle in a shared office with three others. I’ve personalized it and everything. Most of my prop type things have migrated there. So I don’t have to carry around an entire world, since I’ve got plenty of space to stash stuff.

And my “laptop” bag was too small. I made it specifically to carry my old laptop, which was a smidgeon bigger than my current one, and one or two notebooks. I have managed to stuff up to 6 slim notebooks and the laptop, but I was constantly worried about it breaking. I am planning to use it as a “round campus” bag, though.

But I really needed an in-between bag.

So I made one to fit my laptop!

I cut the back to the approximate dimensions of my laptop, adding about an inch to the width, and a few to the height, which I later cut down to size. The width of the laptop segment was maybe 2 inches? I measured the depth of my laptop to be 1 inch, and I wanted some extra clearance room, since this was non-stretch upholstery weight fabric. I forgot, though, that my laptop has some curvy sides, which also ends up adding clearance room.

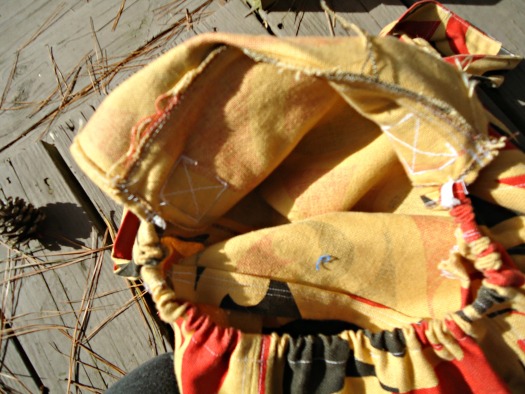
inside

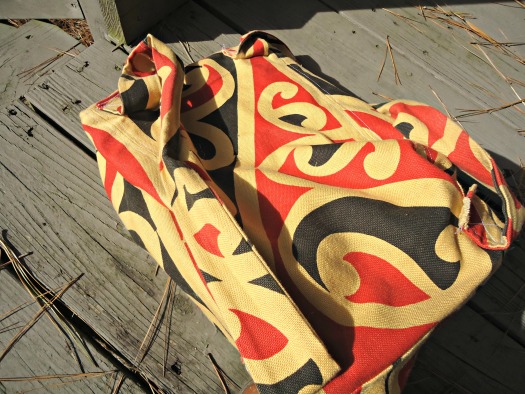
The other bit of side is trapezoidal, made from an eyeballed width of fabric at the proper height, triangled, and sewn up. The front panel was just a longer version of the back. I added a top flap, which rarely seems to sit properly, but I like it. The straps were made up of scraps, and are actually comfy for being un-interfaced and un-padded.

It’sĀ  unlined, but that’s more because I was lazy, and for the most part the seams are unfinished. All the pieces went through my serger, except the top flap, but the seams themselves aren’t backed up.

But it fits everything I need, is comfy, rather stylish at the moment, was free to me, since I was donated the fabric, and I know how to fix or remake, if the need arises.

back

Backpack crisis averted!

Macaron Sorbetto

It wasn’t until this year that I figured out what a macaron was… the almond ones, that is.

Growing up with a family member who despised coconut, macaroon (with two O’s) were not discussed, or talked about, or were to enter the house.

So I just assumed that the two O version was the same as the one O…

I was wrong. The latter is a pastel color rainbow!

front

Much like the Sorbetto I made.

(Jumping in to say that yes, I am wearing headphones for these photos. When it’s just me and my self timer function on the camera, and I’m in the middle of a Thrilling Adventure Hour podcast, I will refuse to remove headphones…)

This pattern has been floating around the interwebz for longer than I’ve been blogging, but I never took much interest in it. I didn’t have many reasons to wear a sleeveless blouse-type shirt, since I was in college… and I’m still in college.

But now I’ve a part time job that suggests business casual attire. And as a newbie to the world, I’m sticking (mostly) to it.

I’ve got plenty of stuff that is appropriate, but I figured that another blouse never hurt anyone!

back

This fabric was given to me when my former boss destashed last year, and even though its not at all my style, I jumped on it. I had been thinking Archer, but in the end that didn’t happen. I’m glad now, as it is very wrinkly right out of the wash, and I have no patience to iron an Archer every wash. A Sorbetto is much more ironable.

The drafting of the pattern seemed nice, and all the sewing went well. If I had worked directly from start to finish (until the alterations) it would have been maybe an hour, hour and a half at most.

Mistake number one was using a small-width fabric, so it felt like I was eating up over two yards (though I do have plenty of scraps).

Mistake number two was using such a wide bias tape, but it was the only one I had in stash that was definitely long enough and happened to match the colors pretty well.

Mistake number three was not pressing my alterations post sewing.

cutefront

My neckline was gaping at the back and the bias tape turned outwards throughout, so it looked very poorly sewn. That was due to mistake number 2. I made darts on the front and the back to fix these, but because I didn’t press it, they still stuck out.

And I wore it that way, even to work, since at the time I was too lazy to get out the ironing board.

But now I want to actually wear it, so out of the corner the ironing board comes…

Sewing Plans, with a Purpose!

Oh dear… It’s been a while.

In explanation – math. Out of my league but its kinda too late to drop the class and we haven’t gotten grades back so I’m not 100% sure I’m failing yet math.

On a happier note, I’ve made a sewing plan.

It seems like everyone is doing it right now. Trendy for the week, I guess.

But for me it’s prudent, because not only does my current math headache end on Tuesday, but I’ve got a four-day weekend coming up, which means sewing time! Especially now that I’ve cleaned the room and can actually walk through it.

My blog posts are perpetually behind, so you probably won’t see much of these for a while, but I felt like putting it down on “paper” anyway.

fabric

So the final sweater is coming soon. I’ve shown you magenta, and beige, and now its finally time for plum. One of these days soon, as finally its sweater weather. At least in the mornings!

AliceHatter-handslink

One of my mini cosplay plans has always been Hatter from the Syfy mini series Alice.

fabric

Mostly just because I have the perfect fabric for his shirt. I’m thinking an Archer. Here’s hoping I’ve got enough fabric!

I’ve got most of the other things too, except the hat, which is actually the best part, so I’ll have to keep a lookout.

fabric

Another Nettie of sorts is up as well, but this time, a t-shirt. My favorite black thin t-shirt is dying, probably due to acid holes that I’ve been ignoring for nearly a year and a half. And I’ve got lots of fabric left over from my Hershey chocolate Nettie, so I’ll be replacing with that!

fabric

My blue velvet and lace dress hasn’t been touched since the last time I posted on it. But I’ve got a “red carpet” event coming up, so if it turns out, that could be up instead of my go-to ready to wear dress. Needs to be danceable though, so that may be a drawback.

fabrics

Seamster’s Dandelion dress was a recent purchase, so I’ve got plans to use this lovely green lace and the grey fabric I made my Aurora skirt from to make up a cute version. I’ve heard I need to muslin it well first though, so I’ll be a good little sewer and start there.

My TARDIS and Susan costumes are still in the works, so those are added to the list as well.

Whew. Does anyone have any tips on photographing just plain fabric? Because it’s pretty darn difficult.

Insanity

** Full disclosure: This insane night was in reality in June… I’m just slow on the picture front**

You know how the night before something big, say prom or job interviews or the first day of school or the last day of school (please stop me now), you immediately rethink the status of your closet? Please tell me I’m not alone here…
front

I’ve noticed that since I’ve moved towards the equator within the northern hemisphere I’ve been wearing skirts more. Perhaps its the fact that I’m dying from the heat, although I’m quite a weakling when it comes to heat shtuff. Perhaps its that I’m not at home, and that when I leave the house it’s pretty much just for actual reasons, like food shopping and getting a new drivers license and and being an adult is difficult. Needless to say, for all I’m a jeans and t-shirt girl, jeans are just not wearable in heat. Skirts are, though shorts come in as the close second.

So now I’m rambling. But what I am trying to do here is stall a bit. Because tonight I’m endeavoring to document my insanity and give you all the play by play of tonights “entertainment.” I am planning to make three skirts tonight, in the hopes that one will satisfy me tomorrow.
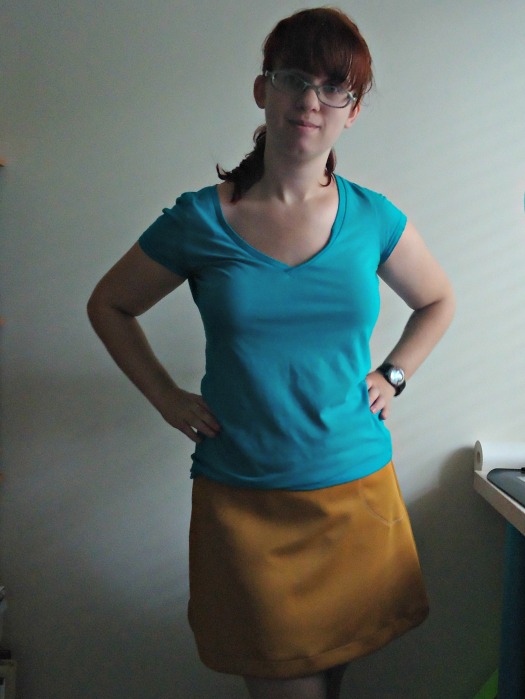
fronty

7:30 – The planning… and 8:00 – The time I realistically started this blog post.

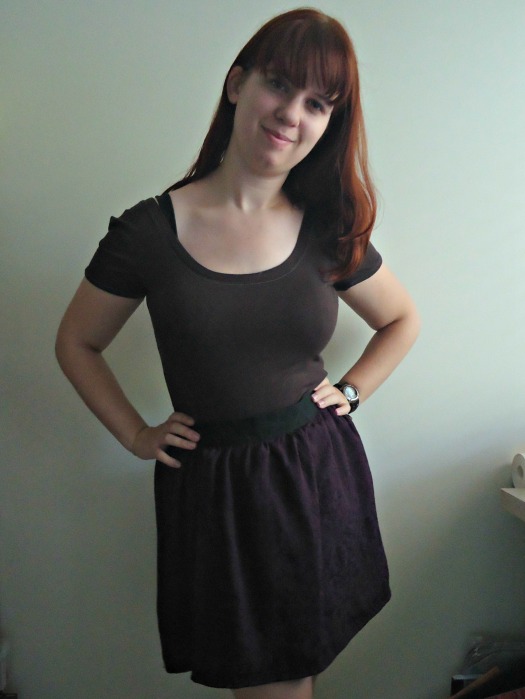
I’ve had the deep purple fabric the longest out of all of these, but in reality it’s been just over a year. I got it while abroad in a remnants bin of the only fabric store that I visited there. It’s really only a half meter, so I’ve been debating what to do, since I wanted to make a blouse. There isn’t really enough for a blouse though, so swishy skirt it is! This is going to be my *fingers crossed* easy one. I’m thinking simpleĀ  gathered skirt with a black waistband… Now I need to find a zipper.

The black interlock in the middle is meant for an A-line skirt… Or that’s what I’ve been telling myself. It’s going to have a waistband, since I realize that I pretty much only wear things with waistband (sorry culottes).

The gold, which happens to be the same gold as I used for my Belle dress, would also be for an A-line skirt. Maybe I should start with this one.
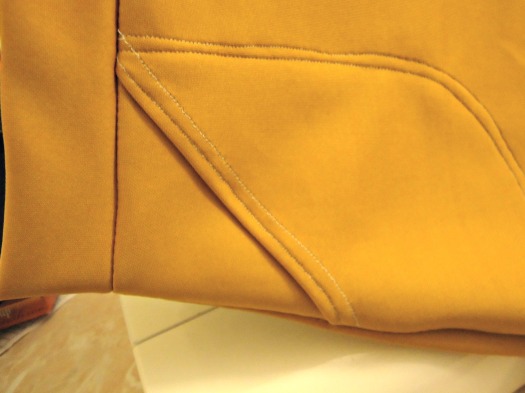
teaser

8:20 – The setting up of supplies

Now’s the time to get out the iron and the ironing board, the scissors and the rotary cutter, and realizing that I haven’t eaten dinner. It’s been a long day, and I shall now pause to reconsider my life as I make mac and cheese… or maybe some leftovers. Leftovers sounds easier.

8:45 – Back on track: ironing

That purple fabric… grr. I hate ironing non-quilting cotton items. I think I suffer a bit from i-learned-to-sew with-the-most-maneagable-fabric-itis. Put I shall press on! Hee hee… I’ll shut up now.

9:00 – Cutting out

For the purple skirt I’ll be gathering all of the fabric in, but I still need a waistband! Need to cut that. Also, cutting out the gold A-line… need to do some measuring there I guess!

10:00 – Sewing of the gold skirt

The internet is distracting. All I wanted to do was find out the basics of knit A-line skirt construction, but no, the internet was much too exciting… Perhaps an episode of Criminal Minds involving twins contributed. It’s hard to keep storylines straight when the same actor plays a set of twins…

But I did find a post from ikat bag which discusses precisely what I was interested in! And it shows pockets! I’ve definitely told you of my love for pockets, right?
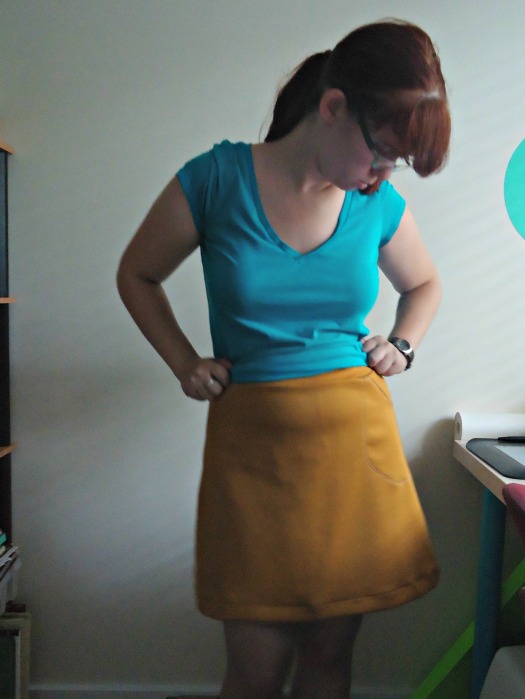
frontyel

11:15 – Sewing of the purple skirt

The gold skirt took a while, and its not hemmed, and honestly the waistband needs to be shortened and reattached, but all in all, not bad. I very much dislike unpicking, so I’ll fix it in the morning. It’s easier then.

The purple fabric is off kilter, though. I don’t think it was the end of the bolt, as both sides are very weirdly off grain. And its fraying a lot…

11:55 – Finally got one side of the purple fabric cut straight, and without further ado I am going to start the waistband process! I figure I’ll worry about the other side (aka hem) when I’ve finished the entire skirt.
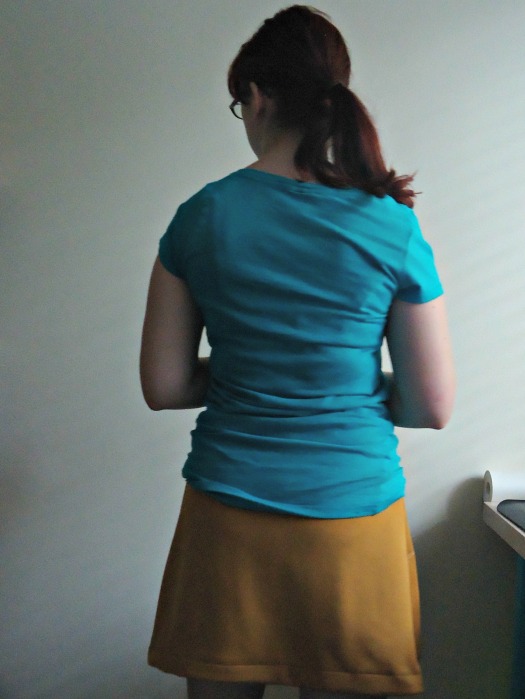
backy

12:15 – I managed to sew the one side of the waistband down, and ironed the folded bit in place. I’ll start sewing soon, but have I mentioned that the purple fabric when hot smells like warm almonds?

12:45 – Finished the waistband and put in the zipper… Time for bed.

I hemmed it in the morning, and was all ready for the interview.
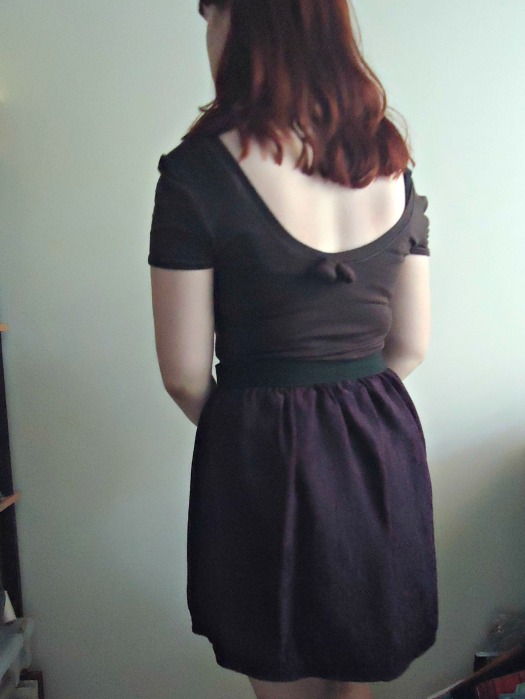
back prple

Never did get around to the third skirt, but it was since made into my black dress

I have learned that while A-line knit skirts are comfy, there is a greater risk of panty-lines, and it’s not good for sprawling when you want to take a nap… not that I have experience with that or anything…

But never fear, I’ve gotten pictures of the two finished skirts now. So, that was one crazy night!
Simple Staples

Looking at my wardrobe, I realized that there were some items that would be really helpful to fill out the holes. For instance, I had a few casual dresses that just didn’t fit, so I cut them down into shirts. I saved the cut edges, and one of these is coming up in a project. But this leaves a gap or two.

pockets

For instance, as much as I don’t like the idea that every woman should have a “little black dress” in their wardrobe, it does come in handy. Especially because for me it’ll fill in the gap between the casual running around dress and the slightly dressy option. So I took some black interlock that I had saved to make a skirt, and I made a dress instead.

What I really needed was a sleeveless dress, one with straps to make it summer appropriate, but because its interlock it’ll still be good for fall and spring. And simple. Something that doesn’t scream special, so I can wear sweaters or jewelry that outshine it without clashing.

back

So I brought out the trusty bodice block that I made the final Belle dress from and started cutting. I only used one layer for the bodice, keeping it cooler, and I’ve now noticed that the princess seams aren’t perfectly where they should be, and I had to take it in on the sides. Time to draft a new one!

I used a fabric band to finish the neckline, and created a simple waistband. I made up a half circle skirt, and added pockets. Who doesn’t love pockets?

Now I’ve got a question. Do you ever make yourself something that works perfectly with one specific bra? Not that it won’t work with others, but that it is meant for one? Because I placed the straps of this dress specifically to hide this one bra, knowing that I’m too lazy to always wear a strapless bra whenever I wear this dress. And after wearing it a day, I know that the straps need to be taken in!

front

It’s a super comfy dress, and filling in a wardrobe gap is always a good thing.

Rainforest Purse

This may be the project I’ve stashed the longest. I never cut it out, or even read the instructions.

I was in maybe seventh grade, or eighth, and I bought this at a moving sale for my favorite quilting store… AKA the store at which I learned to quilt and fell in love with sewing. Granted, they were moving next door, but to a much smaller space and they were getting rid of lots of cut fabric items.

fabrics

And look at these fabrics! Aren’t they really cool? And as for the quilting, I really hate the boring straight line approach, so I went with the lackadaisical curving way.

So I picked up this really neat looking purse pack. Originally I think it was supposed to be $20, but I got it for five… Which was probably better considering that my allowance was probably about five at the time, so twenty would have been extravagant for me. It’s called the CQ Quilter’s Purse, I believe.

But I am on a mission to finish projects, and this one was eating a hole in my blog (ship’s) hull.

teaser

Quilted the fabrics together, cut out the pieces, made the piping, and sewed it together in an afternoon! Or, rather, afternoon and evening… I took a long dinner break.

It’s the perfect size for a project purse. Enough room for all the necessary purse constants as well as a small knitting project. Like socks. Such as the Christmas presents I’m working at… I should get back to work on those…

Knockoff

Have you ever heard of the pattern company Your Style Rocks?

It was a collaboration between fans/designers and patternmakers to create patterns created by the people! But it’s been dormant for a few years now. Some of the designs look great and some are not my cup of tea. The two I gravitated towards were the Eva Dress and the Our Own Pretty Ways shrug.

front

Back in the beginning of July I walked into a Hancock Fabrics and walked out with the remaining fabrics for my TARDIS costume, as well as some lovely turquoise rib knit. Or at least I call it turquoise… I’ve learned that the concepts behind blue based colors often vary between people.

I knew at that point that I wanted that shrug. Now, my fabric was obviously not sweatshirt material, being a rib knit, but now that I’m in the South I may not need heavier materials as much. So that wasn’t going to be a problem.

side

The real problem is that I don’t have easy access to a printer. And it costs 15 cents a page at the library. At least until I find a cheaper option or buy a printer, pdf patterns will be of little use to me. Which sucks cause there’s so many great ones.

So instead of printing out the pattern I decided to mod something I already owned.

back

I took the Plaintain pattern from Deer and Doe and copied it onto newspaper. I didn’t initially change the back, though later on I added darts when I experienced lower back gappage.

But for the front I raised the neckline to a crew neck style, and cut away the most of the bottom edges in an s-curve shape, to recreate the just over bust hugging style. Then I used a fabric band for the bottom hem.

The sleeves were as patterned, and I hemmed them by doing a simple foldover hem.

hood

The hood was frankensteined from some scraps and more of the fabric (AKA I hoped to use just scraps then ran out of usable ones). I had a pattern piece for it, but it’s gone missing. I’ve cleaned my room several times since then, and it probably went the way of the trash can.

I sewed the hood on, and attached some hooks and eyes, and voila! Nice knockoff shrug!

teaser

And my first not in-my-living-space photoshoot! I took my new tripod out for a spin. With my simple point and shoot camera, though, I have to use the self timer. My options are 10 seconds and 2 seconds, neither of which are convenient, but I’m working with what I’ve got… And a DSLR and camera remote is going on my dream wishlist… and my to-scour-Ebay list.