Forest Dandelion

full

I made this for Indie Pattern Month back in June, but it’s taken me this long to fall in love, I guess.

dress2

Partly because of the way it hang as a dress, and partly because as much as I try to stay healthy, summer tends to bring out the junk food and bad habits for me, and this dress is not very forgiving in the stomach area. To be honest, my stomach area is my personal self esteem weak point, and I try my best to help myself in that area by making clothes that I feel good in.

So I cut off the bottom of the dress and made it a tank!

I’ve worn it a bunch now, and I love it this way!

side

Details then…

This was really the third iteration. The first was a straight mockup of the smallest size made of  stretchy fabric, specifically the leftovers from my Peanut Butter Cup bodysuit. It wasn’t terrible, but I needed to make some alterations. I added room to the bum region at the center back seam, and I added a bit in the bust area, plus I “reattached” the yoke pieces to the main pieces, so I wouldn’t need a seam there.

The second version was using a fairly stable, with more give than stretch, ponte I think. Definitely feels like polyester, and I love this version. Except the print is definitely not my thing, it being so floral and dark. It makes some awesome pajamas, though. The neckline was too high for my vision of the final dress, so I lowered the neckline, and I cut in a Merida-type notch.

back

Then the final version. This is where it kinda went downhill, sadly. The fabric was a stretchy t-shirt jersey. Pretty soft, but it wasn’t stable or uber stretchy, and it has very little drape. I used the exact same shapes as the red floraly one, but I was getting butt wrinkles, and it wasn’t flattering. I took in the center back a lot, and all the way around the inner panels a few times. Eventually, this caused the bust to start wrinkling, so I added in a dart, which mostly affects the top layer. Finally, I ended up with something that mostly fit, and felt fairly comfortable.

I got pictures for IPM, but then I stopped wearing it. I couldn’t figure out what was bothering me about it, then two weeks ago I realized. I could see my stomach poking out, and that was my issue. So I tried it on, cut a notch in the center, added in an uneven hem, and voila!

front

All better!

Internally, I’ve labeled this my Merida tank, in keeping with my plan for most makes to have closet cosplay potential, and I think it fits nicely. Sometime soon I’ll accessorize appropriately and show you!

Miter by the Sea

To end the old backlog, I’ve come to show you my awesome shell.

anglefront

In March, about a week before Spring Break, I was on Facebook well past my bedtime, and I saw that Cake Patterns was looking for testers for some of their new tops. I jumped at the chance, especially because I knew I’d have some built in sewing time. I jumped on board with their Miter Shell.

Of course, then the envelope with the pattern arrived and I sat there staring at it.

Firstly, I was facing the fact that my perfect week off had to include a Chemical Oceanography take home midterm, as well as a math program in Matlab that I had been already putting off for a week.

sideback

So of course, after putting off all of these things until the end of the week, I spent the Friday before school started back up not doing homework, but instead working on this new pattern.

I made the Espresso leggings a few years ago, and it was lovely. I’m not a leggings person… at least not unless their a pajama replacement. Or a replacement for tights in winter. But I still wear these leggings, and as soon as the inspiration strikes, I’ll take the pattern out again.

This means I was already familiar with the type of pattern, with the sizing and the connecting the dots loveliness.

I connected the appropriate dots, pulled out my roll of IKEA drawing paper that I use for patterns, and I traced and cut to my heart’s delight.

backo

First I made it up in this orange mystery athletic wear knit that I had just received in a mystery fabric bundle thing. To be honest, the stuff had very little recovery, I used a stitch that was waaaaaay to small, and I found the back “laces” too large, so along with the lack of recovery, they were sagging (and they felt even more saggy).  Also, with the square neckline, and my arguably large bra cup size, and therefore high “cut” of a bra, there was an inch of bra showing at the corners.

At that point, I kinda hated my creation. In a Frankenstein sort of way. Let’s start with the fact that it was bright neon orange. I’m not a bright orange kind of person. So I had very little interest in making this draft work, especially fiddling with it all day. (Also my day probably started at 11am. So all day may be misleading).

I went back to my homework until Sunday.

back

After spending all that time musing, in between chem and math, I realized that the only thing that I really needed to do to fix this was raise the neckline. I did that a little bit in the drafting, but mostly by taking up the shoulder seams. After that I shortened the neckline and arm binding to match, and cut the fabric. (I cut this one, the top of my Nettie dress, and my Nettie top all at once, so I knew for a fact that I didn’t have enough for the back weave, since I was eeking out everything I could just to get all three). I still needed something for the back weave, so I pulled out my collection of vintage notions, and found these lovely seam binding laces in the perfect colors. Of course, I didn’t have enough of either color, but I did have enough for a cool looking pattern!

This is such a comfy shirt. In reality, the weave rarely sees the light of day, mostly due to my cardigan obsession no matter what the outside temperature, but I think its such a nice touch. In the future, I might take in the back a smidge, to reduce the draping a bit. It’s nice when I’m not standing straight, which if I truly face it is most of the time, but it looks so loose in pictures. And the shoulders are quite wide on my uber narrow ones, so I might skinny those up too. Who knows, though. I might forget!

I’ve been waiting to share this with you for over three months, but I can now share that all of the Tidepool Collection, including this one, the Miter Shell, is up for sale on SewingCake.com. I’m definitely getting the Endeavor Trousers soon.

front

**I’d like to reiterate that all of these opinions are based on the testing copy, and I am unable to make remarks on the final product. But I’m sure its fabulous!

The Whole Package

So it’s now June.

That means it’s hot in the South. At least, anywhere that isn’t mountainous.

I was walking home from a ballroom lesson at 9:00PM, and I was still too hot, wearing jeans and a thin blouse, because it was still 85*F.

Any thought of taking up running this summer is quickly fleeing.

front smiley

But that means that when the separates challenge at The Monthly Stitch came up, I knew that there would be no hope of Ginger Jeans, or even Ginger shorts (too tight for the weather). It had to be something skirt-like. Flowy and preferably breathable. And some sort of top.

It’s been windy, though. And windy plus skirts does not always make for a good combo.

Since I lost my pattern for culottes, which was arguable fatally flawed… (Butt length after creasing from sitting is not the best idea), I bought the Tania culottes pattern from Megan Nielsen.

And I love them.

I haven’t shown you my first pair yet, but rest assured its arriving soon.

This pair, though, exists because I went into Joann’s to get fabric for curtains… And came out with this loveliness.

Let’s forget for a moment that I’ve never really patternmatched. Because pattern placement to avoid flowers on boobs is not quite the same  idea. And that I don’t really use patterns with very linear placements. Because it’s been engrained that I would need to be extra careful with those.

But I bought it anyway. Does it help that it was on sale for 50% off? I think in total the fabric cost me 15 bucks for 3 yards…

It might be a deep navy, but I’m considering it black. With the creamy offwhite, it was a warm black tone to it… Or so I’m telling myself. And it’s sheer enough that I wanted to line the culottes. Of course, I decided this after I got home from the store.

Tania culottes with a pocket

So this is my pair of self lined Tania culottes!

I measured a large for these, which surprised me a little, but my tummy did grow a bit from end of semester bad eating habits, so I trudged through it. Like many others, I cut the extra large length to go with the large other measurements. I did have to shorten the crotch curve, which I did uber-scientifically on my last pair (which was already finished) by sewing a larger seam allowance. Since that worked, I just transferred that to the pattern. I also followed the recommendation to raise the seam even more for the lining, which did bring about much confusion with the then four large skirt like pieces, but I think it worked out. Also I don’t have invisible zips handy, so I just put in a regular one. And a pocket. I added a pocket. Because it was very important.

pattern unmatching

Once I had put it all together, before letting it hang for a few days, I tried it on and immediately hated the wide waistband. It just looked so… wrong. Thinking back on it, I remember a pattern that suggests against stripes for the waistband since it was curved. And I’m guessing this was why. But also I’m a fairly short waisted person, but most of my belly fat exists in that lower region below the bellybutton, and with the high waistband, I was going to have to do some excessive fitting to get it to sit close to my body (stay tuned for that in my first version). So I decided to hack off half of it, and pulled out my bias binding collection and used some lovely green to deal with the seam. You can see a peek of it above. Also, look at that pattern almost matching. The lines are at least correct!

Then I let it sit for more days than I care to admit. You see, this week I’ve been having trouble getting to bed before 2AM. But instead of going with that flow, I’ve been still trying to sleep starting at 1, which cuts out a significant amount of available sewing time. As is the waking up late, BECAUSE I WENT TO BED AT 2!

back

I used my rolled hem foot. I think this marks the third time? And this is probably the first time with the right kind of fabric. It was not easy, and the hem is not even. The lining might even have been peeking out a smidgeon. Shush, don’t tell! But it’s pretty darn good for the first time on miles and miles of fabric.

back better

And then the top. I love the Dandelion top/dress, and I figured it was time to make it again. Especially because I’m planning a “super secret” version. But first this one.

My fabric choices were easy. I had just made a Tania pair out of this linen, and it was a perfect amount to use for this shirt. And this lace, I love this lace. I used it on my last Dandelion, to accent the side panels, and the amount used for the yoke here didn’t take away any more yardage. Just into the scrappage from the previous one! I still have quite a few yards, and I’m not sure what to do with it.

Dandelion shirt detail

I cut a medium, like I had done for my first one. The first one is nice and comfy, but it is a little loose above the bust, which I should’ve realized would  become a problem in a sleeveless version. So there were quite a few alterations, including taking in the back, taking up the shoulders, taking in the side seams, changing the back yoke shape, eliminating the zipper, and taking in a wedge of the lace.

It’s still not perfect. I might need to readjust the bias tape, and I should take the shoulders up even more when I do that. But I’m kinda in love with it. It should also get softer after a wash, which’ll be nice. It’s not scratchy, but its also not soft. But soon. Soon it’ll be soft!

front

I like these two options together. We’ll see how much wear they get together. But they will certainly be mix and matchable! In fact this is the first intentional post on the beginning of a little capsule wardrobe. I’ll talk more about it later, I promise!
Macaron Sorbetto

It wasn’t until this year that I figured out what a macaron was… the almond ones, that is.

Growing up with a family member who despised coconut, macaroon (with two O’s) were not discussed, or talked about, or were to enter the house.

So I just assumed that the two O version was the same as the one O…

I was wrong. The latter is a pastel color rainbow!

front

Much like the Sorbetto I made.

(Jumping in to say that yes, I am wearing headphones for these photos. When it’s just me and my self timer function on the camera, and I’m in the middle of a Thrilling Adventure Hour podcast, I will refuse to remove headphones…)

This pattern has been floating around the interwebz for longer than I’ve been blogging, but I never took much interest in it. I didn’t have many reasons to wear a sleeveless blouse-type shirt, since I was in college… and I’m still in college.

But now I’ve a part time job that suggests business casual attire. And as a newbie to the world, I’m sticking (mostly) to it.

I’ve got plenty of stuff that is appropriate, but I figured that another blouse never hurt anyone!

back

This fabric was given to me when my former boss destashed last year, and even though its not at all my style, I jumped on it. I had been thinking Archer, but in the end that didn’t happen. I’m glad now, as it is very wrinkly right out of the wash, and I have no patience to iron an Archer every wash. A Sorbetto is much more ironable.

The drafting of the pattern seemed nice, and all the sewing went well. If I had worked directly from start to finish (until the alterations) it would have been maybe an hour, hour and a half at most.

Mistake number one was using a small-width fabric, so it felt like I was eating up over two yards (though I do have plenty of scraps).

Mistake number two was using such a wide bias tape, but it was the only one I had in stash that was definitely long enough and happened to match the colors pretty well.

Mistake number three was not pressing my alterations post sewing.

cutefront

My neckline was gaping at the back and the bias tape turned outwards throughout, so it looked very poorly sewn. That was due to mistake number 2. I made darts on the front and the back to fix these, but because I didn’t press it, they still stuck out.

And I wore it that way, even to work, since at the time I was too lazy to get out the ironing board.

But now I want to actually wear it, so out of the corner the ironing board comes…

Hybrid

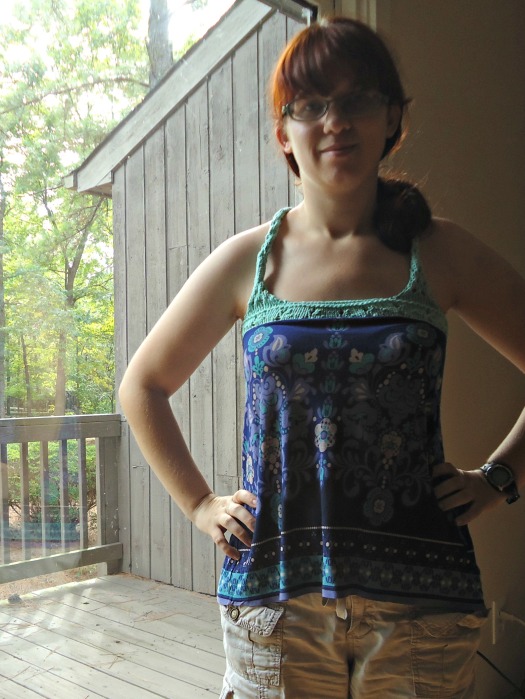
Do you remember when I made a wristband out of this nice minty aqua yarn? I still love that thing. I told you that I had plans for the rest of the ball, but if I remember correctly I told you my plans were top secret… or something like that.

frontcolor

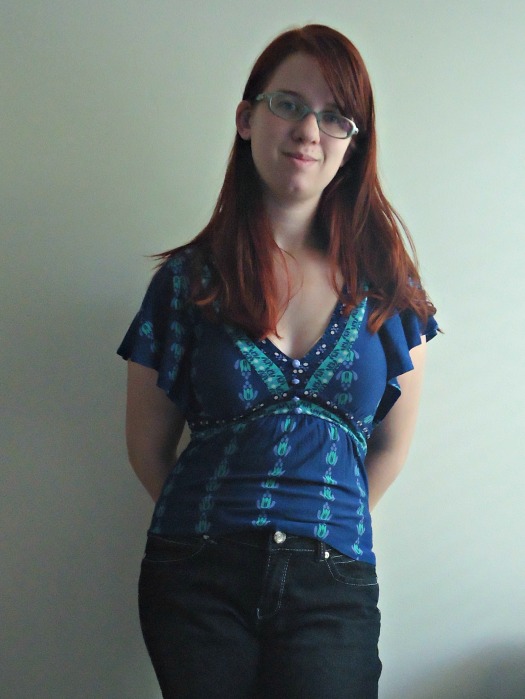
Ta da! I present my knit and sewn hybrid!

I had most of the knit part finished before I posted about the wristband, but I was really more interested in figuring out how to attach it to the part of the knit fabric I had previously cut off a dress.

topofdress

The story of the dress: I got this dress in Germany on a visit with my aunt, who I rarely get to see. It was love at first sight with this dress. It was also about seven years ago. The dress didn’t fit well by today, and I would always have a serious case of panty lines. And who wants that. So I cut the skirt off to make this shirt, which is well cropped at just hitting the waistband of my jeans, so better with high waisted bottoms, and I had this leftover fabric. I had been planning to make it into a color blocked shirt with a yoke.

But then I saw how close this yarn was in color. Match made in heaven.

backlight

I used my wristband as a pseudo swatch and just cast on a bunch of stitches. Throughout the entire make I waffled on construction details and sizing and how much yarn I would need. mostly the latter, as I had a finite amount to work with. Because of this I used stockinette stitch with a small openwork pattern, mostly for the yarn conservation reasons. I was banking on the idea that the sewn part would flatten the stockinette stitch roll. It mostly works.

frontdark

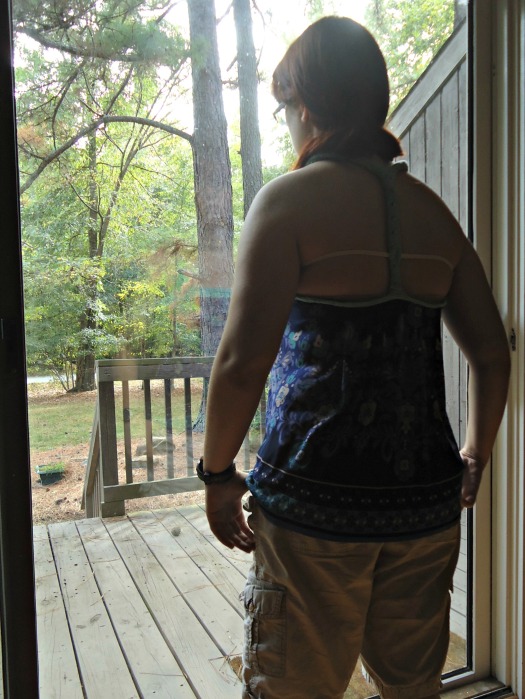
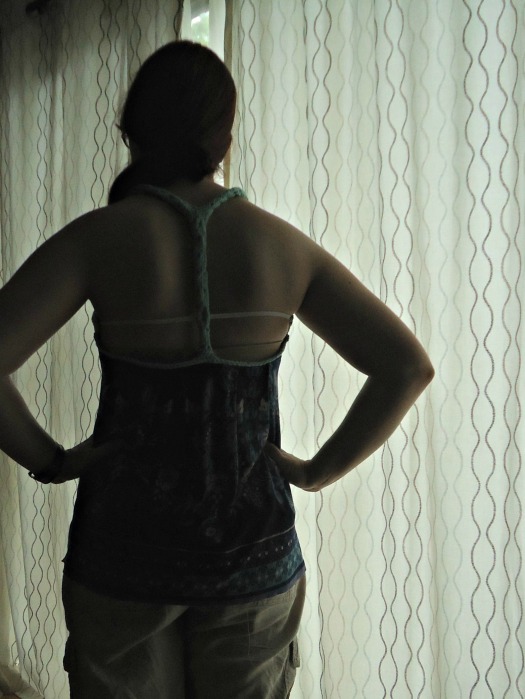
I measured how far apart the straps would need to be, then I realized I just how little yarn I had. Racerback it would be then! Once I got to a reasonable back length, I bound off and used the remaining yarn to cast on for i-cord. And that’s how I finished the ball. Originally I used a bit of some peaches and cream top add some length to the i-cord and more “seamlessly” connect the segments. I wore it for a day, but by the end of the day the back had stretched out way too much… Waaaaay too much.

braback

So I procrastinated for a month. And now I’ve finished it. Took out the peaches and cream and used a different attachment method for the i-cord which helped to shorten it. And I used elastic to keep the top corners of the yoke tight. And it fits nicely and is cute, and because the seasons are changing probably won’t get much wear this year, but next year! Except now that I’m looking at photos the back falls below my bra strap… Any suggestions? I might need to get more creative with elastic.

Lesson of the post – I-cord is super duper stretchy.