How I Make Digital Mandalas from a Sketch

Welcome back for what has become week 3 of my mandala tour!

Today I’m going to show you how I make mandalas from sketch to finished digital product. I do want to note, though, that this isn’t a great process for digitizing a fully drawn mandala, like the one I showed you last week. That’s more of a finesse and fuss problem, which I haven’t mastered yet.

I’ll be using Adobe Illustrator primarily, which is a vector based software that allows for layers. Similar softwares are CorelDraw and Inkscape, the latter of which is free! I haven’t used it before, but its an option. I’ll point out where you could use something like Photoshop to carefully complete the steps.

So let’s get started!

guides

First you’re going to want to draw some guides at recognizable angles, or at least angles you can remember, so bring out the protractor!

sketch

Next, in pen, draw in a design of your choice! It’s hard for me to visualize what a design is going to look like when extrapolated to a mandala, so I just doodle and hope that it won’t look too weird or wacky. Then either take a  picture of it from directly above, or scan it in!

I did briefly bring it into Adobe Photoshop for editing, mostly just upping the contrast and cropping…

Then open up a new document in Adobe Illustrator, and place the image into that document.

4

Lock the picture in place, and draw in a vertical or horizontal line, and then copy it, and rotate the second line to your angle. (Mine was 30*, in case you were wondering…) Make them obvious in some way, whether that’s thicker, or a different color, or both!

5

Then start drawing in shapes and lines!

(If I was working in a raster software like Photoshop, I’d draw/paint in the designs on a new layer, trying to keep inside of the lines I just created, then clean it up with an eraser and skip to the flip and rotate step. )

6

Make a copy of the guidelines that you made earlier, and stack them on top of the originals, then use the Shaper Tool (it looks like a circle with a pencil in the front) to “erase” parts of the shapes you made earlier. The guides will naturally cut the shapes at the proper angles for flipping and rotating!

You can definitely go back and forth between the previous and this step until your design is set! I think I went back and forth at least twice to get it to the above state.

7

Now you can turn off or delete your reference image, and I like to change the color to black for visuals… Lime green is pretty annoying to look at after some staring, right?

You should also be able to turn off any other guides too.

Now, select all the parts of your design, and group them together, then make a copy. Reflect this copy over the axis of your angle. In my case, I originally reflected the copy over the angle 120*.

Adjust the two groups so they meet up, or make changes to the paths until they do. Then reflect the combo over the next axis, and repeat.

10

By adjusting, I mean, drawing in new circles, if the parts don’t properly match up, or extending vectors so they meet, etc. Mine didn’t match up exactly, so I had to do a bit of cleaning up, and that is totally fine! If you drew in the details in Photoshop, you can paint over until the pieces match up.

11

And when you’ve gotten back to the beginning, you’re done! You have made a digital mandala!

(Unless you want to color it in… If so, continue on!)

12

For coloring, I used the Live Paint menu in Illustrator, and messed around with colors until I liked it. You could also do this in a raster software!

13

And here’s my finished mandala!

Export it as a picture and you’re set!

If you like the mandala from this post, check it out on Redbubble!
How I Make Mandalas by Hand

So last week I shared my introduction to mandalas, and I thought it’d be cool to share how I draw mandalas!

This week I’m sharing how I draw them by hand, and then next week I’ll show you how I do it in Adobe Illustrator, the process of which could be adapted for other programs!

supplies

First I gather up my supplies, including a protractor, a compass, a pencil, a ruler, an eraser, and some kind of inking supply (I’m using a set of Faber Castell Pitt Artist Pens).

cross

Then I’ll draw out two perpendicular lines, trying to center it (and typically missing the center).

protractor

rulerguides

From there, I can use my protractor to mark out various angles from the center cross, and then I’ll draw them in with my ruler.

compass

guidesdone

Next I’ll use my compass to draw concentric circles out from the center.  I tend to make a bunch of guides randomly assorted and then build the design around it, so I try to make at least five circles to give a good base.

framework

Then it’s time to build out a structure. I make a general pattern, like these boundary circles and the arch patterns, and I’ll continue this all around the mandala.

nearlydone

After the structure is done, I’ll decide on the details and start to fill out the mandala. I’ve been partial recently to dots, parallel lines and swirls. In this one, the swirls turned into caricatures of waves, and I think it made a neat pattern!

done

And then the mandala is complete! Sometimes I’ll choose to color it in, but for this one, I really liked the simple black and white look!

Tune in next week for my more digital variation!

how i make mandalas by hand

Not a Background Lannister – Prop Shield Tutorial

first

So I started with the trousers last Wednesday… The shield on Friday… Next up in the lead up to the costume reveal is the shield.

And boy am I proud of it!

I have access to a laser cutter, at my job, so I put together a “quick” file (it’s never quick) for a shield that would fit on one piece of plywood. I could’ve made a bigger one, but I was trying to be material conscious, and I’m glad I kept it at that size. The laser in question is technically two feet “wide” in material dimensions, and 4 feet long, but it’s a little bit smaller in both directions due to crookedness and use  over time.

I worked with 1/8″ plywood, and made this as solid looking, but light as possible. There are two fully solid pieces, with multiple border pieces, one set in between the solid pieces, and two sets on the front, and then the decorative pieces there too… This would be better explained in pictures…

alanna_pullapart

Yeah… Like that.

So I layered and glued everything together. It took awhile. What I should have done then, is sand those edges. I didn’t. Moving on.

edge

On the top of the shield I used wood filler and a putty knife to shove material into the seams so it was a fake beveled/routed edge. That’s honestly what took the longest. I’d put on wood filler, wait for it to dry, sand it, apply more when it inevitably chipped and repeat.

bevel
Yeah… not meant to see it up close.

I’m kicking myself that I didn’t get progress pictures as I went. So then I painted the shield. Chestnut brown on the back and sides, then red and gold on the front. The gold is Bright Gold Lumiere Jacquard fabric/universal paint, and the others are stash cheapo acrylic paints. Oh, I so love the Lumiere paints.

lioness
Gaah. I’m gonna stop it (mostly) with the close ups on this one.

On the back are two more sets of laser cut pieces, the main point of which was to provide some material for screws to connect to. Then I guesstimated sizes of leather to attach the shield to my arm, screwed it into the top and bottom bracers. I had to reattach the bottom ones to make them tighter so I could control the shield a bit better, but then I was completely done with the shield!

Lightweight, blocky and just what I needed.

It did mean that I hit a bunch of people accidentally, but… that’s being at a con, right?

I was not too surprised that this wasn’t the recognizable part of the costume (It looks too much like the Lannister crest, or Peter’s from Chronicles of Narnia), but I was surprised what was! You’ll have to tune in on Wednesday to figure out what I’m talking about!

corner

That probably sounded like a ending, but I’m popping back in again to say that though I made this with a laser cutter out of plywood, you could totally do something like this with a craft knife and some stiff foamboard or foam, and come out with similarly awesome results!

Is the pen really mightier? – Prop Sword Tutorial

first

The first prop I needed to make was a lightweight sword. It had to be a short sword (so the double handed sword I bought at my first DC was out) and it had to be me-sized. So smaller.

full

I went to Michael’s one day to scope out the small plywood situation, and ended up with Basswood, I think with the dimensions 24″ by 4″ by either an 1/8 or 1/16″ but I’m not sure which. I also purchased an 1/8″ diameter dowel, which gave the sword it’s structure. That was the cheapest Michael’s trip ever, because with a coupon, the main part of the sword cost $2.50. Craft stores never work out that well for me, so I definitely gave myself a pat on the back for a good job. Or rather, I took myself out to see the Incredibles 2 (this was late July/early August. It was still in theaters.

I’m pretty sure I cut the basswood in half lengthwise, then I cut the pointy bit out, and tried to match on both sides. Most of this was done at night, so cue the bad phone pic here:

DSC_6980

I then taped the dowel to one of the sword pieces. Then I applied wood glue around the edge of the sword outline, and used every single clamp and binder clip I own to keep the pieces together.

DSC_6986

Then I left it for a few days, even though it probably only needed one.

I used a laser cutter to cut out pieces for the hilt from 1/8″ plywood that would slide onto the wooden dowel for stability, and I aimed for a hand and a half length. In the end I got a stacked result, then used wood filler to fill it in and round it slightly. It worked pretty well, though it might’ve worked better if my filler was wetter. It has gotten rather gummy over time. Regardless there was a lot of back and forth between gooping and sanding. Using cardboard would work pretty much just the same way, if you cut some layers and used wood filler and glue and tape to hide the corrugated edges!

hilt.jpg

Then came painting and sanding. I painted up the “blade” with white acrylic first, then with Lumiere Jacquard paint in silver. Then it was too shiny, so I sanded it. Repeat once more to see if anything changed. Add the line down the center (kinda… don’t look too close) and then sand again to blend that in.

For the hilt I first painted everything brown, then painted it with Lumiere Jacquard paint in bright gold.

jewel.jpg

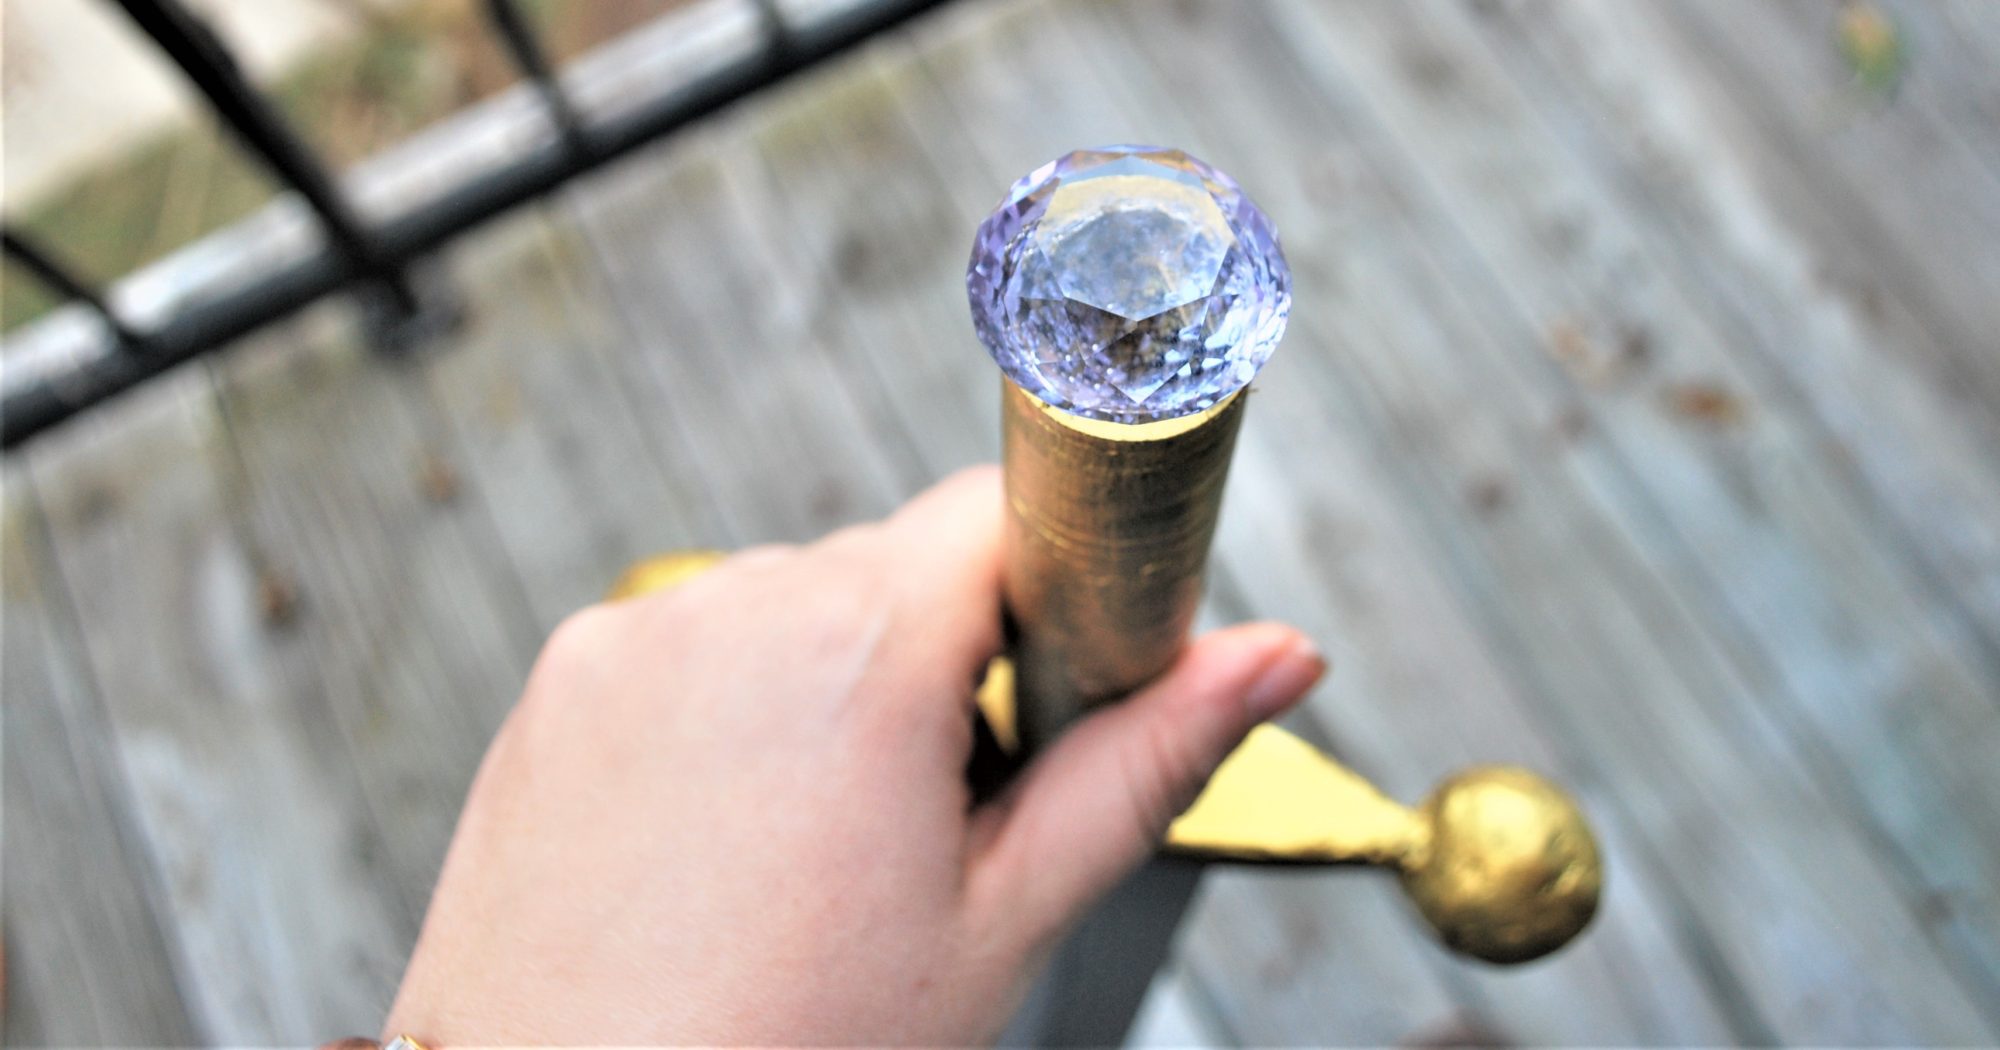
And the jewel. Still the biggest pain in the butt of this project. When I was designing the laser cut part of the hilt I made pieces for the end that would allow the jewel to nestle in.

Then I tried hot glue, then superglue twice, and now E6000. It’s sticking for now.

point.jpg

So that’s how I made my prop lightweight sword!