TARDIS Console Skirt

Now we’ve made it to the real meat of the costume. Last week, or rather two weeks go now that I’ve checked, you saw the petticoat, and the bum pad before that. This week we’re onto the skirts.

This gold polyester taffeta has been sitting in my stash for two years now. And this week I learned that even if I sneeze in its general direction, it will collect water stains. Also, its super easy to accidentally melt.

TARDIS skirt side

But back to the costume. In order to model it off of the console, I wanted 6 sections of gold divided by sections of light aqua.

TARDISconsolelink

Super scientifically I measured the base of the skirt (on the ground…with my flat tape) and divided it into six sections. Now, this ended up being too big, but we’ll get to that. I then decided I wanted the aqua sections to be about 3 inches wide, and divvied up the fabric.

TARDIS skirt back

When I saw how woodgie the aqua fabric was, I knew that I needed to not only back it with something, but back it with something solid, so I used the same taffeta for that as well. I cut the aqua 5 inches wide, and then gathered it every 10 inches or so, and basted it to the taffeta. I was using half inch seam allowances throughout, mostly so it would be easy to calculate the exact widths. I then realized that the skirt could use some extra texture, so I made wide pleats up three of the six panels, and centered one of them in the back.

TARDIS skirt front

Once the entire skirt was sewn up, it was a panel too wide, but I was determined to keep all six, so I left the back pleated one (which I had accidentally melted the bottom of anyway), and cut off 4 inches of each other panel.

It still ended up a bit wide, but it was easily handled by pleating, and the apron and bustle covered up most of the top of the skirt anyway!

TARDIS skirt zipped

I attached a waistband made out of the same taffeta (sense a theme?), and used a zipper to close it. It’s not a long zipper, so it’s still a smidge difficult to get on, but it works nicely. And it’s covered by the bustle anyways. If I knew it would be seen, I’d think of using a different closure, but it’s fine for this one!

Now, by this point I had spent nearly two days working on this skirt, when it was only supposed to take me one, and I hadn’t even touched the pleats on the bottom yet. I took a break to drape the apron and bustle and make the shirt. But it’s probably better that I did.

TARDIS skirt pleats

The break gave me time to buy some poster board, which I used to make a pleating board. It took nearly three hours to pleat enough to go all the way around the skirt. And I only almost melted the taffeta once.

There is always time to add extra trim, which is what I’ll be doing for the next month or so, since my daily life will be too busy to facilitate the extracurriculars. So tedious hand sewing could keep me on track! But that’s the skirt as it stood for the pictures that I’ve taken of the whole costume.

I’ll be back on Thursday to show you the bustle. Till then!
Tales of a Bright Blue Petticoat

On Tuesday I told you about my new bum pad, Fluffybutt, for my TARDIS costume.

Because this wasn’t a lobstertail, with some built in petticoat tendencies, I knew that I’d need to change my plans and make an actual petticoat. I didn’t want to go out and buy fabric, partially because of my fabric ban and partially because I didn’t want to lose steam. So I picked up this turquoise poly-crepe that I originally intended for curtains, and used that! It was a bit over 2 yards if I remember correctly.

left

I first started by “draping” the fabric over my dress form, lining up the selvedge with the hem, and pleating over the bum pad. I tried to follow this tutorial, but I didn’t quite have enough fabric, so it was modified quite a bit. I made as many ruffles as I had fabric for, and tried to overlap them, but it didn’t always quite make it.

front

The back piece, with the ruffles, I did cut down to a trapezoid shape. The front was pinned to my dressform, and I may have forgotten to cut it down. I had already pleated it so it would fit, and I was using ties as a closure instead of a zipper or buttons, so it didn’t really matter if it fit perfectly there.

right

The main piece of advice that I utilized from the tutorial was not sewing up the entire seam of the petticoat, which would theoretically allow me to step with a wider gait. It would work if my skirt also didn’t impede on that problem. I’m pleased with the result, though. It hangs nicely, is lightweight and strangely comfortable. And it provides a nice swish…

back

And the most important part – the overskirt hangs wonderfully! More on that next week.

Fluffybutt

Welcome to the reboot of TARDIS Tuesday! And Thursday, at least until all the pieces have been blogged!

I might have mentioned that I am insane and planning to make a ballgown, but that means that I need to clean out some of my lingering costume projects to make mental, and actual room for said insanity.

So it was off to the TARDIS races. Especially because a weekend with my study abroad musketeers was fast approaching, which would be the best time to get some pictures of this.

For nearly three years I was procrastinating on choosing a type of bustle for the skirts of the TARDIS, but I was waffling. I wanted to make a fishtail bustle. but I also thought a bum pad would be nice. I wanted Natural Form, and also the big poufy bustle look.

But for time’s sake, I went with a bum pad.

right

I measured my back waist, subtracted an inch, and then drew a half circle that looked large enough, which also had a radius a bit shorter than half the back waist, since I didn’t really want a full half circle.

The fabric reminds me of couch cushion fabric that my family had when I was growing up, but realistically it’s an upholstery weight loosely woven floral. It’s probably cotton, and it presses rather well.

The ruffles were all the same length of fabric, and were just gathered to the different necessary widths. I used the rest of the width of the fabric to get the ruffles, after cutting out the two semicircles.

pattern

I sewed on the hemmed ruffles, and then sewed up the circumference, but left the top open. I used a bright blue grosgrain ribbon for a waistband, so I sewed the top of the bum pad to the ribbon before stuffing it.

There’s been a pound of stuffing in my belongings for over 4 years now. Every time I use it I feel like I’m putting a dent into it, but it’s always there patiently waiting. By now, I still have 2/3 left… And this is the second thing resembling a pillow.

When trying it on with the stuffing, I made sure that it stuck out parallel to the floor, knowing that it would flatten a bit with the weight of skirts. Then I whipstitched the opening of the pad closed.

left

The pad sits nicely on top of my butt, which unfortunately does not given me extra padding when sitting, but is a lovely way to increase my butt-profile.

Also, as an explanation for the title… My neighbor has many cats, most of which are outside cats, since we have tiny apartments, and there’s only so many cats you can keep indoors. One has taken a liking to sitting on my windowsill. He (or she… I have no clue) is a long haired black cat with a white belly. And he’ll sit on my windowsill for hours. So I affectionately call him Fluffybutt. And I named my bum pad after him. That makes sense, right?

Stay tuned for the petticoat post on Thursday!

Touch the Sky

no glasses

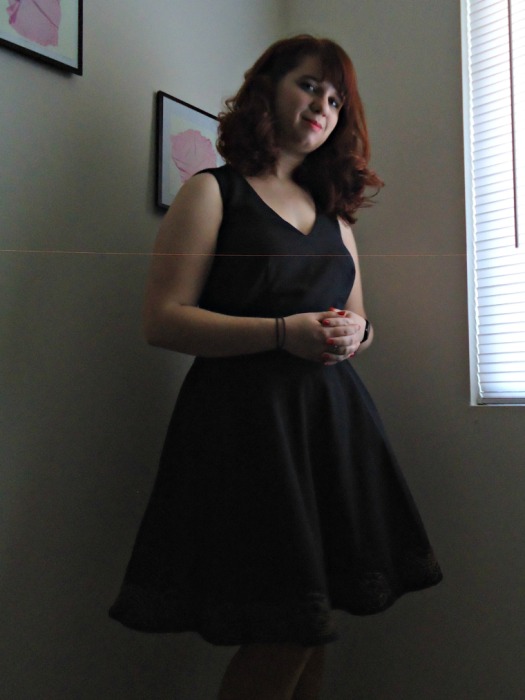
So here’s what my Merida pieces look like together!

EpilogueDress6

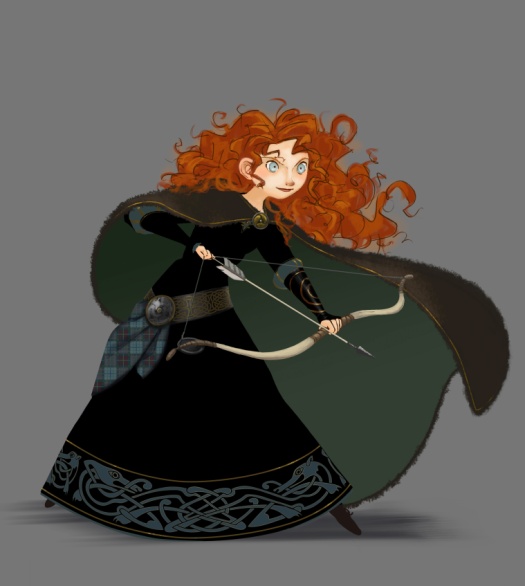
To recap, I made a set of outfit pieces to subtly reference this outfit Merida wears at the end of Brave.

So I made the skirt first, and spent ages to embroider it.

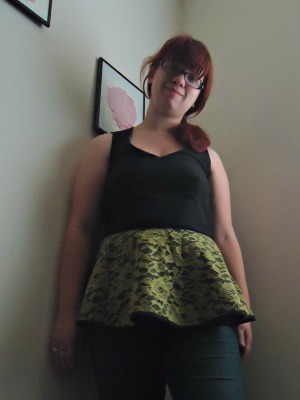
Then I made the top, which I probably won’t wear much alone, but they do look nice together!

sideThey’re connected using a bunch of hook and eyes, so that the skirt doesn’t ride down and reveal the green lace peplum.

I got all gussied up and pincurled my hair, which ended up a little wilder than I expected. Perfect for a dressed up Merida!

front

Have a happy Thursday!

Peggy Carter

So I finally got some pictures of Halloween costume in its completely finished state… I’m only 5 months late, so that’s not bad, right?

And photodump:

ponyfront hat jacket hat shirt jacketpony shoes

The jacket is from Amazon (though they don’t have it in brown at the moment), the hat was a vintage find on eBay, and the shoes are from Modcloth (they also seem to no longer be available. Oops!)… They’re actually the shoes I use for swing dancing and are super comfy. For the first two hours at least!

Hope you like it! And happy Monday to all!

Year 3

WordPress informed me that yesterday was my 3rd blogiversary.

The past two anniversaries, I wrote a post celebrating the year, and especially because this is also my 200th post, I figured I’d give it another whirl.

This year:

storybook back

I finished my Susan dress! Woohoo!

My self imposed ban of new clothing has kept up really well, and the only piece of clothing I’ve bought was jeans from a thrift store.

ponyfront

I’ve self drafted a few items, including the shirt for my Peggy costume (with more full costume photos to come).

right after wash

My first pair of jeans were not entirely comfortable (so not wearable), but my second pair is so comfy that I practically live in them.

sweater

I’m working on a knit sweater that will actually look like a real sweater, which is definitely a first. And I’m another pair of socks and a half into my sock knitting journey.

back side

Real photos of my Belle from Once Upon A Time (casual style) costume were taken, and though I realized I forgot the necklace, they certainly look snazzy! I do need to figure out how to make the extensions better blended though…

cute

The time I spent embroidering this Merida skirt was ridiculous, but I love this skirt to death. It’s whimsical and subtle and awesome all at the same time!

I’ve also realized that my planning skills are rather lax, and that sometimes I’ll completely change my mind and take on ridiculous projects. Case in point, even though I don’t have real space in my apartment to make a ballgown, I’m planning to make Ella’s ballgown from the live action Cinderella.

First though, I’ve got to make and finish my TARDIS skirts. After three years it’s really time.

Here’s to year 4! Thanks for reading!

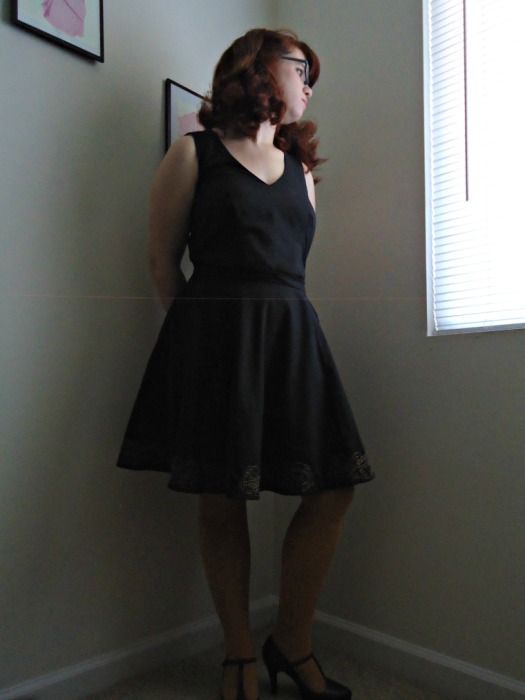
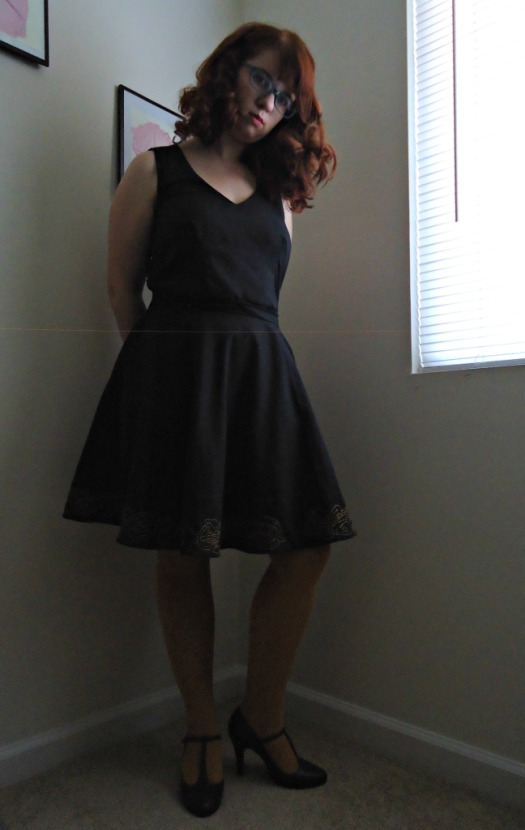
Do you like my party skirt?

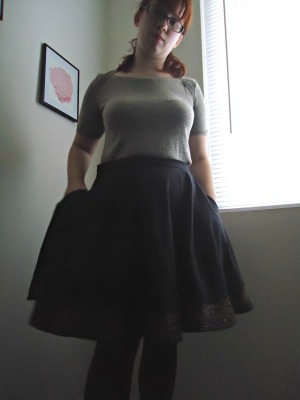
front

Every time I think about this skirt, I think about the song My Party Dress from the musical Henry and Mudge (which I’ve never seen but I think I’d love, because of the song). I think this is the first version I ever heard, and I still love it, no matter how many versions I hear. I think I like the song because I always feel a bit out of place in fancy clothing.

I’ve grown to like wearing skirts and dresses (secret pajamas anyone?), but most of mine are solid (1,2,3,4), made of cheap jersey (1,2) , or are rather simple in design/execution (1,2). The majority are twirly, but rarely are they fancy. I don’t do flashy, you might say.

nback

So when I was trying to get out of my sewing funk in the latter half of my winter break, I surprised myself and reached for this polyester brocade. I bought this from Joann’s two years ago in order to make my Belle cape, but at the time I was not well versed in making circle skirts, or the like, so I ordered too much fabric.

Because it wasn’t particularly wide, it made a small capelet rather than anything like a full cape, but that left plenty of room for this skirt!

pocket

It started as a rectangular tube, and then I pleated it to fit a simple black waistband. There’s also two gigantic pockets and a center back zipper. I did have to use a lot of heat to get the pleats to span the width of the skirt, and I was very worried that I was going to burn the fabric, which would have ruined the whole effect!

I knew from experience that this stuff frays like crazy, so I had my FrayCheck at the ready, and used it every time I cut. But I also figured that a lining would be to my advantage to cut down on additional fraying. I had this brown cotton lawn, I think it is, and I’ve never figured out what to use it for. But it makes a great lining. A little staticy, but it’ll be okay. With the weight of the brocade, it won’t ever stick for long!

side spin

The zipper did puzzle me for a bit, and I had to put it in and take it out a few times. I guess my original seam wasn’t deep enough, so I had to take it in a smidge.

But the skirt had its first outing before that! I wore it the same day that I originally made it, when I went to a social ballroom dance, and it passed the twirling test at least! There was the issue when I was leading a friend in a swing dance, and her hand got caught in one of the pockets as we were passing each other, but that was a fluke.

side gaze

Then I let it fester in the alterations pile until now. I’ve since fixed the zipper, and if I ever need a fancy flashy skirt, I have it!

So… do you like my party dress? Or rather, skirt?

Ripples

Having an almost all handmade wardrobe is not necessarily a dream of mine, but I’ve always thought it would be neat. And that dream is no longer across the Pacific Ocean (in terms of dream distance), or the Atlantic for that matter. More like the Indian. Big enough to count as an ocean, but small enough that it’s realistically attainable.

Because I’ve told you before that I live in jeans. And I mean that literally. There have been (far too many) days where I wear jeans all day, and then I’m too lazy to change into pajamas, so I sleep in them… And then I change into a different pair the next day, so I don’t feel guilty about wearing the same pair two days in a row.

And I’ve now thrown a pebble into that Indian Ocean sized barrier… creating ripples.

few wears past wash

(Get it? Okay I’m done now…)

So these are Ginger Jeans, made with some good quality denim that I got from my LFS. (New interjection… Do us fabric people call local fabric stores LFS? Because I caught onto LocalYarnStore pretty quickly when I started buying real yarn, but I feel like LFS doesn’t have the same ring).

Because of this, I’ve now got a comfortable, (mostly) well made, and fairly well fitting pair of secret pajamas. That cost me about 50 dollars, which makes them the most expensive jeans I’ve ever paid for. Thrift stores and yard sales have been my sources for jeans forever, including the month before I made these when I was supposed to be making these and not doing it. I think that I’m currently wearing my only pair of good quality denim RTW jeans, which were thrift store finds, but that’s 15ish years of poor quality stretching out terrible denim. (Oh yes, I bet I never told you that when I was little I refused to wear jeans. I was a different person then.) Do you want to know how I know these RTW’s are good quality? Well I bought these after trying them on, and they were snug at that point. So I assumed that they would stretch out, like every other pair I own, so I was counting on it. And look where that got me.

right after wash

In the hierarchy of my closet, I now only have taper/skinny jeans. My one bootcut-y flare pair kicked the bucket after 10 long years, and they were also my “fat” jeans, as in the ones that stretched out the most to accommodate any fluctuations in weight. Also, the one pair of low rise jeans I have constantly plague me in awkward belly hanging out feelings, so I knew that low rise was not for me. But at the same time, I had already made a pair of the high rise and it was too high, so I tried view A this time, and just increased the rise using Heather’s tutorial here. I also made a size bigger than I had for my terra cotta pair, and I’m kinda regretting it now. I suspect some of my problems with my first pair was more related to the lack of stretch in the fabric rather than the size.

few wears past wash

I raised the waist of view A by an inch. I like the height, but I can’t help but wonder if I’d prefer lowering view b. My topstitching is done in a nice ocean blue, and I had some fun with the back pocket. I’m thinking I may need a swayback adjustment. And don’t get me started on the knees.

few wears past wash

Perhaps there isn’t as much stretch out as I thought… Looking at the photos, I’m wondering if the rise is a bit too long. Otherwise, though, this is a lovely pair of jeans that I’ll love until the seams break!

Snow Day!

And when I say snow day, I actually mean ice day, but it doesn’t have the same sort of ring, does it?

This weekend I learned a few things.

  1. I own no items of red clothing. I mean, my Kaylee dress has a little red in it, but its not a winter dress by any means. I own and elastic red belt. So much for getting a raffle ticket for wearing red (at a dance on Saturday)!
  2. Trying to carve wood will bring on instant flashbacks to Brave.
  3. Even when I own a plethora of food, I don’t like seeing an empty fridge, and I’ll set out to fill it. Which will inevitably lead to buying other stuff too. I’m dubbing it the Valentine’s food run of 2016.

Because its rather cold outside, and therefore inside too, I’m holding off on taking garment photos, because I’m unwilling to take off my knee socks to change into tights. Or to put on jeans. My pajamas are just too comfy. Plus then I’d have to comb my hair.

So once it warms up later this week I’ll be able to photoshoot.

But to catch you up on my wintry day activities, beyond the research I’m also supposed to be doing, I’ve been working on the following projects:

sweater

I cast on the back of the Vale Cardigan last year, sometime in the fall I believe. I’ve now progressed past the armscye shaping, and I might be able to bind off tonight. I’m then going to make the sleeves, and then the fronts, to see how much yarn I’ll have left.

My fingers have been twitching on the interwebs some more, and I spent a few nights lost on the RPF looking at builds of Claudia’s mini Tesla pistol. So I immediately (and slightly regrettably because it was unplanned and hasty) went to work on it.

tubes
and there’s more tubes…

I got some vacuum tubes, bought a dial which is way too big for the build, but may work for the TARDIS, and bought wood carving tools from a craft store.

tools

At first, I only bought a set of chisels and some wood blocks. I got the one I’m currently working with for 25 cents, on clearance. It’s pine, which is not recommended for absolute beginners, but it was cheap. I’ve got some other pieces of wood, of the more beginner variety, so maybe I’ll return those, or I’ll use them for another project.

After some trouble with using just the chisels, I went back to the craft store (on the Valentine’s Day food run of 2016)  and bought an x-acto knife with some extra blades. Things have gone much more smoothly since then. Although I’m even more scared of cutting myself.

pattern

After all, my hands are angry at me enough after working with the chisels and my hand saw. They don’t need any more reason to hate me. For instance, blood. Blood would be bad

In other news, I’m mulling over drafting and making a sweater out of some lovely navy blue sweater knit…

Plenty to keep me busy on this wintry day!

Warmth, in this incredibly Warm Winter

full

So after the large winter storm passed by here, it got warm.

Like really warm. There were some people wearing shorts. Winter, even around here, should not be that warm.

So its a fitting time to be knitting with wool, right?

In reality, both of these projects were conceived earlier in the month/last year.

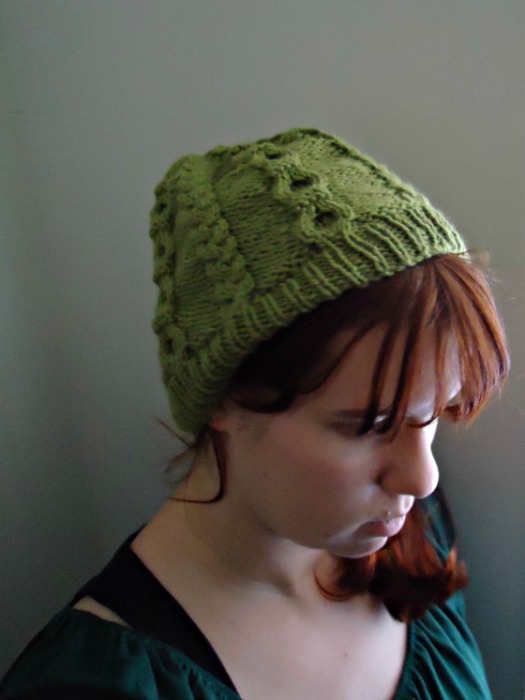
Knowing that its supposed to be winter, I had decided that I needed a warm hat. I’m not a hat person, really, but I walked home (about 2 miles) one night when it was near freezing, and I only had a thin scarf and my “fall” coat (because its lighter than my winter coat, but still normally warm enough), and I’m pretty sure that I nearly died. It took me about 45 minutes to warm up enough to function like a human being, and then another hour past that to eat and drink enough hot stuff to warm up enough to fall asleep.

side

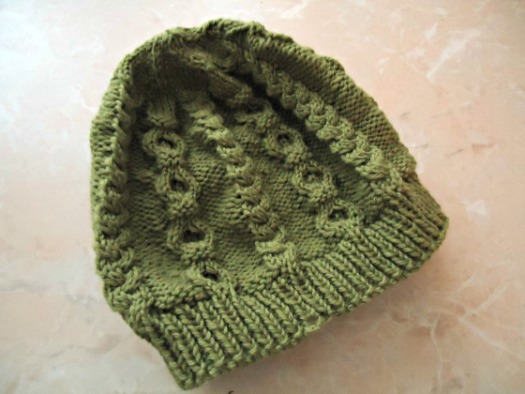
The next day I started this hat. I had this orphan skein that I got on sale when I was looking for sock yarn. I couldn’t find any on-sale sock yarn, but even with my full-price sock yarn, this still fit into my hobby budget. It may have been 4 dollars, and I’ve got a couple of yards left.

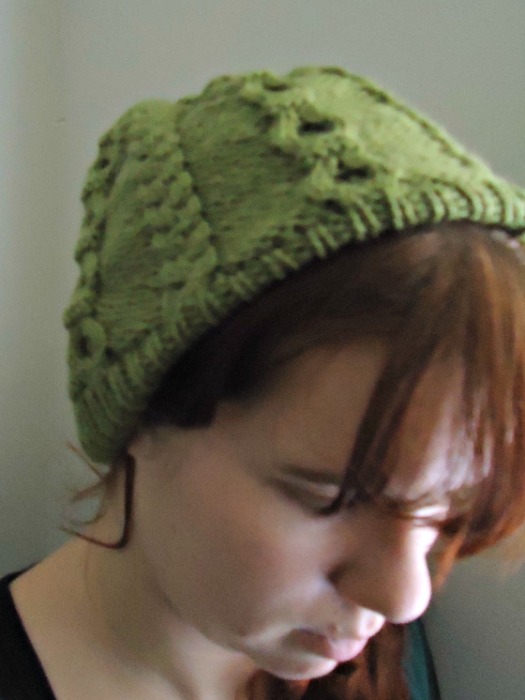
So the pattern is Helios, free on Ravelry. It’s a pretty good pattern, though I stuck with the size 7 needles throughout, since I don’t have a slightly bigger needle. It makes it more of a globbular slouchy hat, instead of a beret/tam kind of slouchy hat. The one thing I’m afraid of is blocking it, since it’s a tad big, and I don’t want to stretch it out any. My other green knit hat was too small, so I gave it away to my cousin, so I guess I overcompensated with this one, and made it too big.

top

Oops! Its still wearable, which is perfect. Because I was not going to admit defeat and try again.

And the second knit project is this pair of socks! This project can be described in three words:

Second Sock Syndrome.

full

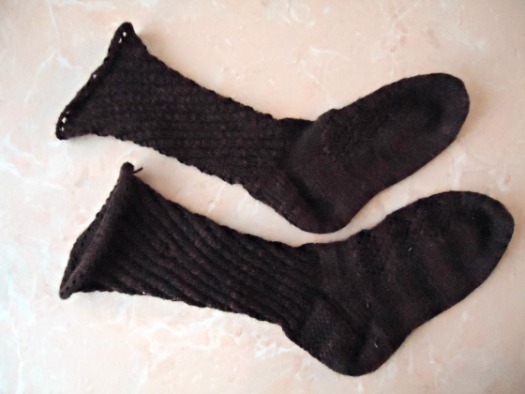
Yes, this time I fell prey to SSS hard. Really hard. There was a thought in the back of my head that I should somehow work both socks together, and my circular needle collection does not include a skinny enough needle with a long enough connection. So I planned it that once I got to the ankle of the first sock, I’d put it on stitch holders, and start the second. Which worked perfectly.

Yarn-wise this is an alpaca merino blend that I intended to use for socks for my dad… last year. Meaning 2014. Sorry dad. It’s also not machine washable, so perhaps its best that I made them for me, since I’ll be more likely to remember that…

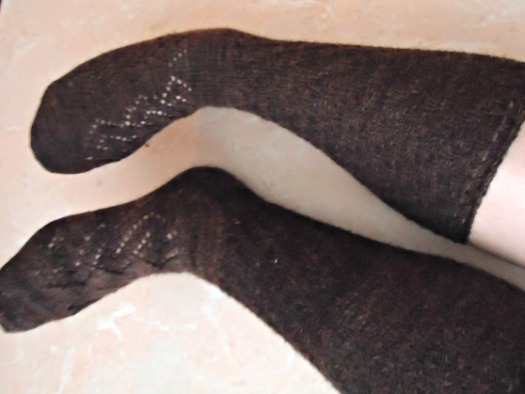
The pattern is ish-designed by me. Meaning, I used this book I got, Socks a La Carte 2 Toes Up to plan it out, with a rotating rib leg, technically a double picot cuff that I’m too lazy to fold over and seam. But once I made the toes of the first sock, I realized that I would get super bored doing a simple stockinette for the foot, so I found this.

lace-diamond-knitting-motif-chartTo be honest, I’m not sure where I found it, but I think it was on a Russian stitch pattern website, and since this was before I started the sock, so I never anticipated needing to cite the source. If you know who’s this is, please let me know! Because its a beautiful lace pattern, and I’d definitely suggest it!

So after finishing both feet of the socks, I started in on the rotating rib of one of the socks, and I got a long way through when I realized that I should weigh out the yarn so I could maximize the height of the sock. Once I double checked that, I ribbed until I got to the cuff, made the double picot cuff, bound off, and then the socks sat there. For months. And months.

What I haven’t  told you yet, is that these socks were started over the summer. July or August.

Oh yes.

These took me about 6 months.

leg

When I went home for the holidays I brought these with me, and didn’t even make it a row. So once I got back I vowed that I would finish before the semester started. Which also didn’t happen. I made progress, but didn’t finish it.

It was during the first week of the semester, and I told myself that I couldn’t start any new projects until I finished these. Trust me. These got finished really quick after that. I even took them with me to the movie theater when I saw Star Wars the second time. I had the whole row to myself, so I didn’t even feel (too) self conscious about KIPing. There are some advantages to itsy bitsy theaters.

And then I started on the hat! So a happy ending finally. Plus, the hat got done in less than a week. All that pent up knitting energy I guess!

Got any SSS, or longtime knitting projects?