Year 3 with Ariel

cuteariel

Well guys, it’s my 3rd year of making costumes and actually wearing them (as opposed to year 8 of making long term costumes and not wearing them maybe ever… Because that does still happen… This one’s cheerier), and it’s also my 3rd round of updates to my Ariel costume.

Year 1 was my Ariel with a deep blue rayon skirt, matching bow, and hair extensions.

Year 2 was the Ariel with a pair of light blue rayon lawn culottes, along with Year 1’s bow and hair extensions.

Year 3, or this year, is the year that I made linen-cotton culottes and ditched the hair extenions. I kept the bow though!

Last year’s culottes were awesome! Except, well, except for the hole in the butt. So this round, I decided to keep with the culottes idea, and ditch the way too lightweight rayon. Plus I wanted them to be wearable in real life.

Again, like last year, I dyed the fabric myself. This year it’s this linen/cotton blend as the substrate, though. I dyed it with the same royal blue fiber reactive procion dye, in my trusty five gallon bucket. I’m not sure how much fabric is actually was in there, but it was waaaaaay too much for that bucket.

culottes

I think it was about 4 yards of fabric, though. Those legs are wide…

The fabric is reasonably stiff with almost no drape, which does mean that these culottes come with their own volume. But, since I didn’t bring an iron with me, only a steamer, I didn’t get a sharp front crease at the pleat, so some illusion was lost.

back

It also made problems in the back. See, I wanted to avoid the zipper and corset problem I found last year, and installed an elastic back… But I was a bit willy nilly in the altering, and didn’t think about the large quantity of fabric that’d be gathered on the back, so I trudged through. (I used this tutorial, if you’re interested.)

This was right after Megan Nielsen released pockets as an add on/update to the pattern, so I was lucky to get the huge pockets that I so love about her patterns. They’re fantastic!

Sewing up went quick, and I installed the elastic and tried it on. In hemming I probably cut off at least two inches, and the hem is about an inch and a half deep. But then I discovered that the elastic (two rows of elastic, mind) was not strong enough to keep the skirt up.

So I took off the elastic, cut it down, and then reattached it, and it worked fine enough.

side

When I walk, sometimes the extra fabric “walks” awkwardly in front of me, but I did raise the inseam by about two inches after I noticed that, so fingers crossed that fixed it.

I’m considering unpicking the back and making “artistic darts” to reduce that waistband bulk, but that month is not this month. Maybe next month.

style

My hair was super long this year (comparatively), so I nixed the hair extensions on the day. They always get stuck on stuff and drag my scalp with them, and then I take them off midday anyway.

cuteariel2

But the bow and necklace have held strong! This year, I did stick on some fake earrings, meaning pearly cabochans with eyelash glue. They were cute, and did last all day!

So that’s year 3 of Ariel! I dunno if she’ll make it another year… I had to do some repairs to the corset this year, due to the really cheap “coutil” that I used, but I hope that next year it’ll be around!
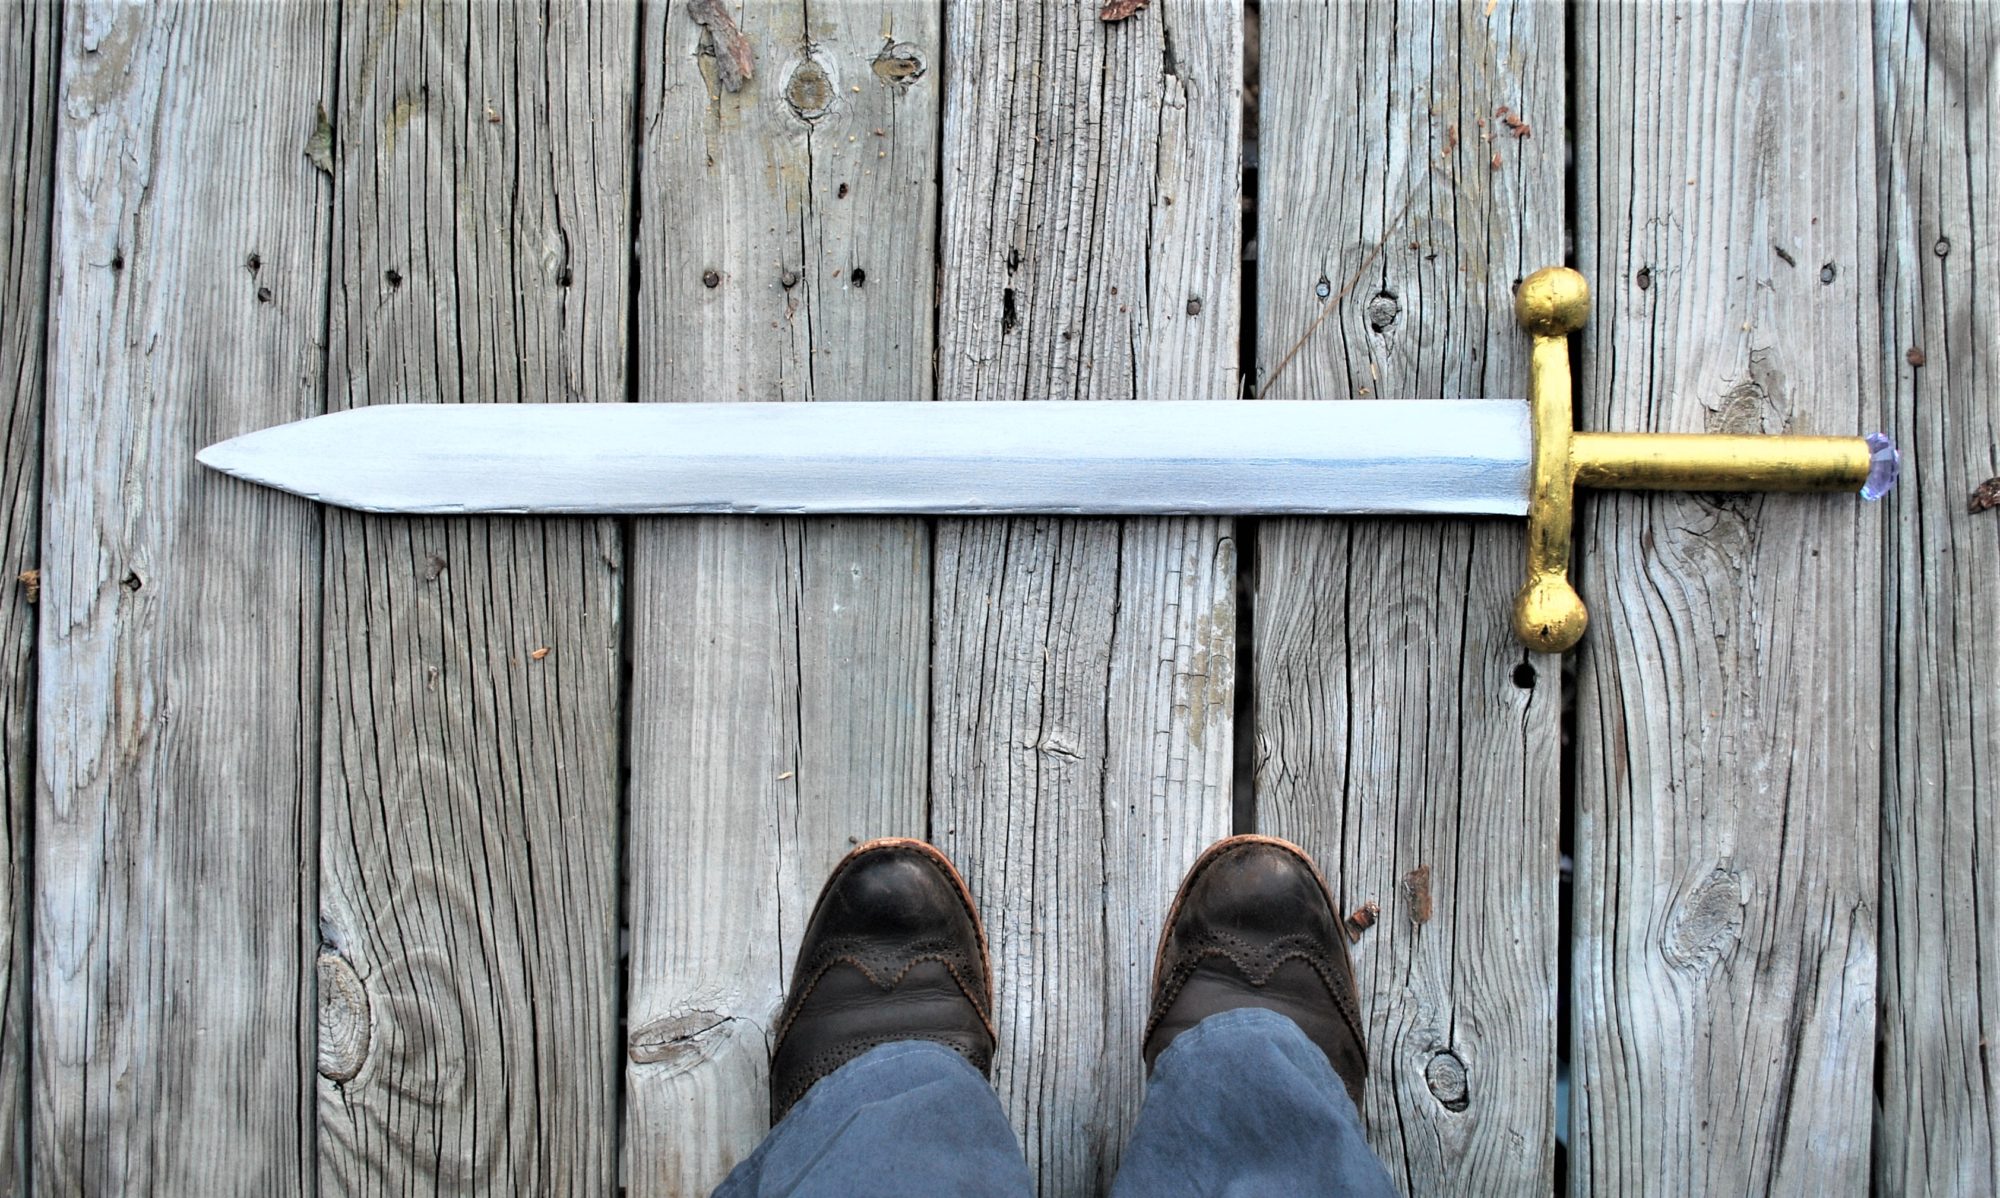
 

Is the pen really mightier? – Prop Sword Tutorial

first

The first prop I needed to make was a lightweight sword. It had to be a short sword (so the double handed sword I bought at my first DC was out) and it had to be me-sized. So smaller.

full

I went to Michael’s one day to scope out the small plywood situation, and ended up with Basswood, I think with the dimensions 24″ by 4″ by either an 1/8 or 1/16″ but I’m not sure which. I also purchased an 1/8″ diameter dowel, which gave the sword it’s structure. That was the cheapest Michael’s trip ever, because with a coupon, the main part of the sword cost $2.50. Craft stores never work out that well for me, so I definitely gave myself a pat on the back for a good job. Or rather, I took myself out to see the Incredibles 2 (this was late July/early August. It was still in theaters.

I’m pretty sure I cut the basswood in half lengthwise, then I cut the pointy bit out, and tried to match on both sides. Most of this was done at night, so cue the bad phone pic here:

DSC_6980

I then taped the dowel to one of the sword pieces. Then I applied wood glue around the edge of the sword outline, and used every single clamp and binder clip I own to keep the pieces together.

DSC_6986

Then I left it for a few days, even though it probably only needed one.

I used a laser cutter to cut out pieces for the hilt from 1/8″ plywood that would slide onto the wooden dowel for stability, and I aimed for a hand and a half length. In the end I got a stacked result, then used wood filler to fill it in and round it slightly. It worked pretty well, though it might’ve worked better if my filler was wetter. It has gotten rather gummy over time. Regardless there was a lot of back and forth between gooping and sanding. Using cardboard would work pretty much just the same way, if you cut some layers and used wood filler and glue and tape to hide the corrugated edges!

hilt.jpg

Then came painting and sanding. I painted up the “blade” with white acrylic first, then with Lumiere Jacquard paint in silver. Then it was too shiny, so I sanded it. Repeat once more to see if anything changed. Add the line down the center (kinda… don’t look too close) and then sand again to blend that in.

For the hilt I first painted everything brown, then painted it with Lumiere Jacquard paint in bright gold.

jewel.jpg

And the jewel. Still the biggest pain in the butt of this project. When I was designing the laser cut part of the hilt I made pieces for the end that would allow the jewel to nestle in.

Then I tried hot glue, then superglue twice, and now E6000. It’s sticking for now.

point.jpg

So that’s how I made my prop lightweight sword!

The Moment, Mark 2

I was at DragonCon over Labor Day weekend, and what I realized when I wore my costume Saturday was that I hadn’t actually updated you on my newest (meaning 1 year old) Moment box, and the costume that goes with it! I’m going to give you the super short synopsis version here, and then link here to the page that goes in depth.

DSC_7144

Also, I apparently never posted specifically about last year’s costumes… Finishing my Master’s hit me hard. I’ll be changing that soon!

Some awesome creators complimented me on this version and gave me suggestions and new ideas for a future version, so at the end of this post I’m going to write down some of them before I forget… Because I can be terribly forgetful. Shout out to Circus Jack (?), the Joker and Harley that tracked me halfway across the Marriott, and to Daniel at BlueBoxDezigns who also has made a Moment box! All of you made my day when we talked about the details!

DSC_7136

Let’s start with the costume…

Shirt: Onyx Top by Paprika Patterns out of white rayon lawn, tea dyed to a tan. Netting was cut into rectangles and sewed to the end of the existing sleeves

Vest: Some variant on the Archer Shirt by Grainline Studios, drastically changed out of shape though. I don’t even remember what I did, it was done so quickly and haphazardly. Rayon spandex twill

Skirt: Syrah Skirt from Baste and Gather out of a lovely, buttery, rayon jersey. So comfy! Too light colored for me to wear in real life! Basically I made it exactly the same, just sewed up only part to my knees so I could knot up one side.

Accessories: The “vortex manipulator” I made in 2013, boots that I painted a different shade of brown, various bracelets I’ve picked up over time.

DSC_7189And the box:

All the sides are laser cut, mainly out of 1/4″ sanded plywood.

DSC_7193The outer frame was constructed by splitting 2×4’s lengthwise and then cutting the pieces to size.

DSC_7196The corners were then modeled in the online 3D modeling page Tinkercad, and then I 3D printed them.

cropped-DSC_7199.jpgA lot of the gears and such move. It also opens!

Anything more you want to know, check out the breakdown on the costume page, and email me if you want to know more than that!

P.S. I won a costume contest at my university with this costume, so the last shot is from that day!

Suggestions:

Make the acrylic part articulated so that the individual circles can move

Make everything on one side articulated together: Moving one piece moves them all

(Even better if moving one side moved something on another…)

Keeping the opening from falling open by using velcro or making it in a lighter-weight material and keeping the magnets.

moment