It’s time to talk about the gauntlet.

So picture the scene: I have been waiting for a year to see Avengers Endgame. In some ways I’d been waiting for this movie since I first saw Iron Man in 2008. The whole year I was trying not to speculate and guess what was going to happen. I’ve tried to not watch trailers, since I was going to see it no matter what. I caught a couple pictures, by accident, but other than the white team up suits I didn’t see much. I wait until the weekend post premiere to see it and manage to avoid spoilers on the internet.

I’m in the theater, one of my small local theaters which has thin walls, but my movie is going to be the loudest anyway. There’s a pretty good crowd, but there’s only about 4 people in my row 3/4 of the way to the back.

I am shocked by the time jump, but liked the plot device. I enjoy the Bruce Hulk combo, and Scott’s time travel banter. I like Morgan. I can see why Clint has changed. I cry over Black Widow. And then they create the gauntlet. The Iron Man/Hulk/Nano gauntlet to take the strength of the infinity stones to make another snap. It’s a great team up of all the sciencey people of Marvel!

20190827_10114721

And then the “twist.” Thanos comes back to the future from the future past, and wants the stones, so he blows up the Avenger’s HQ. And suddenly, the person who has possession of the gauntlet is the least powered person on the team. Clint Barton.

In the MCU, he’s survived on wits, on archery skills, and on hand to hand combat. But he doesn’t have a super suit that flies or shrinks. He doesn’t have sorcery or superpowers. He’s just a guy. A guy with skills, but just a guy.

That was the image that stuck with me when I left the theater. Sure, I cheered over the “We’ve got this” moment, I cried over Tony, I was heartened by the win, and was pleased by the dance. But a guy playing keep-away with a seemingly unbeatable alien. That’s what stuck.

So when I realized I could go to DragonCon in August, I decided to make a Hawkeye/Ronin costume and carry around a gauntlet to recreate that moment. It’s maybe two minutes of the story, and probably only 30 seconds of screen time total. But that’s what DragonCon is for! Recreating beloved moments, and someone will get it.

Even before making the costume, I knew I needed to make the gauntlet, and I knew that would take the longest time, mostly for drying and waiting and mistakes.

Foam was new to me. I found my local Harbor Freight and bought the two different types of floor mats they had, and used both for the costume, but only the thinner rolled one for the gauntlet.

I found this awesome 3D Pepakura model for the gauntlet from MasterMod, and printed off a cardstock copy so I could test out the size and how it fit together. Cutting those pieces nearly broke me, and I hadn’t even gotten to the foam yet.

20190730_12162003

Deciding to size up a bit, I printed out a new copy, and set to work cutting the foam. I was using a couple of fresh X-acto blade, and was still having trouble, so next time I’ll follow suggestions to use a scalpel.

I would cut out some pieces, and glue some pieces, and cut some pieces and glue some pieces. At the time I was living in a townhouse where I only had one room for both living and crafting, so I didn’t have the space to cut and arrange all the pieces at once.

Contact glue was my weapon of choice for assembly, and boy is it smelly and sticky like mis-made caramel sauce. The stick, not the smell. Something I didn’t consider until it was too late was that the edges of the foam should probably have a specific angle in order to fit together properly. Oops!

Also, don’t let the can of contact glue fall over and spill into the bottom of a bookcase. I got lucky, and the carpet underneath the case wasn’t affected, but it could’ve been disastrous. And eternally smelly.

Cut and glue and cut and glue and cut and glue.

Okay, so then it was assembled and I needed to get a move on, as DragonCon was coming up quick.

20190827_10121926

Plastidip and North Carolina humidity in August doesn’t work well together.

Average spray paint is actually worse.

Masking off tacky spray paint and mildly tacky Plastidip is less than ideal.

20190827_10120123

So I grunged it up with some black and brown acrylics.

The jewels. Those were a treat. I found them in a grab bag of rhinestone jewels at Michael’s. I spent about 20 minutes sitting on the floor of the young craft kit section one night after a work shift making sure that I had the correct colors and shapes if I was going to spend 15 dollars after a coupon on a bag of jewels I might never use afterward. Massaging a bag of craft jewels 15 minutes before closing is… not a pretty look.

20190827_10122627

I think I used contact cement to attach them, then used some kind of puffy paint (craft supply hoarding for the win!) to really cement them in.

For the inside, I decided to keep my super glue, and my wallet inside the glove, which would mean that I needed a pocket inside.

20190922_07485904

I found some scraps from the Merida skirt, made a zippered pouch, then glued in the pouch and some lining to black out the inside of the glove.

And that rounded out my Nano Gauntlet! It now graces my curio cabinet in a tribute to Ironman.
Not a Background Lannister – Prop Shield Tutorial

first

So I started with the trousers last Wednesday… The shield on Friday… Next up in the lead up to the costume reveal is the shield.

And boy am I proud of it!

I have access to a laser cutter, at my job, so I put together a “quick” file (it’s never quick) for a shield that would fit on one piece of plywood. I could’ve made a bigger one, but I was trying to be material conscious, and I’m glad I kept it at that size. The laser in question is technically two feet “wide” in material dimensions, and 4 feet long, but it’s a little bit smaller in both directions due to crookedness and use  over time.

I worked with 1/8″ plywood, and made this as solid looking, but light as possible. There are two fully solid pieces, with multiple border pieces, one set in between the solid pieces, and two sets on the front, and then the decorative pieces there too… This would be better explained in pictures…

alanna_pullapart

Yeah… Like that.

So I layered and glued everything together. It took awhile. What I should have done then, is sand those edges. I didn’t. Moving on.

edge

On the top of the shield I used wood filler and a putty knife to shove material into the seams so it was a fake beveled/routed edge. That’s honestly what took the longest. I’d put on wood filler, wait for it to dry, sand it, apply more when it inevitably chipped and repeat.

bevel
Yeah… not meant to see it up close.

I’m kicking myself that I didn’t get progress pictures as I went. So then I painted the shield. Chestnut brown on the back and sides, then red and gold on the front. The gold is Bright Gold Lumiere Jacquard fabric/universal paint, and the others are stash cheapo acrylic paints. Oh, I so love the Lumiere paints.

lioness
Gaah. I’m gonna stop it (mostly) with the close ups on this one.

On the back are two more sets of laser cut pieces, the main point of which was to provide some material for screws to connect to. Then I guesstimated sizes of leather to attach the shield to my arm, screwed it into the top and bottom bracers. I had to reattach the bottom ones to make them tighter so I could control the shield a bit better, but then I was completely done with the shield!

Lightweight, blocky and just what I needed.

It did mean that I hit a bunch of people accidentally, but… that’s being at a con, right?

I was not too surprised that this wasn’t the recognizable part of the costume (It looks too much like the Lannister crest, or Peter’s from Chronicles of Narnia), but I was surprised what was! You’ll have to tune in on Wednesday to figure out what I’m talking about!

corner

That probably sounded like a ending, but I’m popping back in again to say that though I made this with a laser cutter out of plywood, you could totally do something like this with a craft knife and some stiff foamboard or foam, and come out with similarly awesome results!

Is the pen really mightier? – Prop Sword Tutorial

first

The first prop I needed to make was a lightweight sword. It had to be a short sword (so the double handed sword I bought at my first DC was out) and it had to be me-sized. So smaller.

full

I went to Michael’s one day to scope out the small plywood situation, and ended up with Basswood, I think with the dimensions 24″ by 4″ by either an 1/8 or 1/16″ but I’m not sure which. I also purchased an 1/8″ diameter dowel, which gave the sword it’s structure. That was the cheapest Michael’s trip ever, because with a coupon, the main part of the sword cost $2.50. Craft stores never work out that well for me, so I definitely gave myself a pat on the back for a good job. Or rather, I took myself out to see the Incredibles 2 (this was late July/early August. It was still in theaters.

I’m pretty sure I cut the basswood in half lengthwise, then I cut the pointy bit out, and tried to match on both sides. Most of this was done at night, so cue the bad phone pic here:

DSC_6980

I then taped the dowel to one of the sword pieces. Then I applied wood glue around the edge of the sword outline, and used every single clamp and binder clip I own to keep the pieces together.

DSC_6986

Then I left it for a few days, even though it probably only needed one.

I used a laser cutter to cut out pieces for the hilt from 1/8″ plywood that would slide onto the wooden dowel for stability, and I aimed for a hand and a half length. In the end I got a stacked result, then used wood filler to fill it in and round it slightly. It worked pretty well, though it might’ve worked better if my filler was wetter. It has gotten rather gummy over time. Regardless there was a lot of back and forth between gooping and sanding. Using cardboard would work pretty much just the same way, if you cut some layers and used wood filler and glue and tape to hide the corrugated edges!

hilt.jpg

Then came painting and sanding. I painted up the “blade” with white acrylic first, then with Lumiere Jacquard paint in silver. Then it was too shiny, so I sanded it. Repeat once more to see if anything changed. Add the line down the center (kinda… don’t look too close) and then sand again to blend that in.

For the hilt I first painted everything brown, then painted it with Lumiere Jacquard paint in bright gold.

jewel.jpg

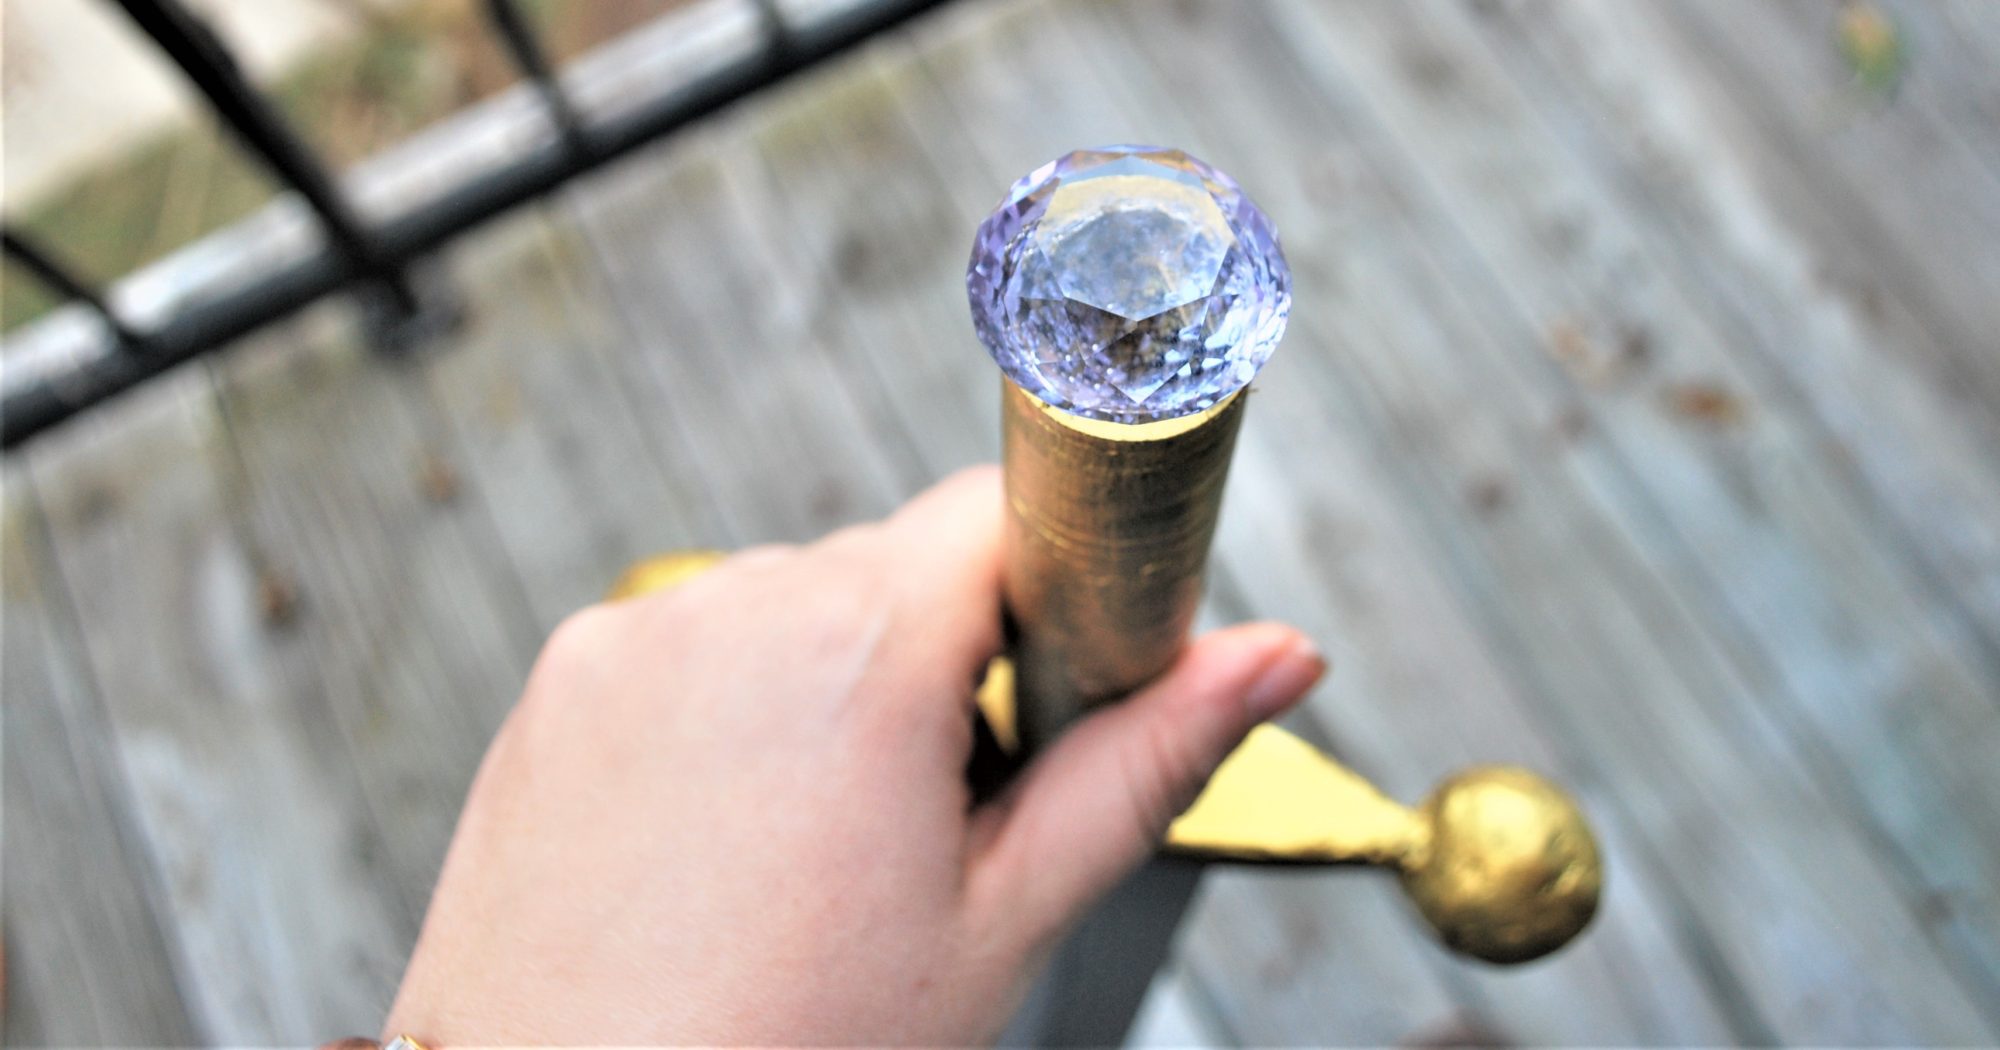
And the jewel. Still the biggest pain in the butt of this project. When I was designing the laser cut part of the hilt I made pieces for the end that would allow the jewel to nestle in.

Then I tried hot glue, then superglue twice, and now E6000. It’s sticking for now.

point.jpg

So that’s how I made my prop lightweight sword!

The Moment, Mark 2

I was at DragonCon over Labor Day weekend, and what I realized when I wore my costume Saturday was that I hadn’t actually updated you on my newest (meaning 1 year old) Moment box, and the costume that goes with it! I’m going to give you the super short synopsis version here, and then link here to the page that goes in depth.

DSC_7144

Also, I apparently never posted specifically about last year’s costumes… Finishing my Master’s hit me hard. I’ll be changing that soon!

Some awesome creators complimented me on this version and gave me suggestions and new ideas for a future version, so at the end of this post I’m going to write down some of them before I forget… Because I can be terribly forgetful. Shout out to Circus Jack (?), the Joker and Harley that tracked me halfway across the Marriott, and to Daniel at BlueBoxDezigns who also has made a Moment box! All of you made my day when we talked about the details!

DSC_7136

Let’s start with the costume…

Shirt: Onyx Top by Paprika Patterns out of white rayon lawn, tea dyed to a tan. Netting was cut into rectangles and sewed to the end of the existing sleeves

Vest: Some variant on the Archer Shirt by Grainline Studios, drastically changed out of shape though. I don’t even remember what I did, it was done so quickly and haphazardly. Rayon spandex twill

Skirt: Syrah Skirt from Baste and Gather out of a lovely, buttery, rayon jersey. So comfy! Too light colored for me to wear in real life! Basically I made it exactly the same, just sewed up only part to my knees so I could knot up one side.

Accessories: The “vortex manipulator” I made in 2013, boots that I painted a different shade of brown, various bracelets I’ve picked up over time.

DSC_7189And the box:

All the sides are laser cut, mainly out of 1/4″ sanded plywood.

DSC_7193The outer frame was constructed by splitting 2×4’s lengthwise and then cutting the pieces to size.

DSC_7196The corners were then modeled in the online 3D modeling page Tinkercad, and then I 3D printed them.

cropped-DSC_7199.jpgA lot of the gears and such move. It also opens!

Anything more you want to know, check out the breakdown on the costume page, and email me if you want to know more than that!

P.S. I won a costume contest at my university with this costume, so the last shot is from that day!

Suggestions:

Make the acrylic part articulated so that the individual circles can move

Make everything on one side articulated together: Moving one piece moves them all

(Even better if moving one side moved something on another…)

Keeping the opening from falling open by using velcro or making it in a lighter-weight material and keeping the magnets.

moment

The Moment

When I posted Spring Updates I wasn’t sure if I’d be posting again about this prop, at least not until I had completed the costume to go with it. But that has been postponed for a smidge, so I think its time to share!

If you don’t recognize this prop, you probably didn’t see the Doctor Who 50th anniversary episode. That’s okay! What you should know is that it’s central to the storyline, as its the most dangerous weapon in the universe, so dangerous that it has a conscience, who just so happens to appear as Billie Piper’s character Rose, or rather her image, but calling herself Bad Wolf. If you find that a reasonable thing, then you should definitely join the Whovians!

Anyway…

Last October I fell in love with a (relatively) new technology: LASER CUTTING!

And when I say fell, I mean I fell hard.

The panels of this prop were the 2-7th things I ever laser cut.

So I was completely new to Illustrator, but this project (and everything I’ve designed since) has taught me so much!

Back to the prop… I used photos found on the RPF (here and here) as references, and then designed all the sides. 5 of them were reasonable, since there would good references, but the one with all the Gallifreyan was more difficult. Only half-ish was ever visible, so I made a lot of fake Gallifreyan… Which was entertaining. And some of it looks reasonable, and others… Don’t. Luckily it’s only about 12 by 6 inches of ridiculous.

And I’ll probably be one of the few that cares.

I went on a week long “bender” of designing and laser cutting. I would design something one night, cut it out the next day, and then turn around and design the next one that night!

Then came time to take them all home and paint them. All the metallics are Jacquard Lumiere paints, and I used some cheap acrylic paint for other bits.  I think I had everything painted by December. And then my project brain stalled. (In January I found myself working 2 part time jobs, plus my grad school research so everything shut down. Like this blog, for the most part.)

In March, when things had mostly settled, I found myself with the inkling to get in the wood shop to make the frame. I ended up splitting two by fours for the final product, and creating an empty cube. I spent a lot of time sanding it down and trying to get many of the imperfections out. Some of the wood I had used had some kind of black paint on it, so I had to sand it down a lot in places.

Then I made the bad decision to wood burn the frame by hand. In the show prop, it was probably laser cut, but I wanted the deeper worn look. I spent 6 hours over 3 nights working on it (from 10pm to 12am) which was not my finest decision…

I borrowed some stain from a friend, and stained the entire thing, which was a kinda messy affair. My bathroom looked like a crime scene for a few hours. The stain was oil based Zar, in color Rosewood.

Then came Easter weekend. The laser cut panels were “installed,” meaning pressing them until they fit and attempting to glue them together cleanly. I had installed a small “door” into the corner of one of the sides, so I installed hinge hardware, and used some foam board leftover from a friend’s project to fill in some gaps between panels.

I was marathoning the project at this point, so I managed to get on Tinkercad and designed the corner caps, which are essentially 3 sides of a cube with a half sphere, and printed them. For a first 3D project, they turned out unexpectedly perfect! I primed each with some cheap primer spray paint and then painted the corners grey with acrylic paint mixed with some silver Lumiere paint. Then everything got glued together and I used a clear coat over everything, from the wood to the 3d to the laser cut stuff.

But this thing is huge. It’s bigger than the actual prop, and I can hardly hold it. So it takes up a remarkable amount of floor space. So I laser cut an acrylic topper, and I use it as a coffee table!

The intention was that this would be a prop useable for DragonCon, but as I said it is huge. I think it measures 16 inches cubed. I have trouble picking it up, due purely to the dimensions, though the weight would be a problem an hour in…

I’m thinking that it might be worth it to make a smaller one. I’ve only got two months, but I think I can cut down the working time to a two week period, if I do it again, since I know all the steps, and the only real thing I’ll have to buy is stain for the frame. I would definitely laser cut the frame though, before assembly, since it was way too much time to burn it by hand…

We’ll see what that idea comes to!

Tale of Three Plushies

Not only are my two bestest buddies joining me on my DragonCon adventure, but we’re doing two group cosplays, and a couple of weeks ago I had the most adorable idea…

link/link/link

Nausicaa is not exactly the most recognizeable character, and because I’m really not a wig person, and I didn’t have time or cash to learn, I wanted to have at least one real prop for her. So I wanted to make a Teto plush. And then I realized that my two friends (going as Sophie from Howl’s Moving Castle, and Kiki from Kiki’s Delivery Service) could also have plushes! And that I could make them! Because I’m insane like that.

I worked on the Jiji plush first. Jiji is Kiki’s companion, a sarcastic black cat that travels with Kiki when she moves away from home. I asked if my friend wanted to hold him, or if she wanted him to sit on her shoulder, and she chose the first option. So I made him a little oversized. It’s hard to tell from the reference pics I was using, since I don’t own the movie, but I think he’s technically a rather small cat, but the plush I made was more of a large cat. He’s the biggest of the three plushes, but since he’s black against a navy dress, I wanted to make sure he could stand out. The plush also looks much more like the toy cat in the movie, but I think the point gets across well. Plus mouths are hard…

In fact I avoided the mouth completely… I ended up embroidering the eyes and nose, which took much longer than I expected, and then free forming the plush. Take it in a little here, and out a little there, add some more stuffing there and not here, etc. And I ended up with a loveable Jiji… until I realized I forgot the tail. And then once I remembered and added it, I ended up with a loveable Jiji!

The second plush was Calcifer, since I wanted to get the plushes for friends out first… Calcifer is a fire demon that is under a contract with Howl, but really becomes best of friends with Sophie, so I thought he’d be better than Turnip Head, who I also briefly considered. I had this reddish wool coating ( I think) and attempted to make a 3D version. I intended to make the bottom perfectly round, using 4 panels, but it ended up a little boxier… I cut the top of the four panels to look like flames, and attempted to use a “facing” to make it a bit cleaner… and then had to hand sew the top shut.

Then I painted the plush with some acrylic paints. Mostly yellow, since it “melted” into the wool like orange… I gave it two layers, one that went around the majority of the plush, and then a second to give the appearance of the “core.” And then I let it dry for ages, before adding puffy paint eyes. Once the puffy paint dried, I painted on the mouth and the irises. Isn’t he adorable? He’s not particularly cuddly, but I don’t think fire should be cuddly… right?

So I then got started on Teto. He was the only one I actually bought fabric for, since I didn’t have fake fur or brown felty fleece, so I know for a fact that he’s made out of poly fleece. with poly fake fur. He’s an imaginary creature called a fox-squirrel, and has always been my favorite character in Nausicaa. I basically made tubes for the body and legs, and lightly shaped them into submission. Then I free handed the head and tail, and then shaped the ears. The ears are held up in part by cardboard inserts, and also by some clear fishing line attached to a hook and eye to the tail so the ears can either stick straight up or flop down when I want them to.

The darker brown on the body is stitched on, as is the faux fur belly. The bib-like structure is lightly stitched, but the bottom is mostly left free to hang and move. The eyes are some green knit interfaced and then hand sewn to the head. Then I drew and painted on some high and lowlights. He’s designed to sit over my shoulder, which he does pretty well, and I’m terribly pleased with how he came out…

And here ends the tale of three plushies! Do you have a favorite animated sidekick?

Shiny

This project took me forever.

I was looking up when I ordered the parasol in the first place. It was the end of September. That was a long time ago, wasn’t it?

This is basically the same one I got, which is the perfect size in every way, except it doesn’t fit well on my desk… So painting it sometimes got touchy.

Now, I then didn’t start painting until the first of our snowstorms. Because what else was I to do? So that was February…

I also have nearly no in progress shots, because I worked on it mainly at night, or when it was raining/snowing, neither of which provide enough natural light to take nice pictures. I do have this one though.

For paints, I used the cheap acrylic for all of them. I’m talking the 50 cent paints at Walmart. Maybe they’re a dollar, but either way, very inexpensive.

This might be why I needed nearly three coats to get the green to look solid, not streaky. The yellow and red didn’t have that problem, but the green and I were not getting along.

But the funny thing is, a few days after some snow melted, and we were back in classes, the power went out at home. I’m pretty sure that’s why I woke up before my alarm. Since it may have been three hours till it came back on,  as expected by the power company, I decided to pack up the project and take it into work.

In my defense, I’m still basically only taking classes. This first year of grad school is basically undergrad part 2. So when I don’t have a class until 12, am I going to do work in the morning? Or rather, on a Friday, with no homework due in that class, what am I supposed to do in the early morning?

So I finished it up, and during my mass photography escapade (where I also photographed my shawl, and a yellowtail cami that’s upcoming, and maybe something else too), I got some nice pics.

And there you have it! A lovely parasol in a Kaylee style. Yes, I did wait for the entire post before I mentioned Firefly. Can you notice my restraint?

Because I’ve been squealing internally ever since it was finished.

Quiver – Part 2

My unfinished quiver sat around for over a month between the first part and todays, but it was mostly because I was trying to determine the best way to sew it up.

I thought I could maybe butt up the two sides so they would form a solid point… My leather was just a bit too floppy for this.

I thought maybe I could fold under and sew it up like a seam. My leather had just too much structure.

And then it became the lace versus waxed thread debate. And where would I even attach the belt?

So I waffled.

initial

But I knew that my TARDIS belt was going to be made of leather, and I have a policy for leather goods and myself, that I am not allowed to cut into leather if I’m still working on a different piece. So I had to finish the quiver.

stitching

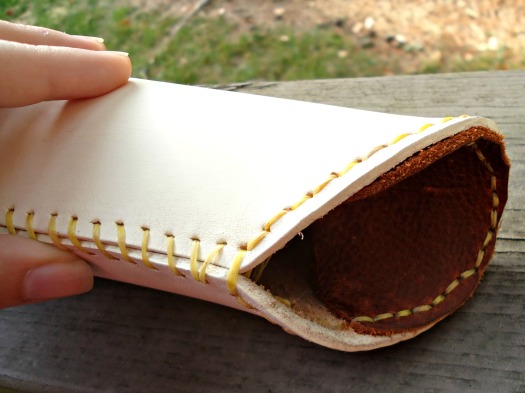
Using my trusty awl, I punched holes every 1/4 inch both up the seam line and around the bottom, since I knew I’d be attaching a cap to the bottom.

Waxed thread was my “weapon of choice” in the end. I used a whip stitch, I guess, to sew up the seam, which seemed to hold it very stably.

inside

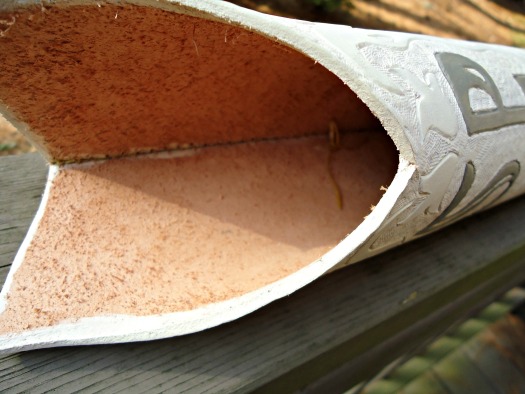
I had intentions of attaching the belt by running it through the quiver itself, but that didn’t pan out. For one, I only had as long as a partially used cow belly, which was not as long as I was expecting. Threading it through like that also made it really blocky and uncomfortable. Comfort is key in the costume game, especially since I’d already be wearing a corset, which is enough comfort-restraint.

top

So I ended up running a few loops of waxed threads to serve as attachments for the belt. It works well for now, but I’ll probably need to adjust it in the future.

Then I actually needed to make the belt.

belt

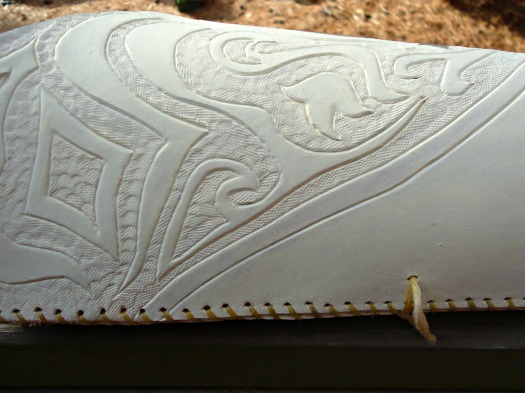
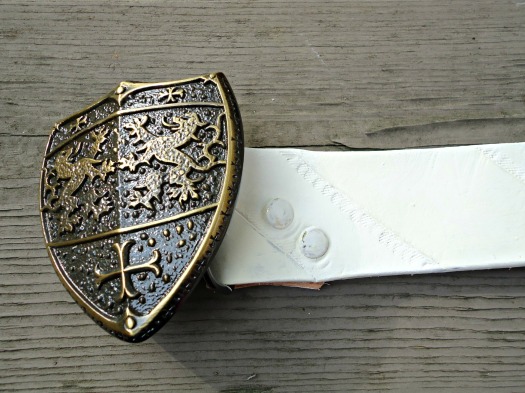
I wanted it to be something I could potentially wear, since I love the buckle so much. Isn’t it just the cutest shield ever? But I also knew the belt had to be long in order to cross my body like a messenger bag. So I made it as long as I could, and punched holes in various places, so I could wear it at my natural waist, or through jeans, or through the quiver. I cut a simple design using my swivel knife, just diagonal lines, and I tooled a few sections for some visual interest. It doesn’t show through the paint though, so I ended up painting a very subtle alteration between cream and ivory, based on my ability to mix paints well, which ended up with a more ivory batch right at the end of the painting cycle.

So that’s it for my quiver! Isn’t it purdy?

Quiver – Part 1

Even though Susan doesn’t actually wear her quiver with her final gown, it was still a must have prop for me.

Though it is very likely that the cosplay I see is not a full indication of people’s geeky interests, I’ve always thought that Narnia fans, of the movies more specifically, are more subdued (aka they don’t cosplay). There have been a few wonderful ones, but altogether the cosplay quantity is rather low.

tease

So the likelihood that I would be easily recognized from the costume alone (and with my hair, not a wig) is slim. I’m already risking the Lucy vs. Susan issue, with the red hair, but anything to make the costume more recognizable is good.

Plus I’ve always wanted a quiver for all the imaginary arrows I have.

The problem with Susan’s quiver is that it is likely meant to be ivory, or rather it was carved in one piece. There have been some good reproductions made with PVC pipe, but I didn’t have the requisite skill set. So I decided to use leather, something I do know a bit about.

I took pictures like this was a real tutorial, at least for this first half…  and then I let it sit for two months before I finished it. But that’s another story.

pattern

I started with posterboard, knowing that I had a limited amount of leather big enough to create this quiver. I drew a pattern, dragged a belt from the closet to “try it on” and fiddled with the pattern until it felt right. It slimmed down a bunch, and shortened as well, so that it would feel proportionally right on me.

Then came time to cut into the leather. I managed to find a big enough piece, and I used my rotary cutter to cut clean lines through… Leather is like fabric, right?

begintool

I had previously drawn designs for the top of the quiver, but they  didn’t precisely fit, so after some tweaking I got a useable pattern and traced it on. I cut into it with my swivel knife, and began tooling.

finishtool

And here it is with the design finalized!

The real quiver has a picture of Aslan carved in the bottom, but I didn’t want to take this that far.

So I began painting. I had both white and cream acrylic paint, neither of which was perfect, so I mixed the two and diluted with some water.

first

The first coat turned out streaky, and it ended up taking 4 coats before I was satisfied. In the tool-work, there’s still some areas of low paint, but I’m learning to give it up.

DSC03285

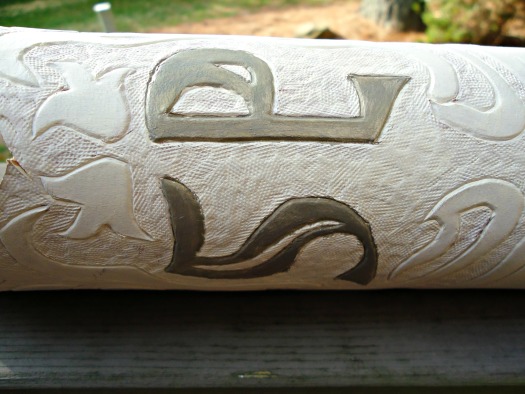
I then painted the initials with a grey and gold mix of paint (though technically it was a mix of cream, white, black, and gold), with the gold added in for a bit of sparkle… Not that its really visible, but it can be seen in real life.

Look out (hopefully) next week for part 2 of my quiver fun!

There’s a swimming pool in my library!

So the leather dying didn’t work out as well as I had hoped, so I got out my acrylic paints and went at it.

See? Not lovely, but for the first time working with leather dye, I think I made out well!

I washed it with some blue, but then it was a little too bright.

Then I washed it with a bit of black, forgetting that I still didn’t have any white to soften it to a dull grey.

So I then washed the entire bit in water, and wiped off most of the black. It left a nice marbled appearance to the leather.

Like an aged River Song journal.

This left me in a good mood about the state of the project.

Then I got busy, so I ended up waiting  to sand the altoids tin for a while.

Note to self. Don’t sand indoors. Perhaps wait to do it outside with a slight wind. Breathing in aluminum dust fumes was not my best decision.

By the way, I’m beginning to think that Sharpie products are little bits of miracle.

All summer I’ve been loving the Sharpies with the super fine tips, as I’ve been using them for sketching and stuff.

But my new favorite is this metallic copper one. It adheres rather well to the sanded aluminum, and even looks nice!

Not a whole lot sticks well to this aluminum. I tried to use the gold paint pen I made my Farnsworth with, but it didn’t adhere well. It might have been the pen, or that I was using it over the original altoids paint, but nevertheless.

This looks so much better. But it may need another coat.

Especially after I sanded down the altoids tin. In hindsight, this probably should have been done before the clay “water” was put in, but oh well.

A couple weeks later, meaning this past weekend, I bought some E600, and glued the tin to my leather cover. It took two tries on one of the sides, since the tin was in at an angle, making the leather sides look wonky.

So then I remembered that I still hadn’t painted the inside, so I set to work doing that.

Got it painted with the handy acrylic paints, then I covered it in modge podge to seal.

And here it is:

My swimming pool in the TARDIS journal!

Now off to finish my Belle dress…